Printer Placement, Auto-Calibration, and Account Binding
Printer placement
To ensure you get the best experience, it is recommended to place the printer on a flat stable surface, in a location where the environmental temperature is between 15-30 °C (~60-85°F), free from air drafts. If the temperature is lower, there might be cases where the print fails due to the model detaching from the plate. This can also contribute to the printed layers having weaker bonding.
In higher temperature environments, the printer might suffer more from extruder/nozzle clogs as the filament gets softer before reaching the hotend. It is also recommended to keep the printer outside an enclosure, as the increased temperature can affect the electronics and lead to overheating.
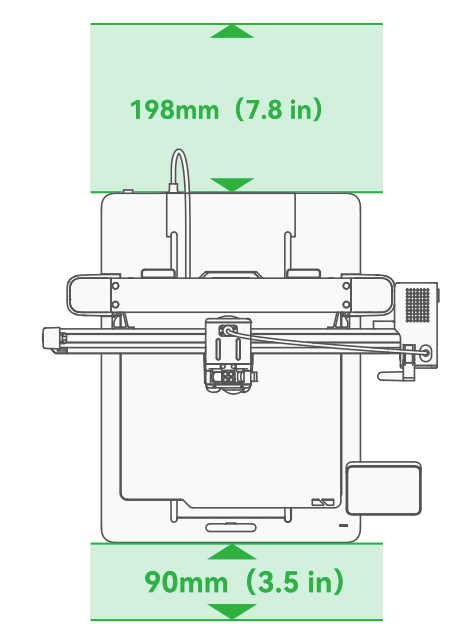
The printer requires at least 198 mm in the back, and 90mm in the front, to allow unrestricted heatbed movement. Please ensure enough room is available.
Binding the printer to your Bambu Lab Account and Handy App
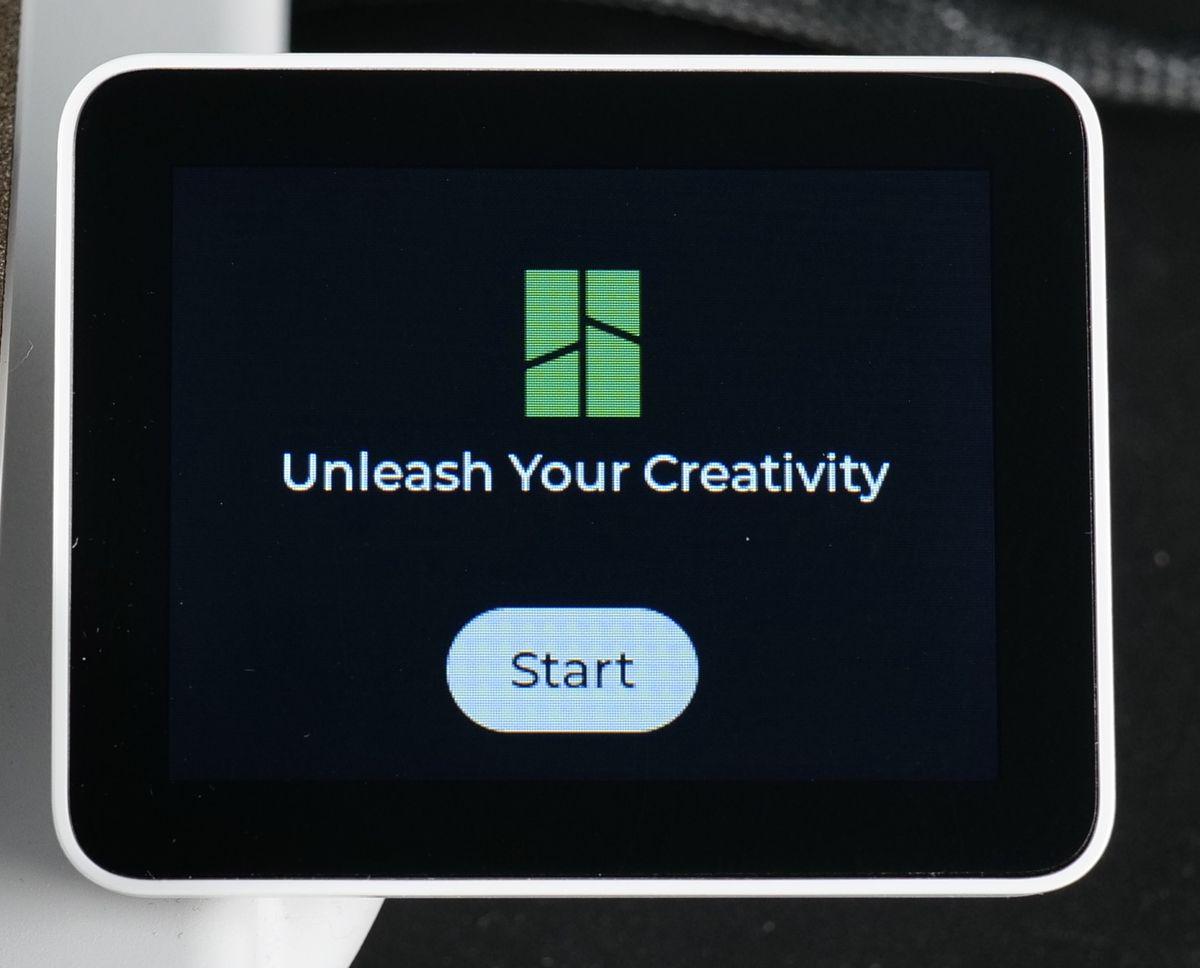
After you power on the printer for the first time, the Setup Wizard will begin.
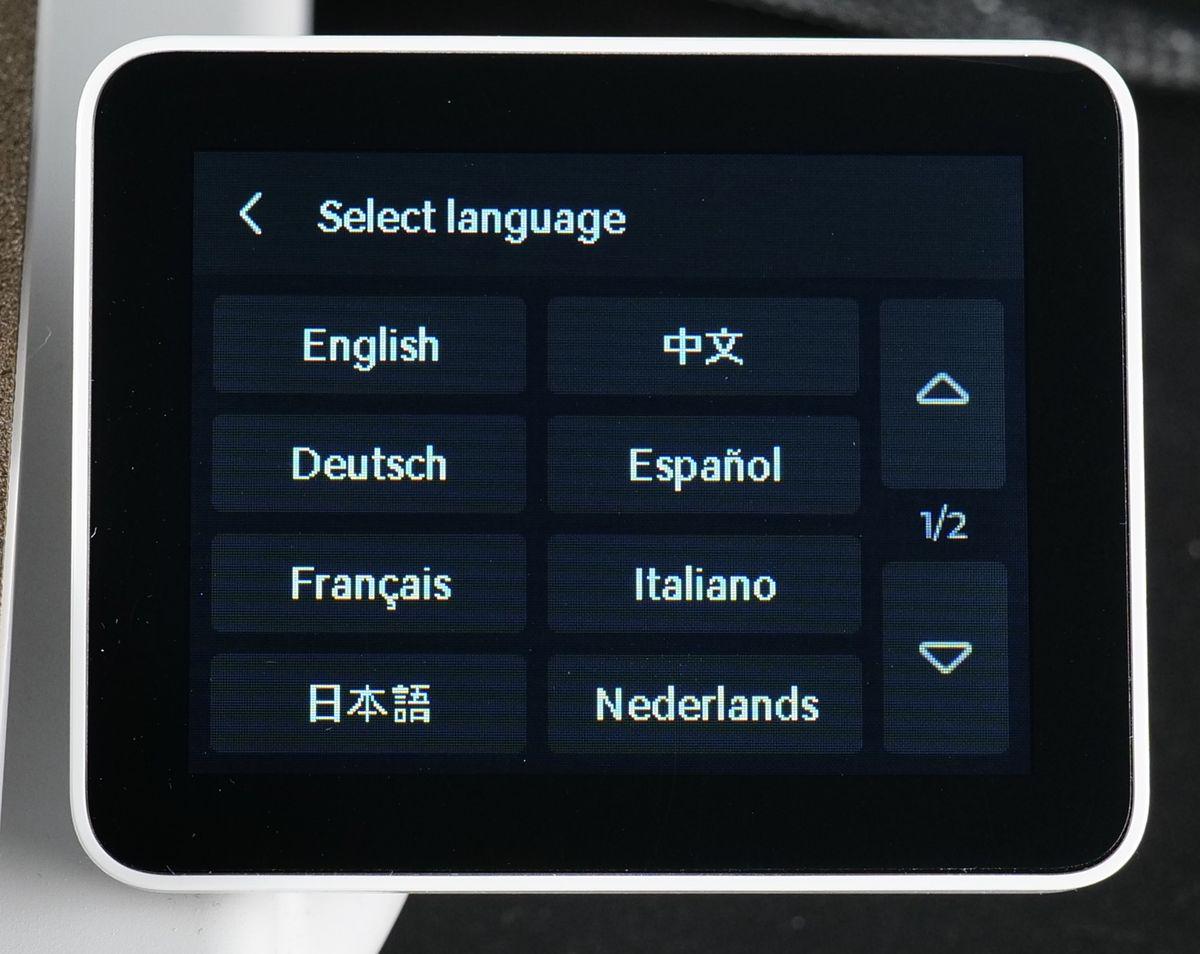
The first option is to select your language.
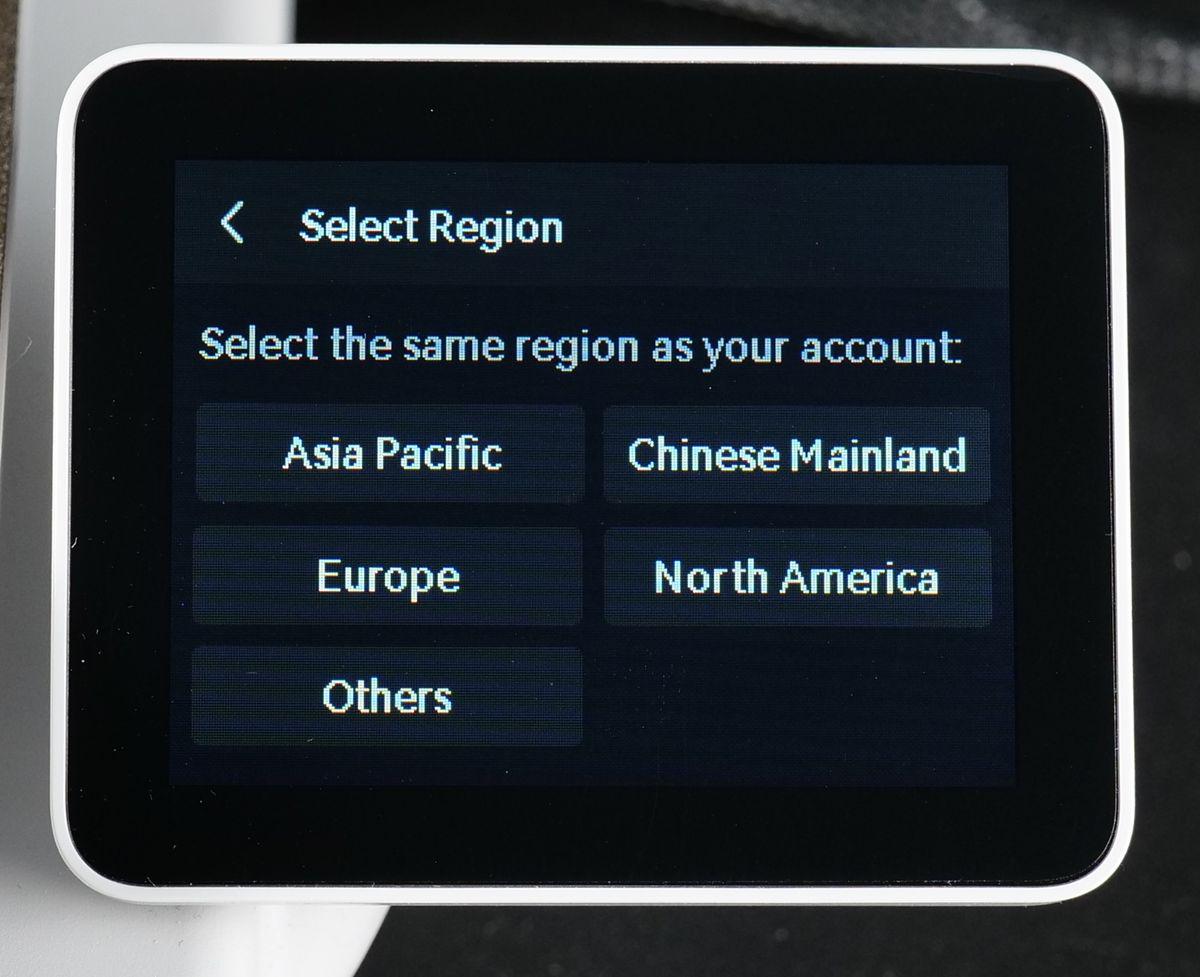
Next, select the region where you will be using the printer.
In the next step, you will be asked to connect your A1 3D printer to the Wi-Fi Network. Simply select the Wi-Fi network from the list, enter the password, and your printer will be connected. It’s important to note that the A1 printer only supports 2.4 Ghz networks, so if your Wi-Fi network does not show up, it might be caused by the type of network.

During the setup process, your A1 3D printer will ask you if you wish to bind it to your account.
You can bind your printer using Bambu Handy, unlocking multiple benefits such as remote monitoring, remote printer control, starting new prints, and seamless firmware updates. Using Bambu Handy brings the convenience of managing your printer from anywhere with ease.
Of course, you are also free to use the printer offline without being connected to the network. In that case, you can skip the connection process.
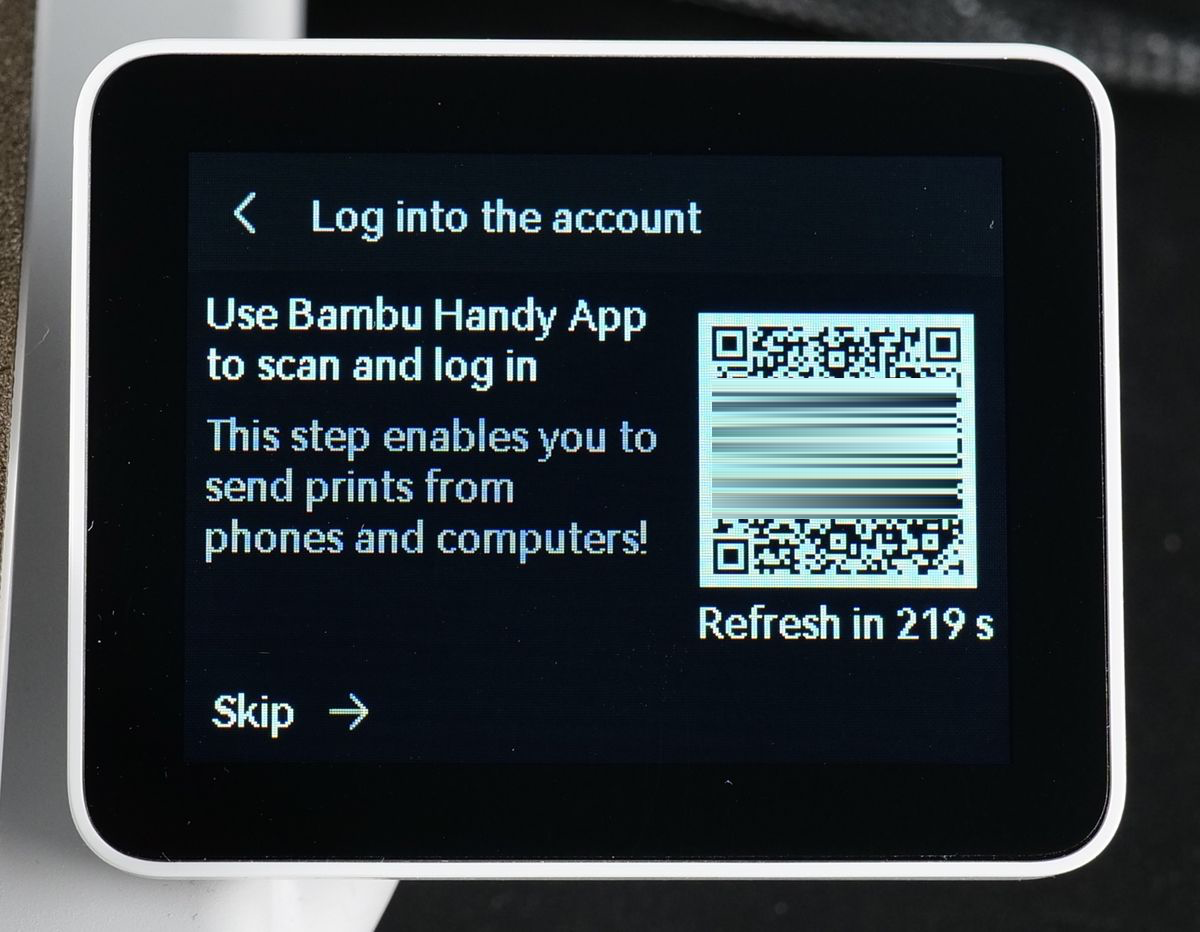
As shown in the image above, a QR code will be displayed on the printer’s screen. This QR code can be scanned with Bambu Handy. Install the Bambu Handy app from the App Store (for iOS devices) and the Play Store (for Android devices). Once installed, you can create a Bambu Lab account.
After logging into Bambu Handy, tap on the Devices button, and the following screen will show up, where you will need to tap on Bind Printer.
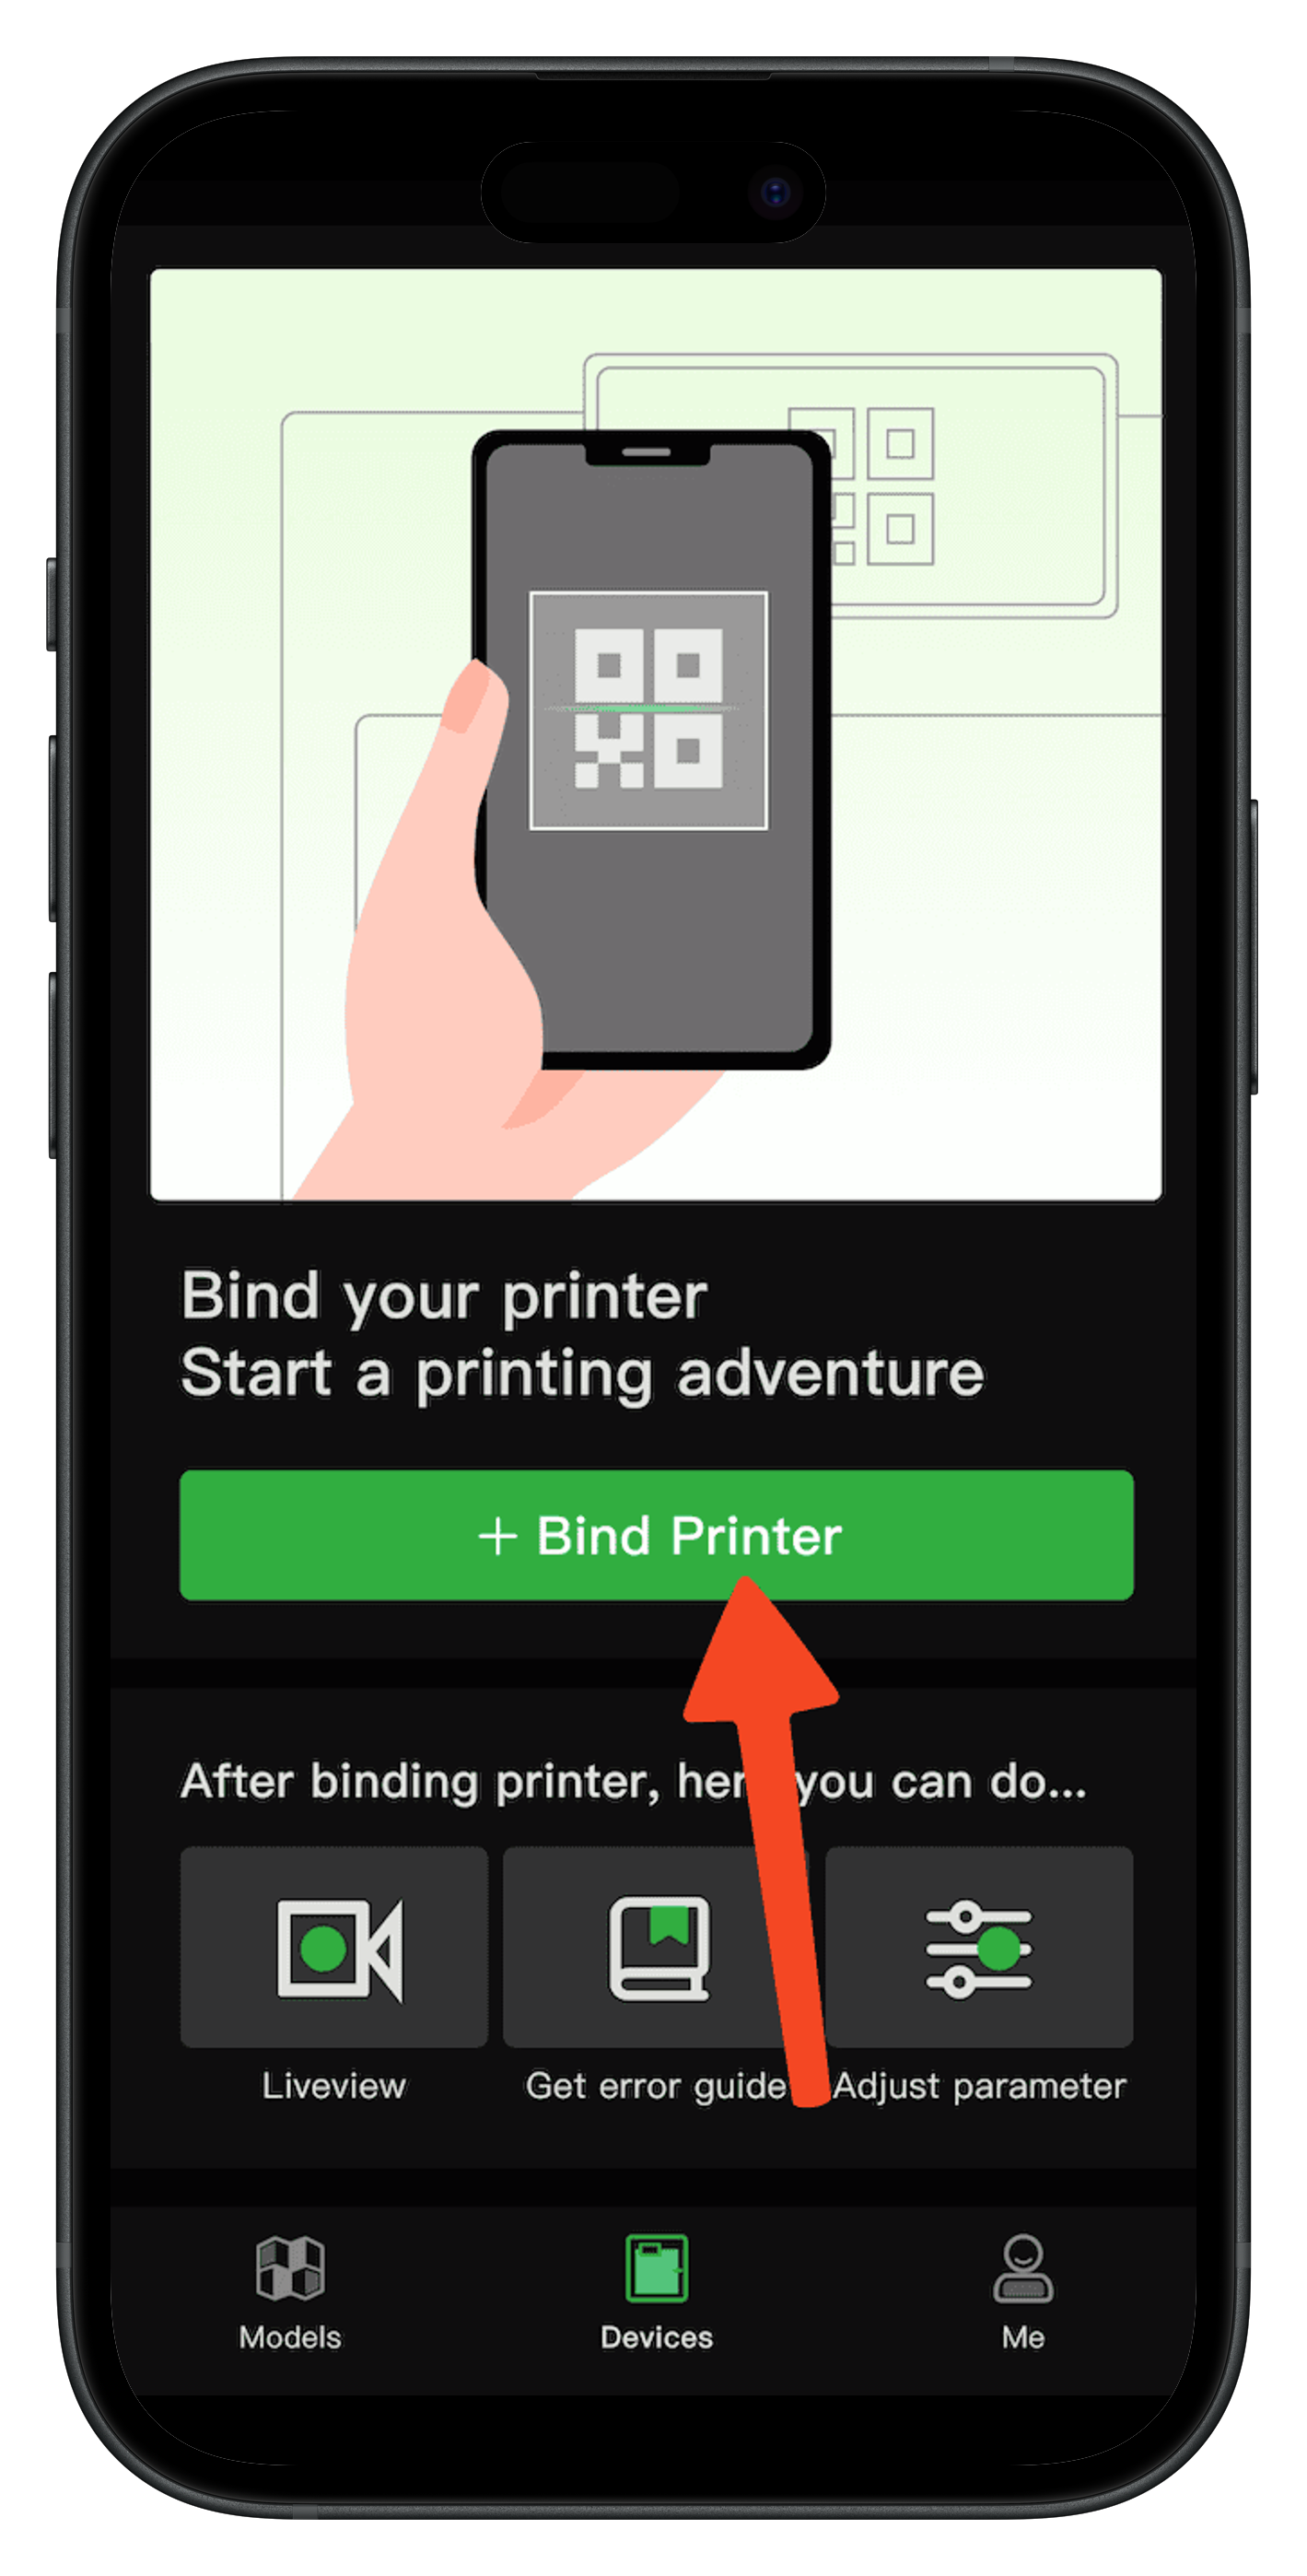
After tapping on the Bind Printer button, the camera on your phone will open to allow scanning the QR code displayed on the printer.
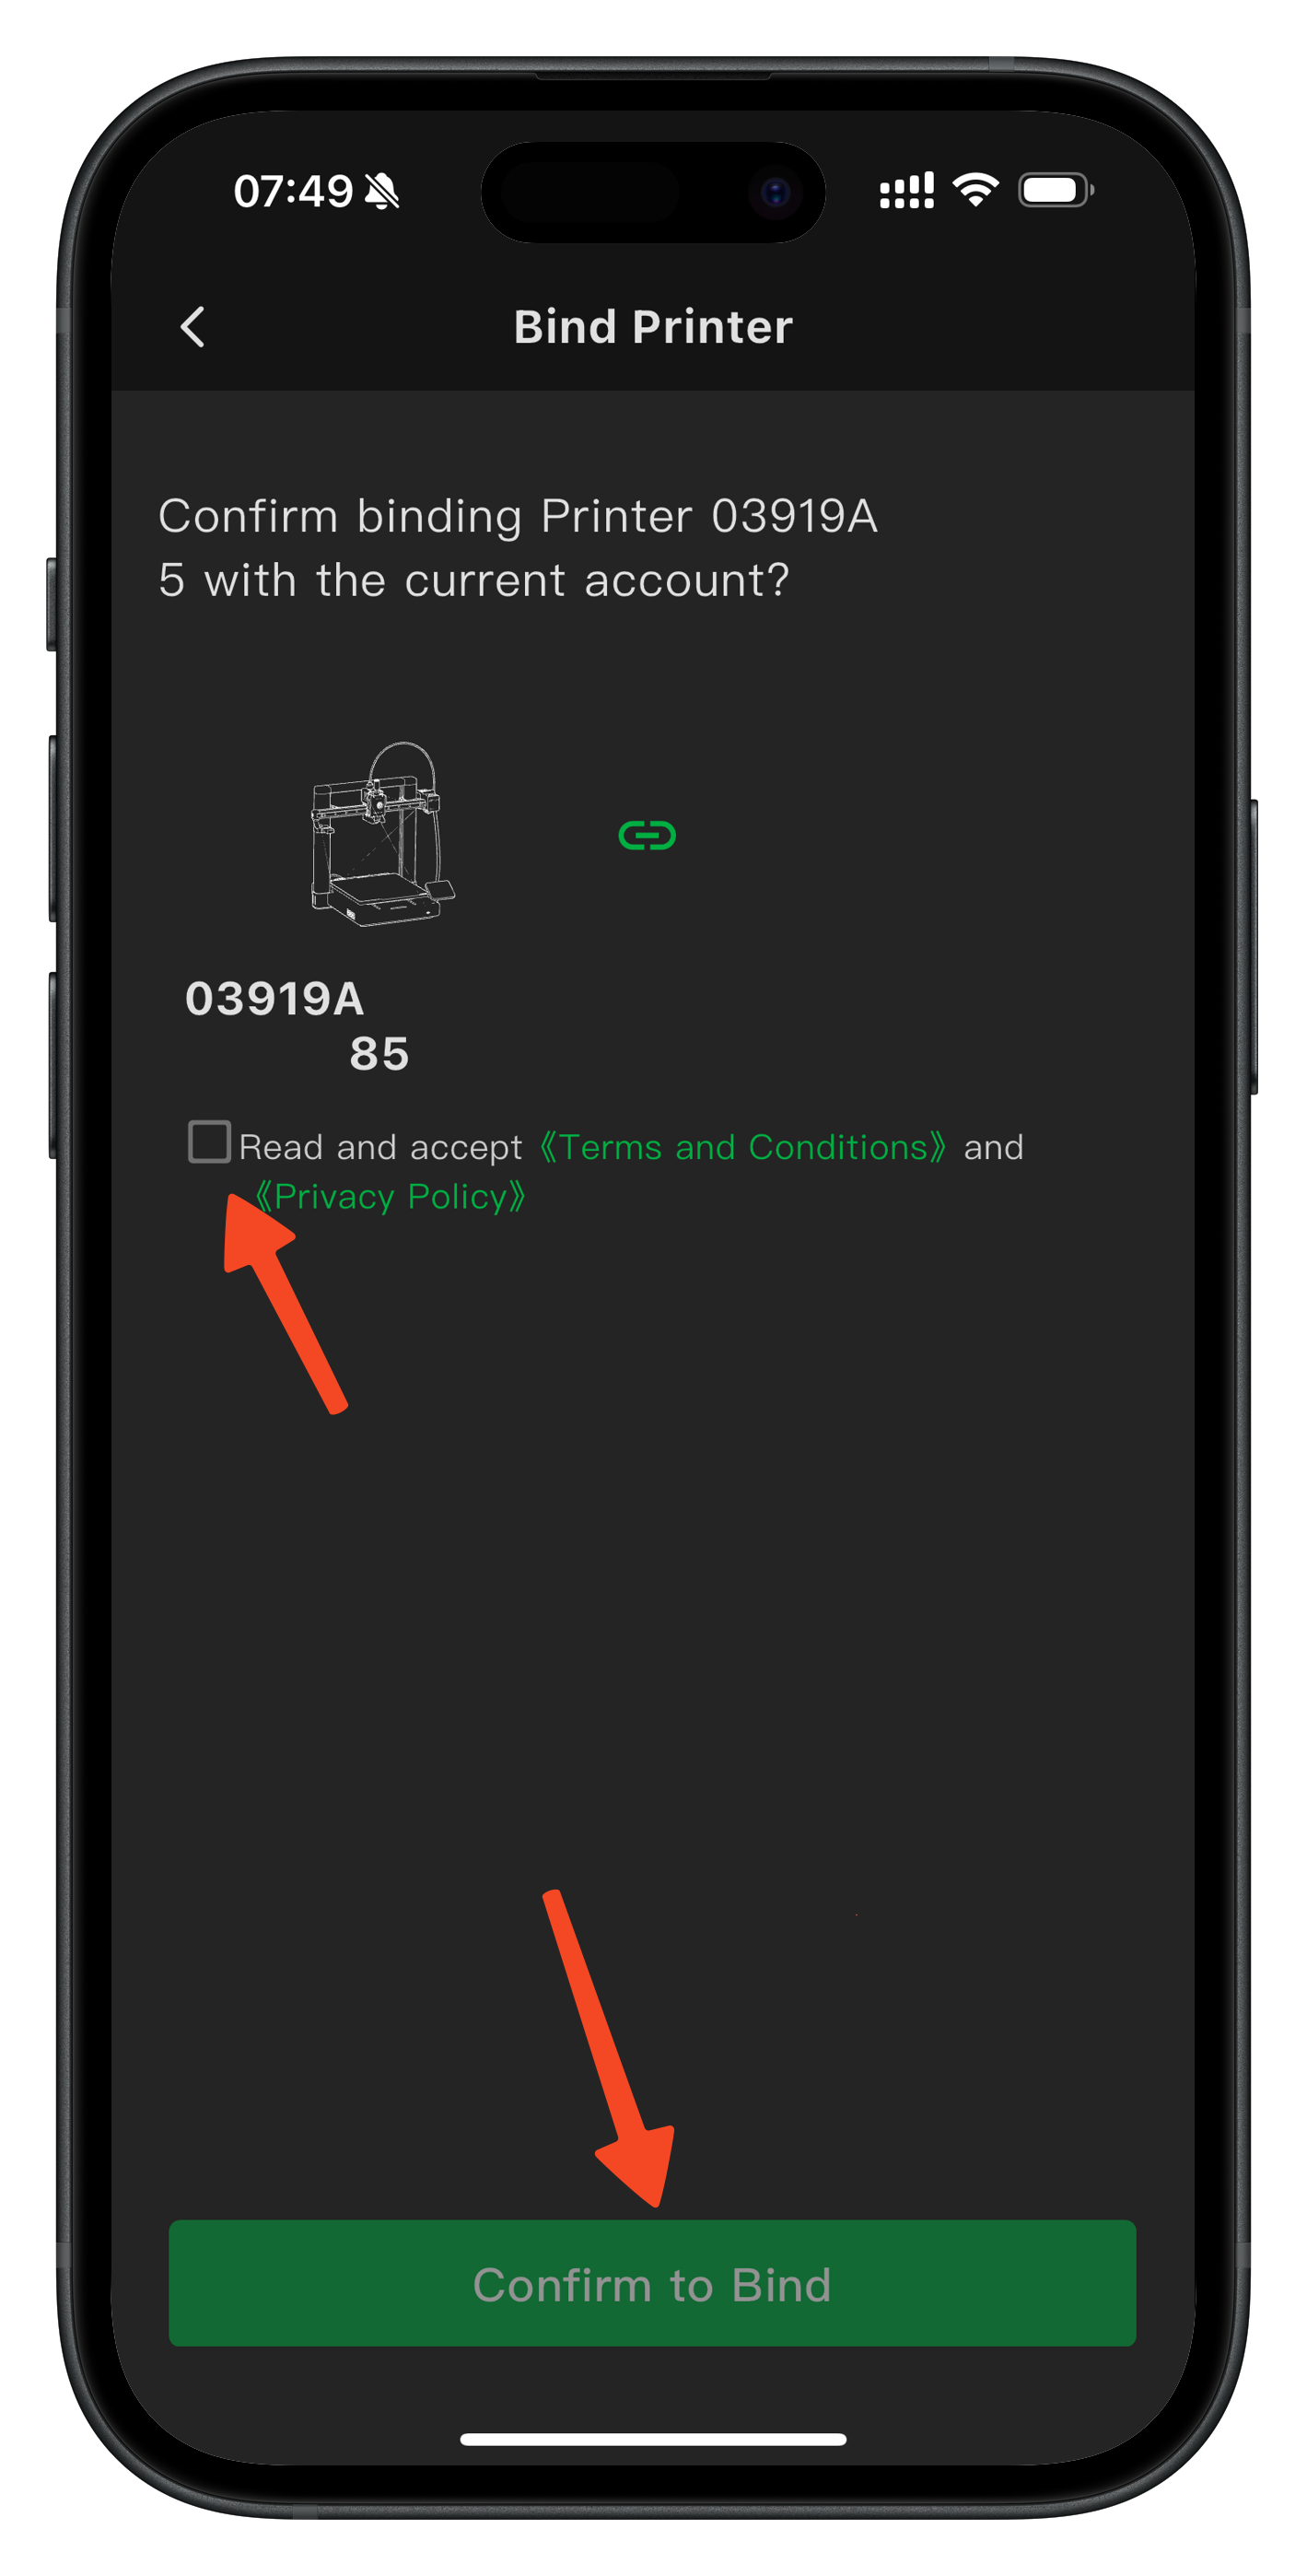
Once the QR code is scanned, you will be asked to read and accept the Terms and Conditions and the Privacy Policy. If you agree, click Confirm to Bind after checking the option.
You will then be asked to set the name for your new printer.
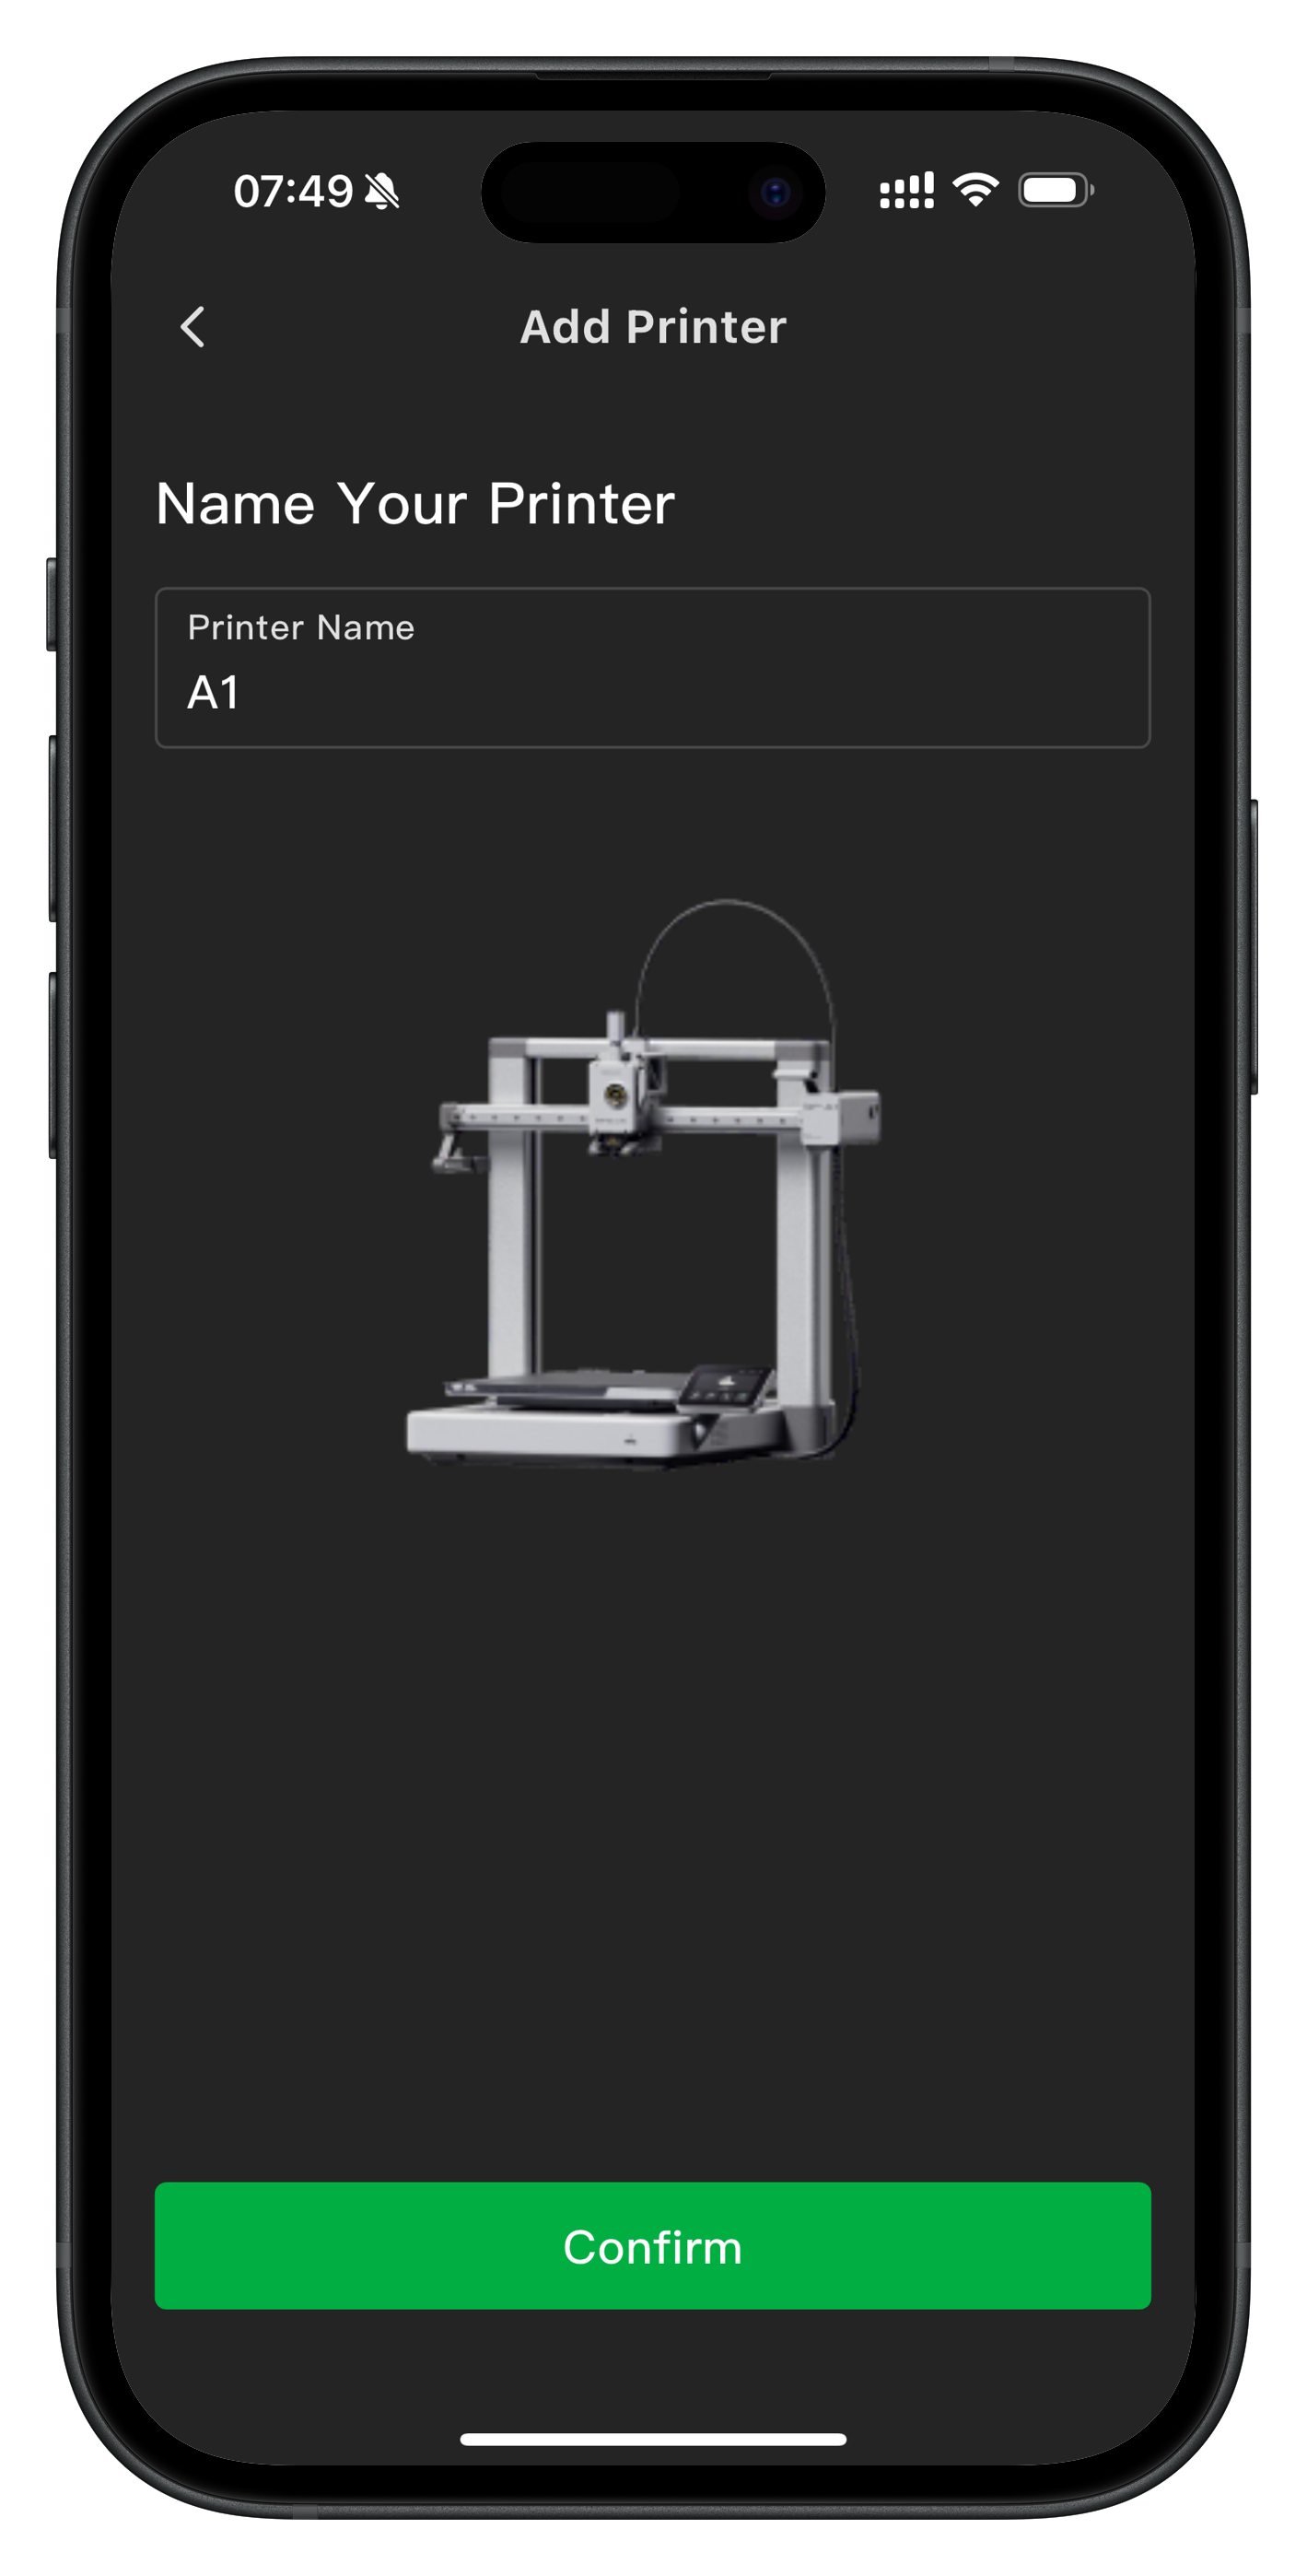
Once set, tap on Confirm and that’s it! Your printer is now connected to your Bambu Lab Account.
You can now move forward and perform the Auto-Calibration process.
Auto-Calibration
What is Auto Calibration?
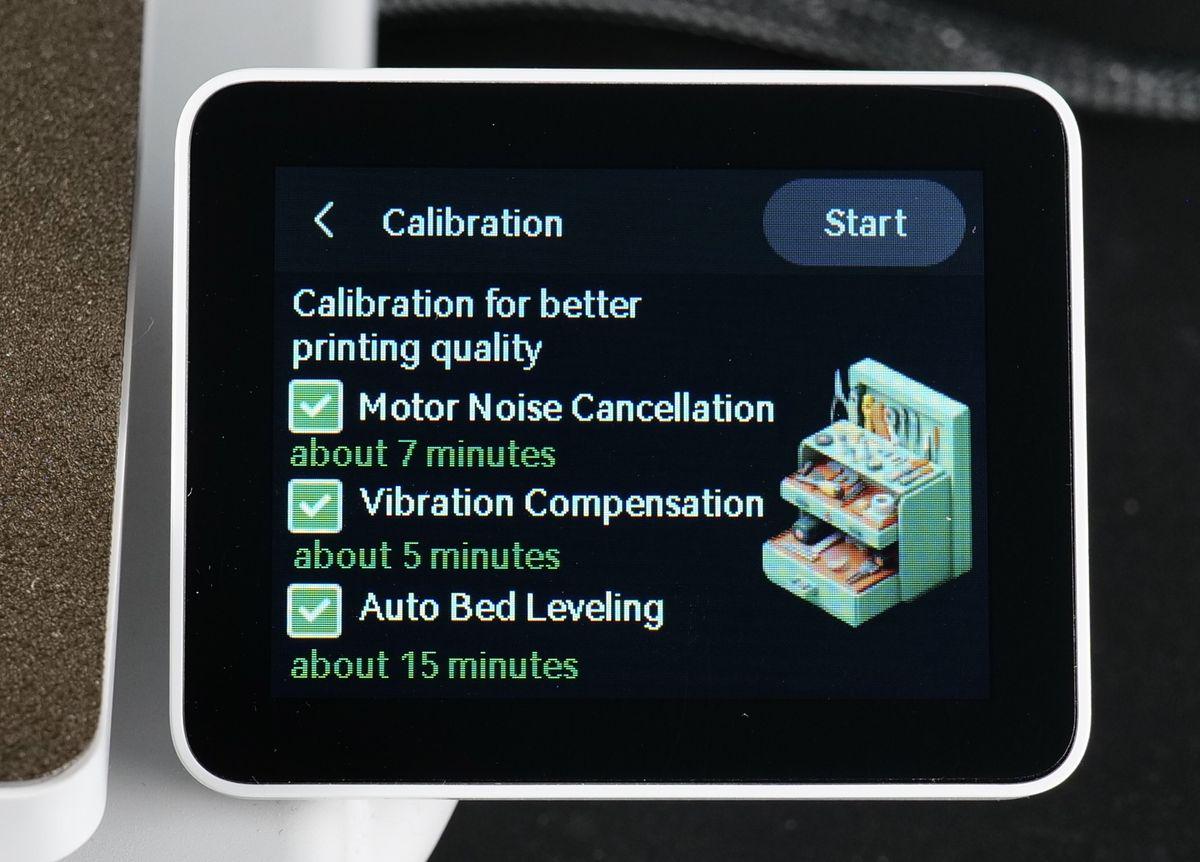
Auto-Calibration is a feature that automatically adjusts key printer settings, such as bed leveling, nozzle height, vibration compensation, and motor noise, using sensors to ensure optimal printing conditions without manual intervention. This automation simplifies the setup process, reduces user error, and ensures consistent print quality by maintaining accurate measurements over time. As a result, users can save time, focus on design, and achieve better print results with minimal hassle.
How to perform the Auto-Calibration
The Auto-Calibration process is integrated into the printer’s Setup Wizard, which shows up when you start the printer for the first time. When prompted to begin this step, make sure all components are correctly installed according to the Quick Start Guide, and place the printer in its intended final position. Then simply select the Start button to proceed.
Auto-Calibration uses the printer’s sensors to adjust for environmental factors and placement, so performing this step in the printer’s permanent location ensures the most accurate results.
How often do you perform the A1 Auto-Calibration?
The Auto-Calibration procedure should be repeated when there is a decrease in print quality, after maintenance has been performed, or when the printer location changes.
It is also recommended to perform the calibration after installing a new firmware update, as new features may have been added.
You can do this procedure easily from the printer’s menu. Simply navigate to Settings → Maintenance → Calibration to initiate the automated procedure.