Introduction to A1’s Main Hardware Components
The printer is now calibrated and ready to start the print. We know you’re excited to start printing, so let’s do it!
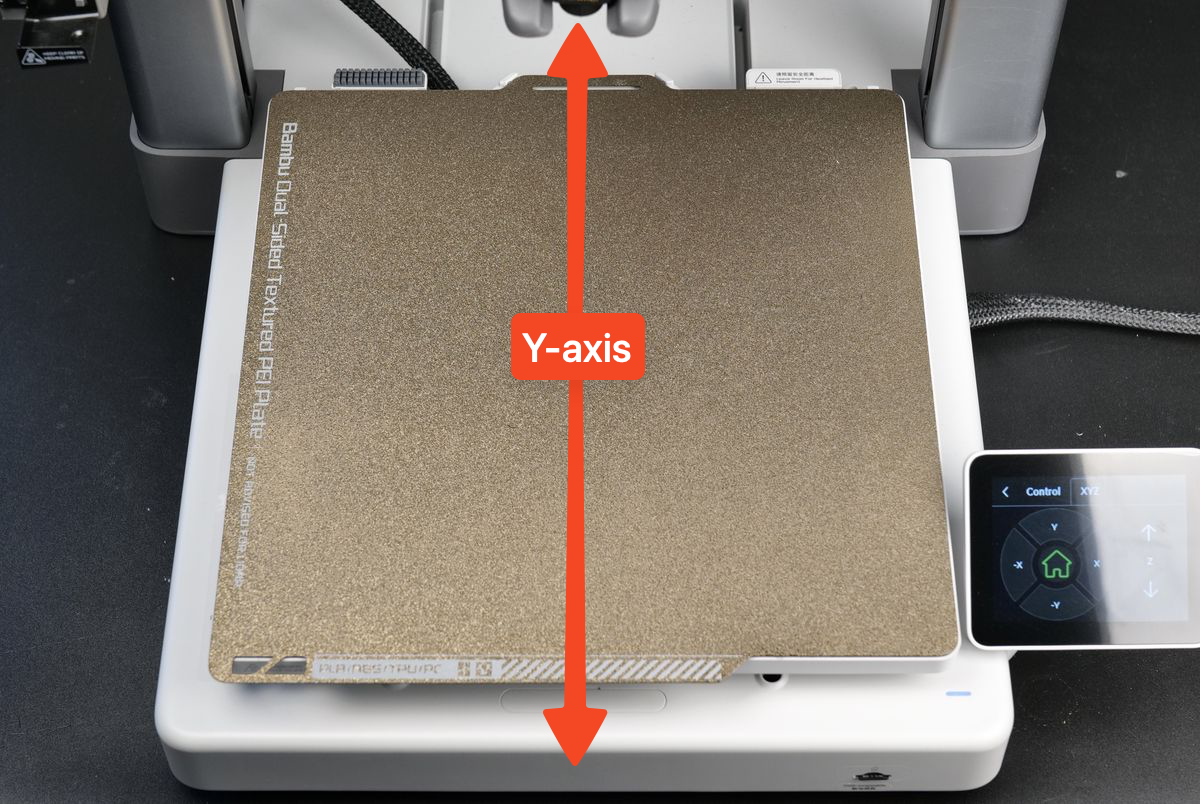
Printer axis
The A1 is a smart 3D printer, perfect for a newcomer in the 3D printing space.
There are multiple kinds of 3D printers, and the A1 is a Cartesian 3D printer with three axes – X, Y, and Z.
Looking at the printer from the front, the X-axis is the one that moves left to right and holds the toolhead.

The Y-axis is the one where the heatbed moves front to back.
Finally, the Z-axis is on the left and right side of the printer, which moves the X-axis up and down. It holds the X-axis from the right side.
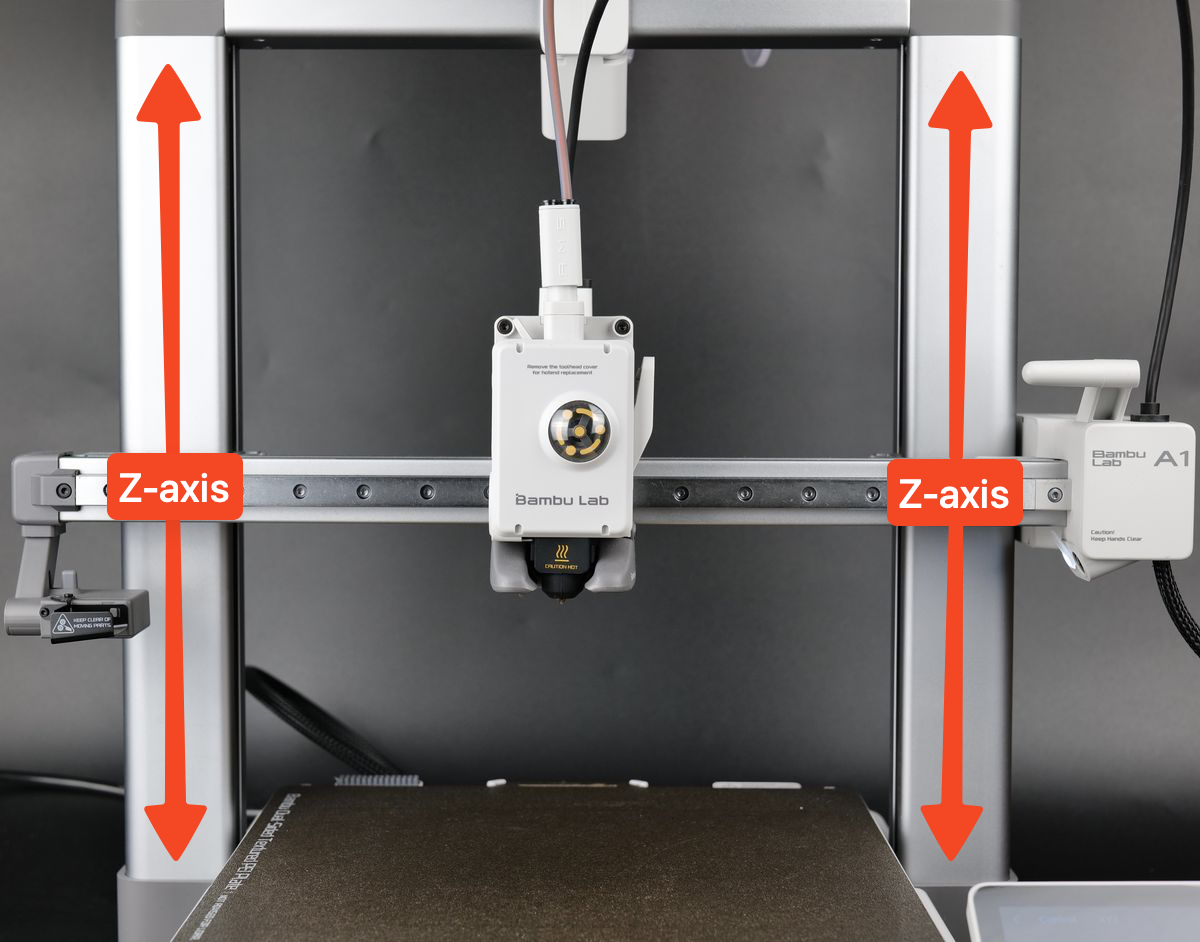
As previously mentioned, the toolhead is attached to the X-axis and can move freely along a metallic bearing assembly called a linear rail. The printhead is moved by a motor that is located in the small box on the right side of the printer.
The toolhead contains multiple electronics and sensors, but the most important ones are the extruder, the hotend, the part cooling fan, and the filament hub. Let’s explain what each one is used for, one by one.
Extruder
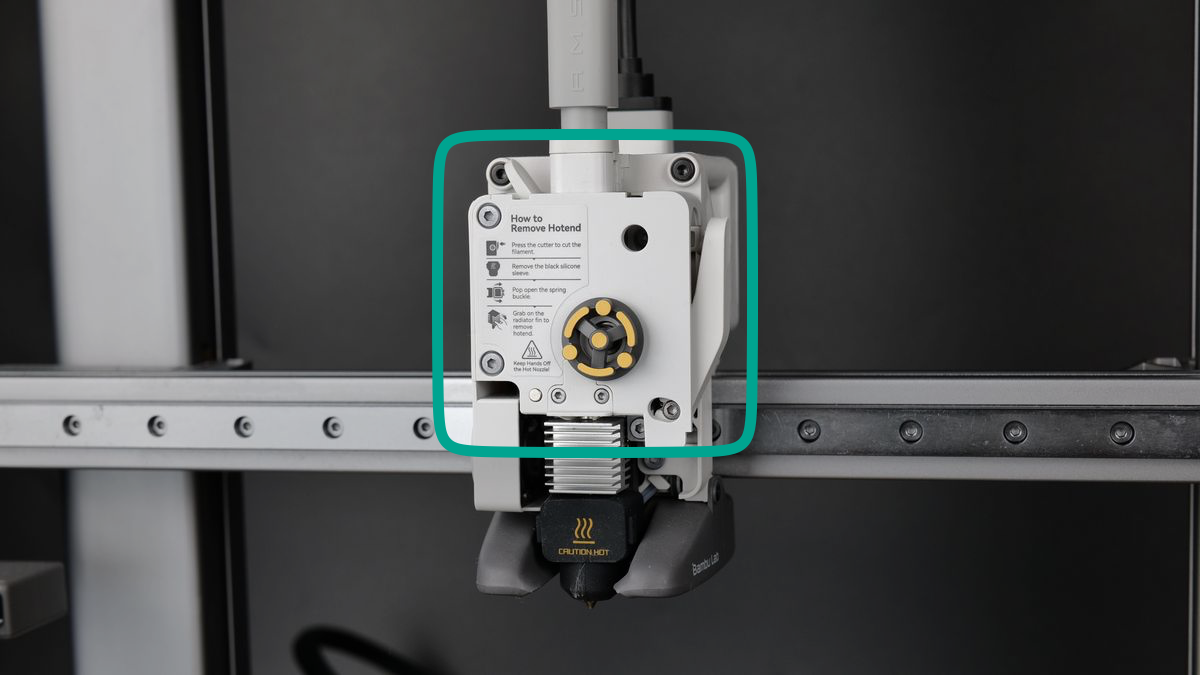
As the name suggests, this component is used to extrude the filament, which is pulled through the top via the filament hub. A gear inside the extruder grabs the filament and pushes it through the nozzle. There, it is melted and then deposited in thin layers to construct a model. This extruding motion is made possible by the extruder motor, located behind the extruder.
The entire assembly of the extruder, hotend, part cooling fan, and other attachments is called a Toolhead.
Nozzle
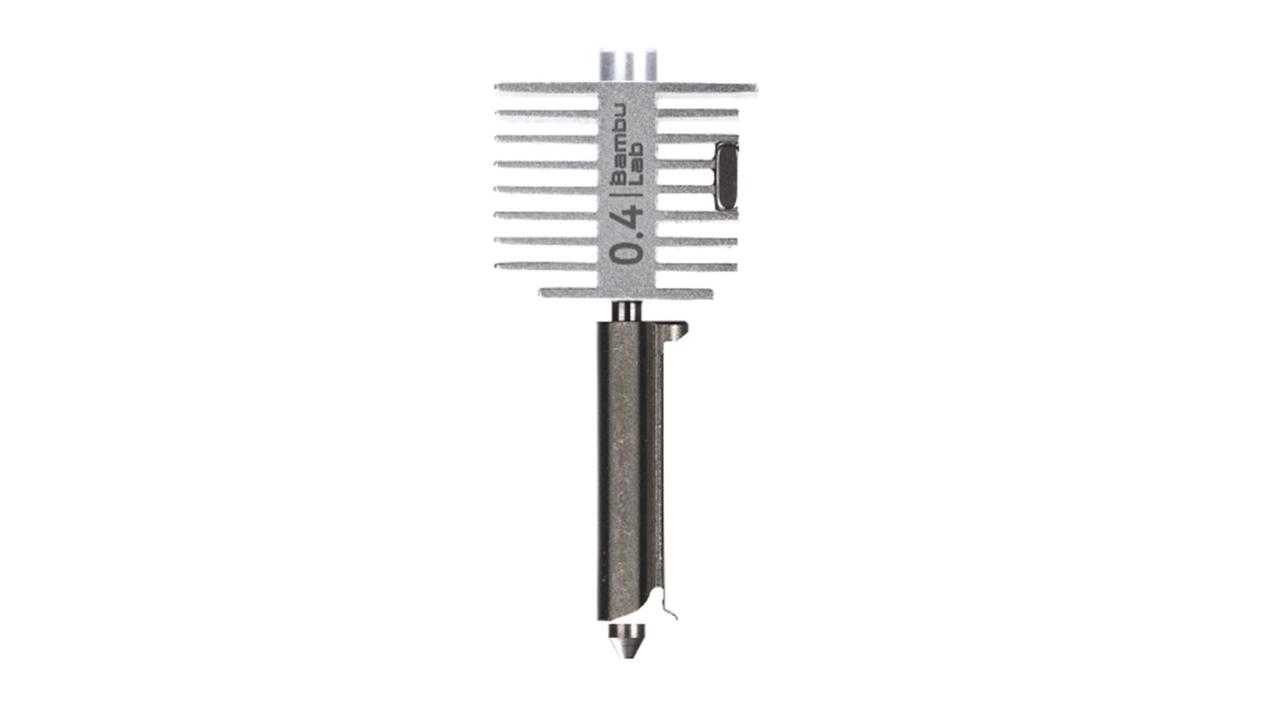
The nozzle is another important component in each 3D printer. It is responsible for melting the filament at a certain temperature to prepare it to be printed.
The A1 nozzle is easily detached from the heating assembly (which heats the nozzle to melt the filament). This makes replacing the nozzle as hassle-free as possible.
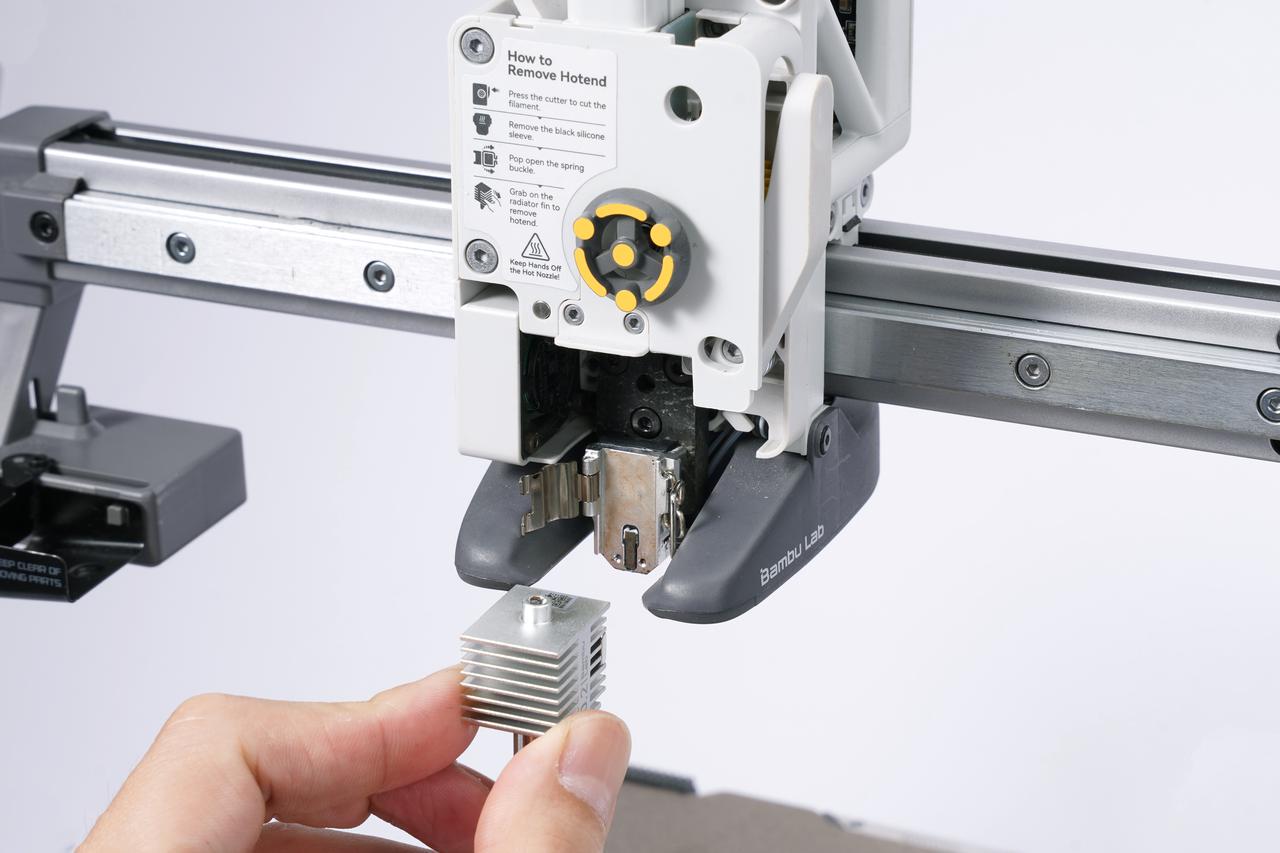
There are two important parts of the nozzle:
The cold end section contains a heatsink to keep the filament cool until it goes inside the hot end, and it’s kept cool by the small hot end fan on its left.
The hot end section of the nozzle is where the filament is heated and melted.
The hotend is covered by a Hotend Silicone Sock, which is a small black silicone attachment that fits over the nozzle. It is essential to use this accessory during printing, as it helps insulate the hotend and maintain a stable temperature. Without the silicone sock, the hotend can be cooled by the part cooling fan, which may lead to temperature fluctuations and result in print inconsistencies. The sock ensures the hotend stays at the optimal temperature for better print quality.
Part Cooling Fan
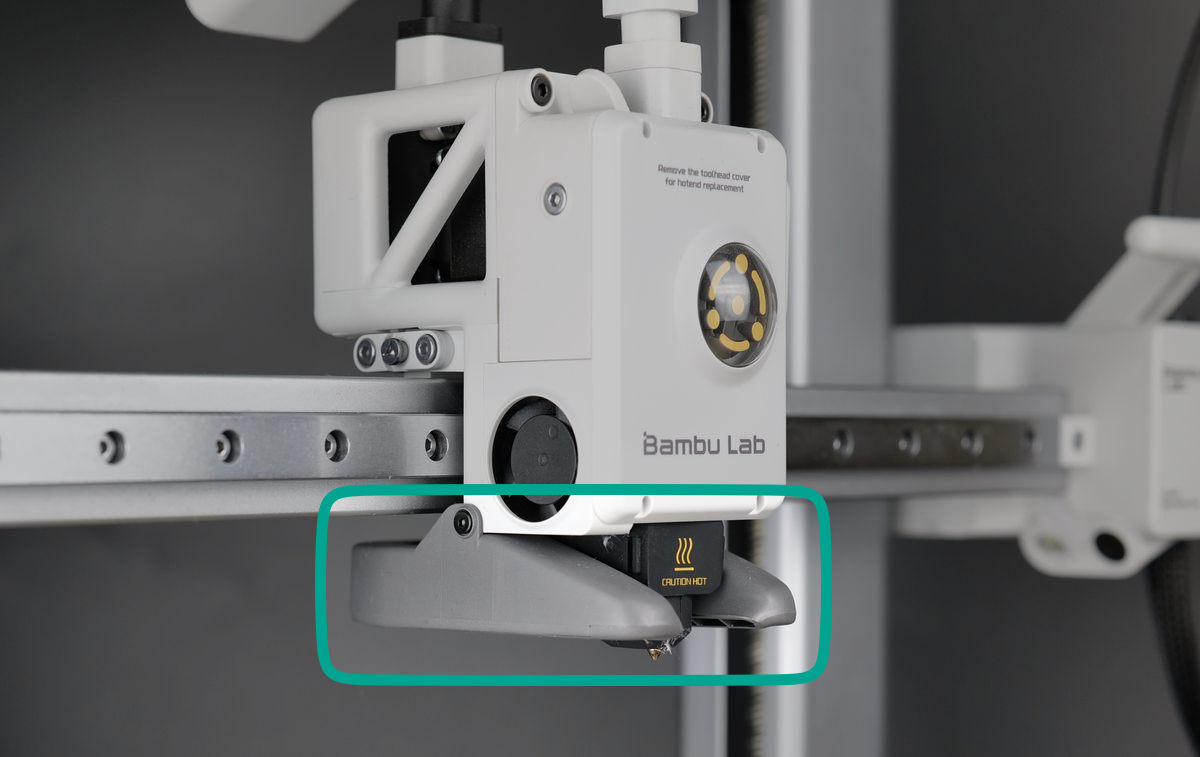
Surrounding the nozzle, you can see the air ducts from the part cooling fan, which is responsible for quickly cooling the filament once deposited. In 3D printing, it is important to quickly cool down the printed filament in order to solidify it in the shape of the design.
The speed of the part cooling fan will change during printing, as some sections of a model might require less cooling while others might benefit from stronger airflow.
Filament Hub
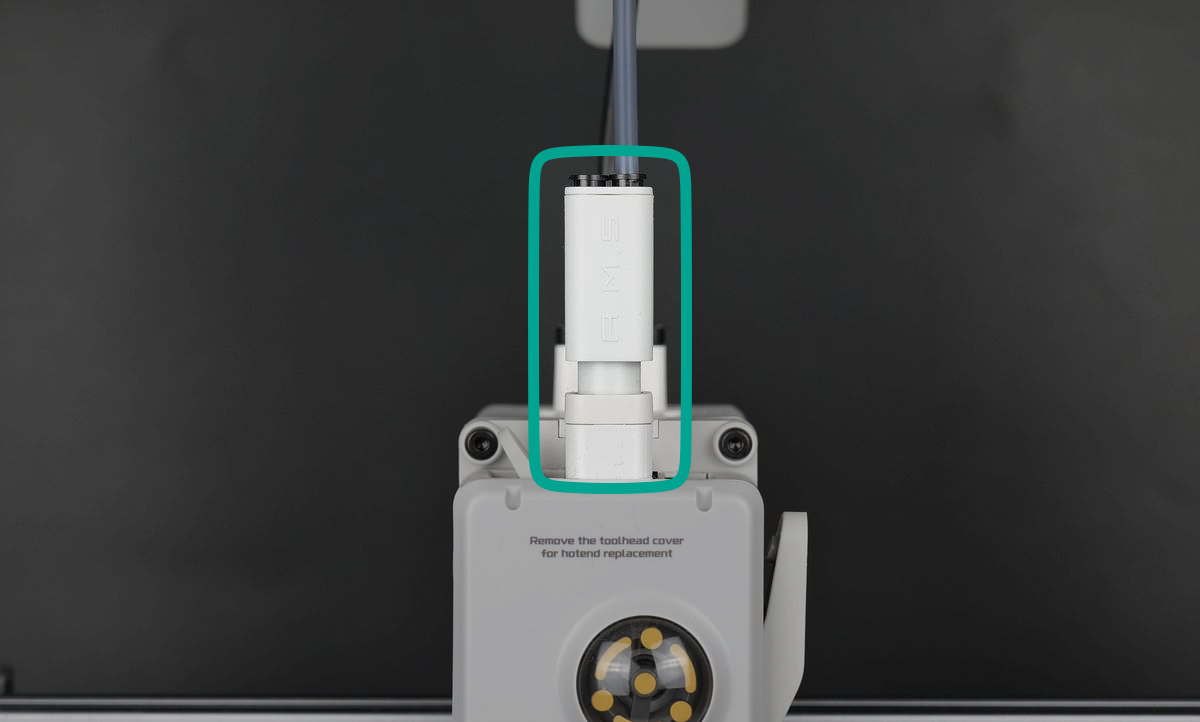
On top of the extruder sits the Filament Hub, featuring four PTFE tube inlets and connected to a built-in sensor designed to detect filament movement located in the filament sensor base. This crucial component helps identify filament tangles or when the filament runs out, and enables seamless multi-filament printing when paired with the AMS lite, supporting up to four different filaments.
Purge Wiper
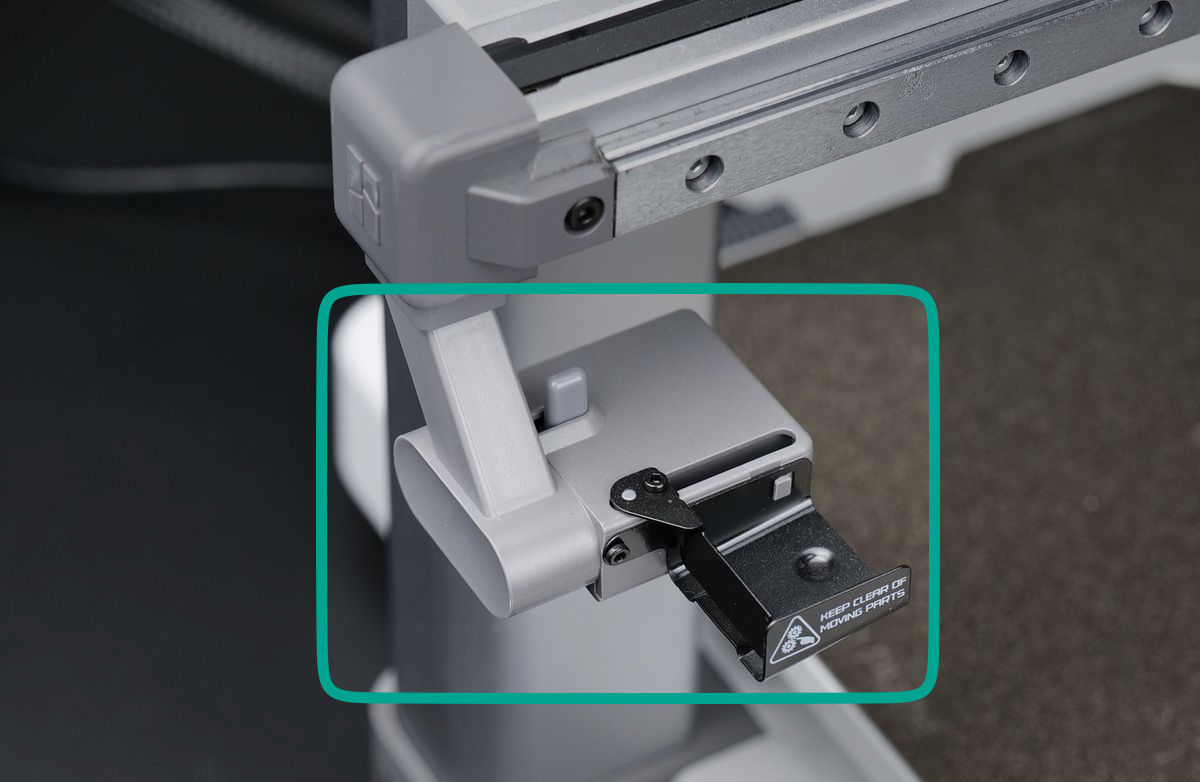
The Purge Wiper is a mechanical component located on the left side of the X-axis, designed to clean the nozzle by wiping off excess filament. This action occurs both at the start of a print and during the print process.
At the beginning of a print, the extruder moves over the wiper while extruding filament. Once the filament is fully purged from the nozzle, the extruder moves a few times, activating the wiper, which then pushes any remaining filament pieces away from the nozzle.
This same process is used during a multi-color print when the filament is changed. The extruder performs the same motion to clean the nozzle before switching to a new filament, ensuring smooth transitions between colors.
Camera
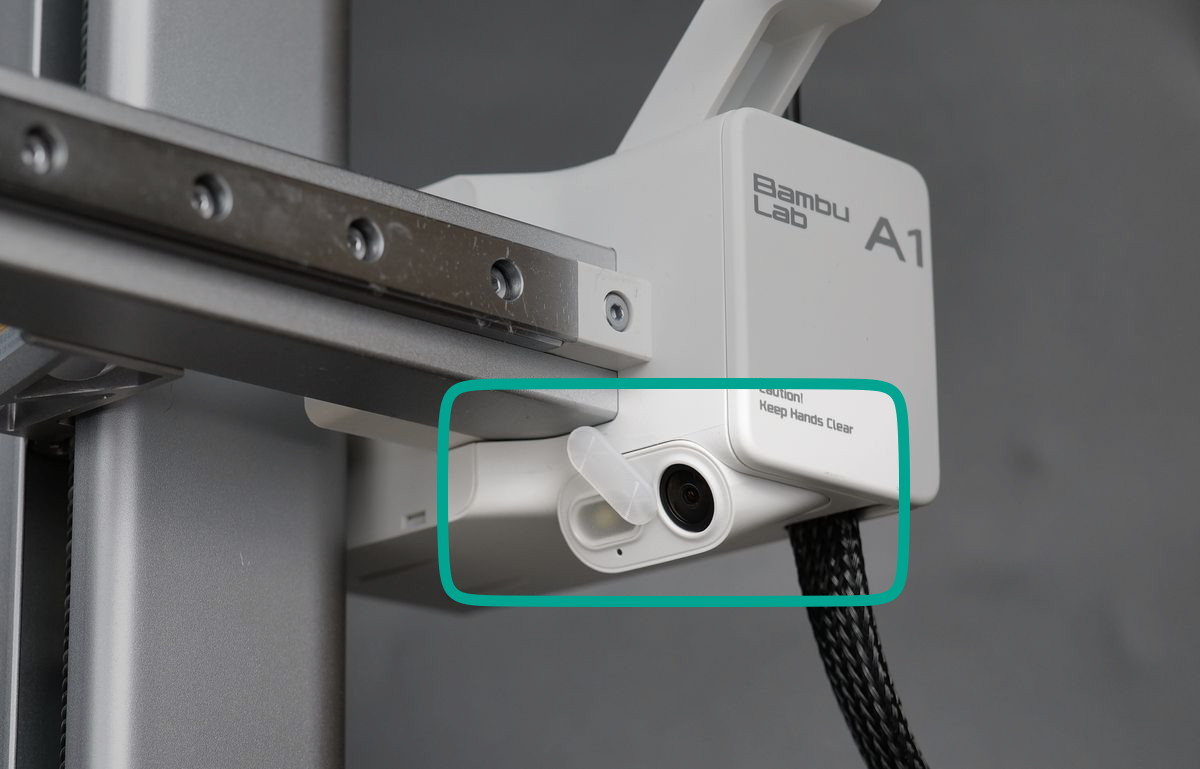
Your A1 is also equipped with a camera located on the right side of the X-axis, angled towards the heatbed. This camera can be remotely accessed to monitor the print and also create Timelapse videos, which we will talk about more a bit later. There’s also an adjustable cover that can be rotated to cover the camera, for privacy reasons.
Heatbed
As the name suggests, the heatbed is the heated platform located on the Y-axis. It is heated and covered by a magnet to hold the build plate attached to it.
The A1 uses a heatbed to allow for more filaments to be printed successfully by helping with adhesion. It is very important for the 3D model to have a solid foundation and grip on the heatbed to ensure a successful print at high speed.
Certain filaments, when used with specific build plates, can be printed without a heated surface or at a low heatbed temperature. However, having a heatbed capable of reaching higher temperatures significantly improves adhesion, ensuring more reliable prints. This will be explained more in the chapter related to Build Plates.
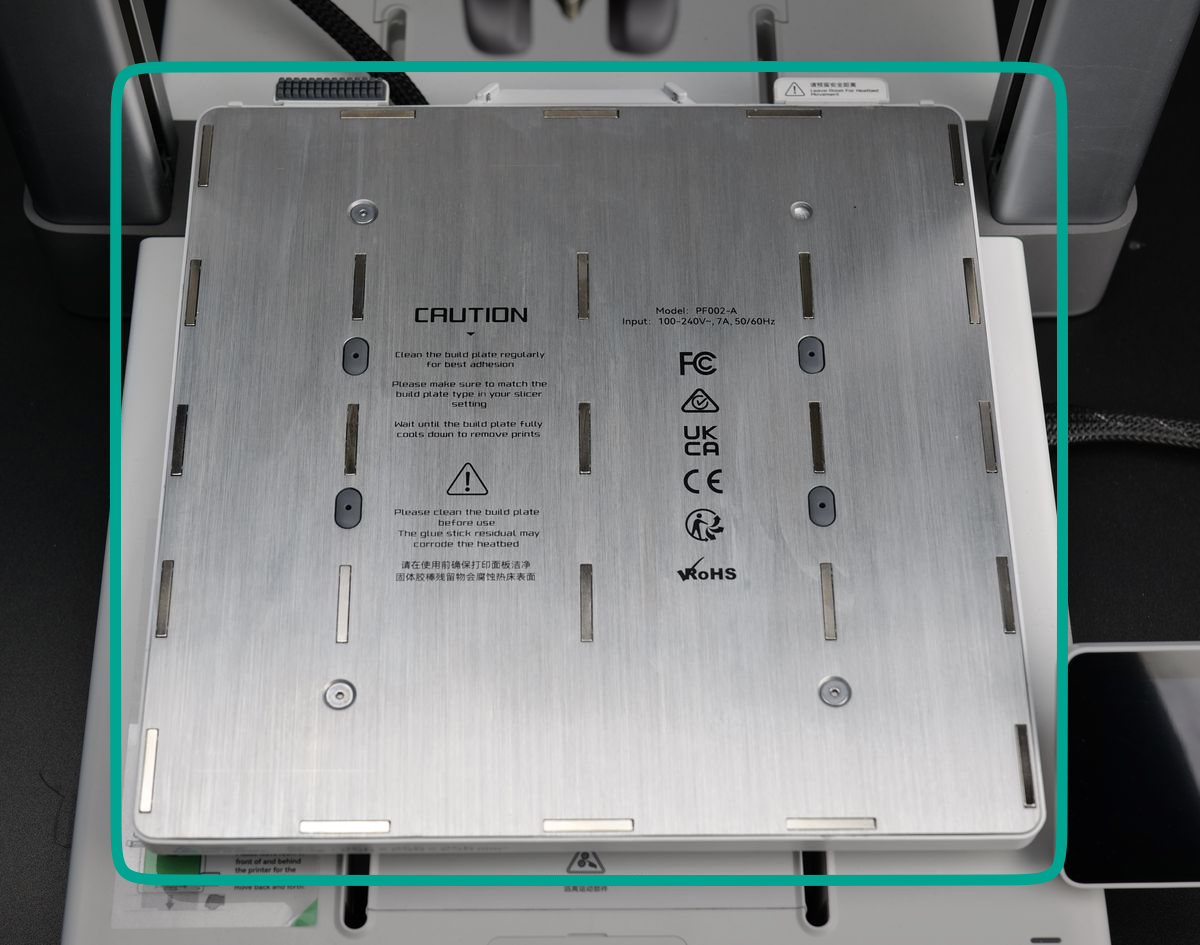
Build Plate
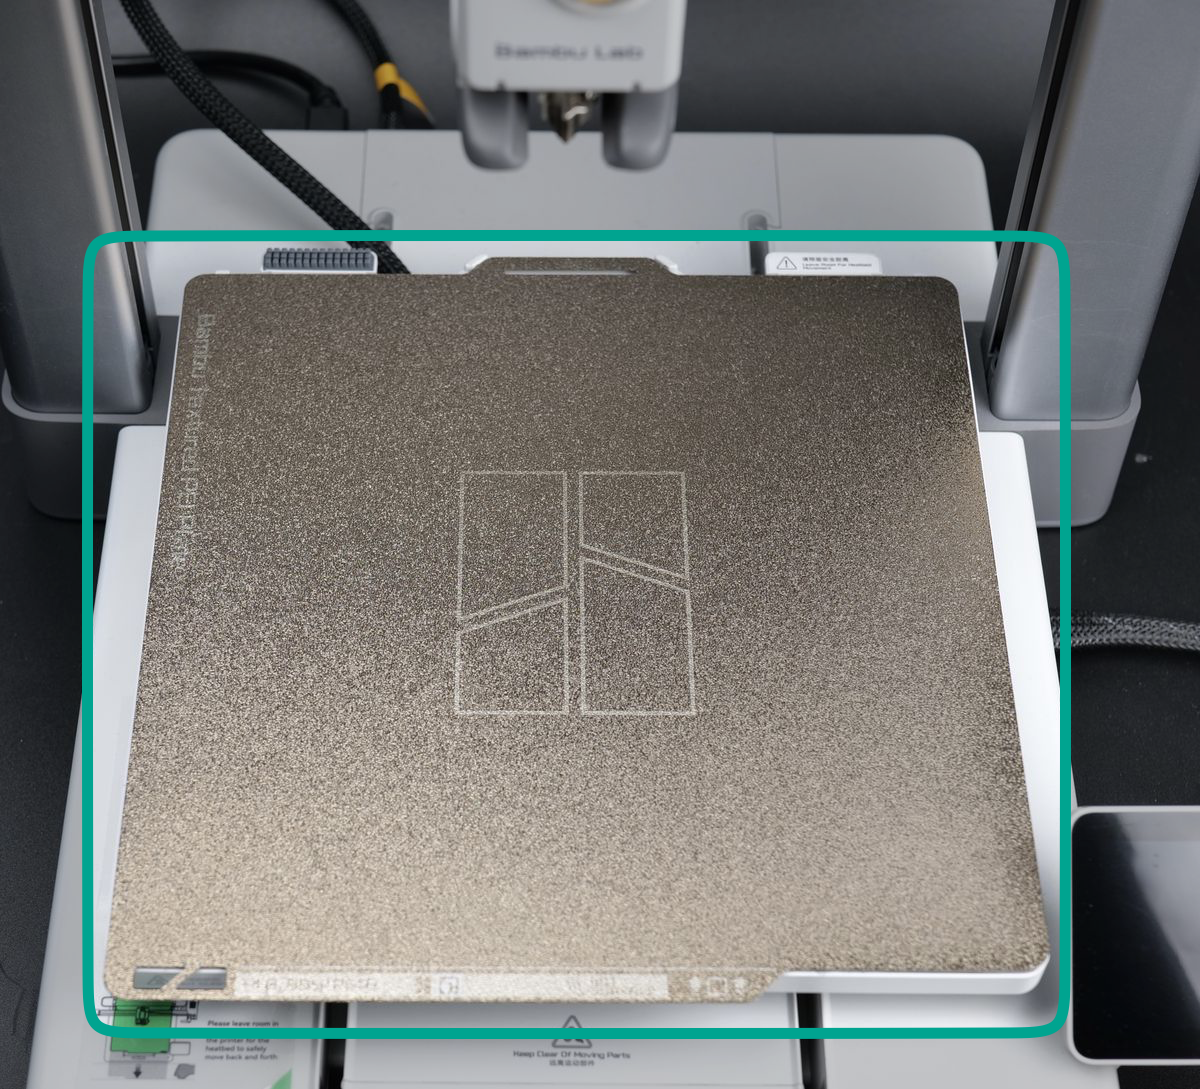
The A1 comes bundled with a golden Textured PEI Plate, which is magnetically attached to the heatbed, and is the surface on which you are printing the model. Build plates are meant to adhere to the model directly during printing and allow for removal after printing is complete. A detachable and flexible build plate can be flexed after removal to effortlessly separate the printed part.
There are multiple types of build plates available, each with different properties, and we will go into more detail soon to explain which one to use in different scenarios.
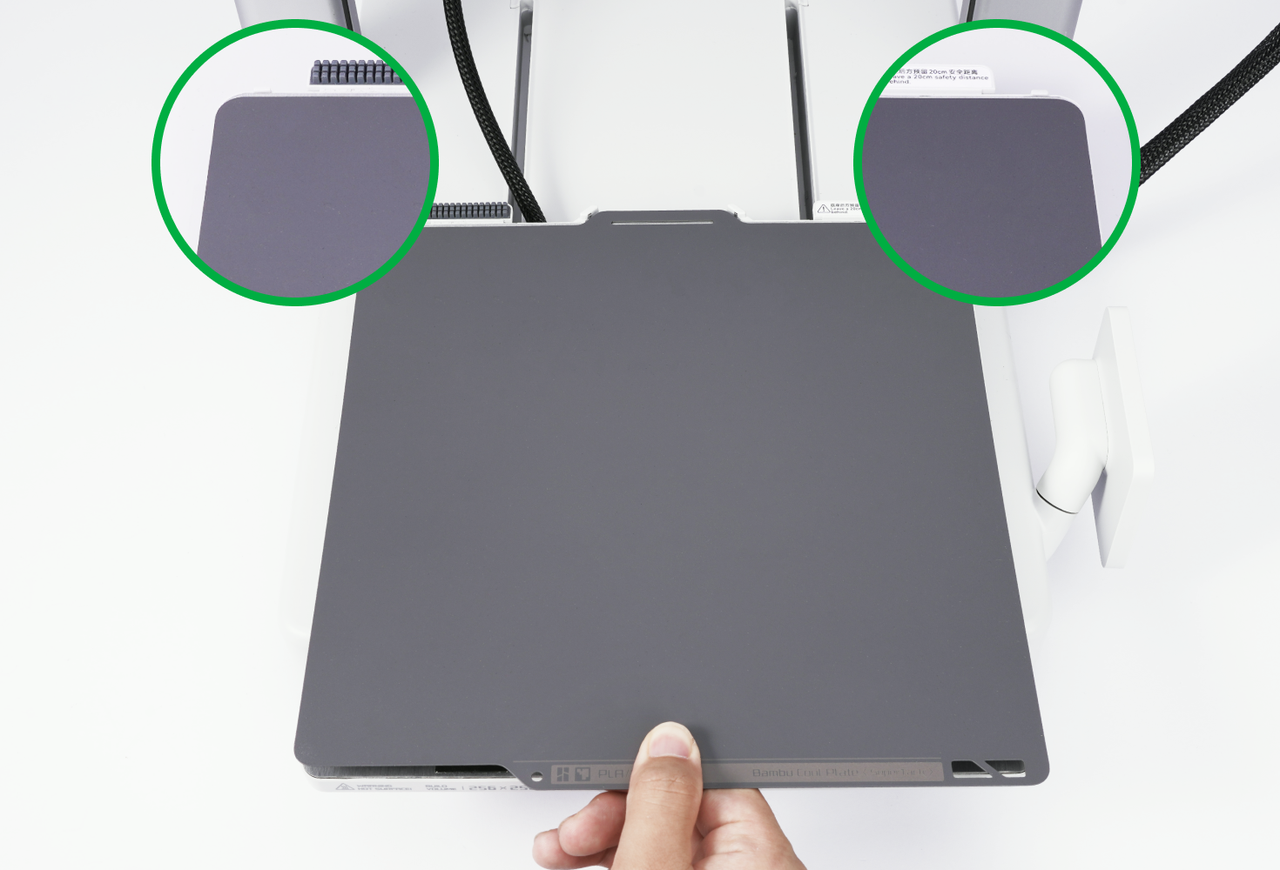
At this point, it is important to remember that the build plate should be kept clean, and it’s best to avoid touching the surface to ensure no oils or contaminants get to it, as it can affect the adhesion performance.
When handling the build plate, it’s recommended to hold it by the front section to avoid touching the surface where filament will be printed (as shown in the image below). When reattaching the build plate to the heat bed, first align both back corners, then lower the front of the plate to the bed.
If you do happen to touch the printable area, it’s important to wash the plate thoroughly before use. This helps prevent print failures, such as the model detaching from the build plate during printing. If the model detaches, it could get stuck to the hotend, potentially causing hardware issues and rendering the printer inactive.
Washing the plate
A clean build plate is essential for successful 3D prints. Contaminants like dust, oils, or residue can lead to adhesion issues, causing prints to fail. To ensure consistent results, regularly wash the plate and avoid touching the print surface with your hands.
You can wash the build plate with warm water and dishwashing detergent, just like you would do with a regular plate, then dry with a clean paper towel or let it dry naturally. This video shows the procedure that can be followed:
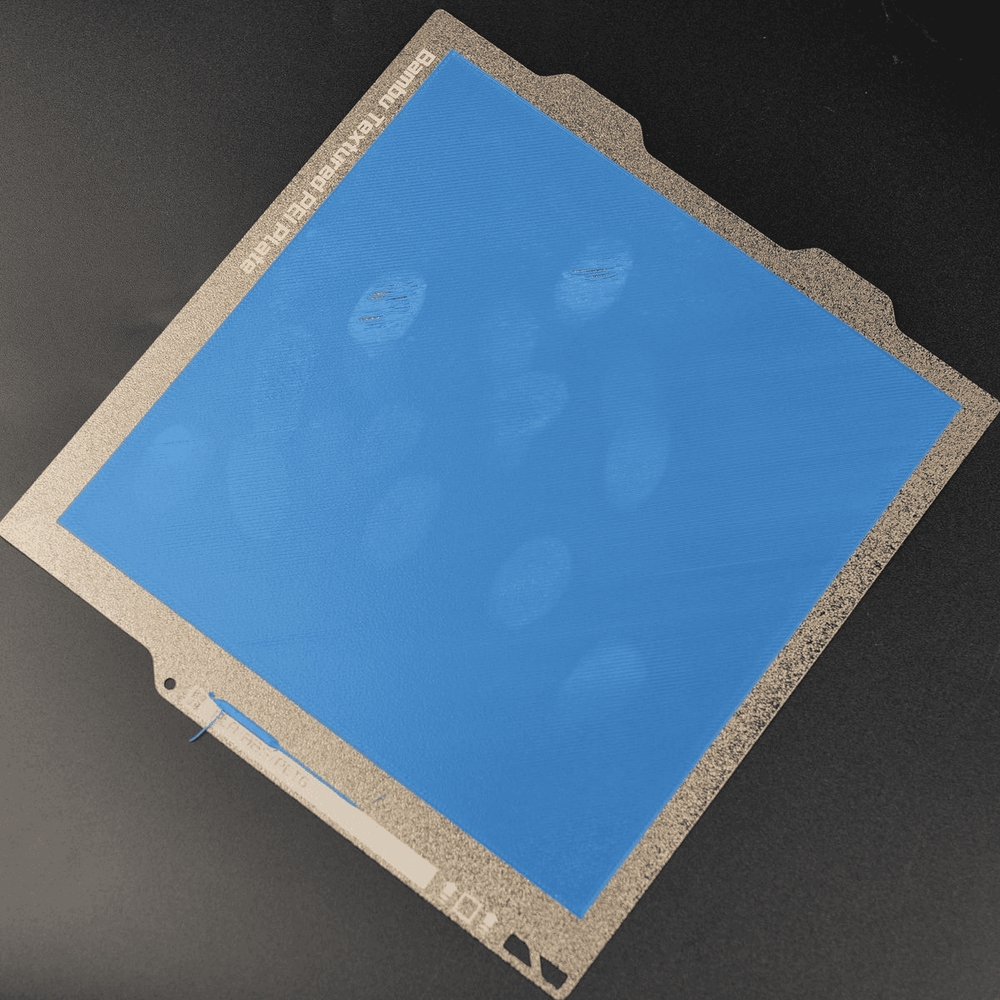
In the image below, you can see an example of a dirty plate, and how fingerprints can impact the first layer quality, and lead to adhesion issues:
Important to remember
- Avoid touching the build plate surface with your fingers to prevent contamination. You can handle the plate by grabbing it from the front section.
- When removing the parts, simply flex the plate from the front tab to release them. This will increase the interval of time between plate washes.
- Avoid using IPA alcohol to clean the Textured PEI Plate. Due to the texture on the surface, IPA will be unable to degrease the surface and can actually spread the grease on the entire surface. Instead, use dishwashing detergent.
Learn more about the A1 components
If you want to dive deeper into the hardware components of the A1, it’s highly recommended to visit the A1 Glossary on the Bambu Lab Wiki. There, you’ll find comprehensive information about each component used in the printer, including technical specifications, functionalities, and other useful details to help you better understand how the printer works.
Each component is thoroughly described to provide a clear understanding of its role within the printer. Additionally, the wiki includes links to purchase replacement parts, as well as step-by-step instructions on how to replace or maintain them, ensuring you have all the resources needed to keep your A1 in top condition.
This resource is especially useful for users who want to learn as much as possible about their printer’s components. However, if you’re not looking for that level of detail, don’t worry—the A1 course will cover the most important information you need to know. The quiz questions will focus solely on the material presented in the course, ensuring you’re only tested on what’s essential for using and maintaining your printer effectively.