Common print problems and solutions
Filament not sticking to the bed
One of the most common problems you can experience with the A1 is with the adhesion of the filament on the bed. The most common issue that can lead to this problem is grease or other contaminants on the plate.
When handling the build plate with your bare hands, natural oils from your skin can reach the surface of the plate. When this happens, the best solution is to wash the plate with hot water and dishwashing detergent that doesn’t contain any specific additives for skin protection or oils. Simply rub the plate with a clean kitchen sponge or brush, then rinse the plate to get rid of the contaminants.
Once the plate is washed, avoid touching the surface and handle it from the sides to prevent grease or other contaminants from getting on the plate.
You can repeat the washing process every time you are experiencing adhesion issues, but if this solution does not solve the problem, it is recommended to perform a full calibration from the printer menu to ensure the printer self-calibrates again.
Model lost adhesion
If your model has lost adhesion during printing, one of the most common reasons is air drafts. The printer’s heatbed uses a higher temperature when printing to ensure the filament remains stuck to it during printing. If the printer is located in a colder place, or it is prone to air drafts, it can make the filament lose its adhesion to the build plate and cause a print failure.
To avoid this issue, first ensure the build plate is washed with hot water and soap, as a dirty plate also contributes to poor adhesion. Next, ensure you have used the correct slicer profile for your filament. For example, PETG is printed with a higher heatbed temperature compared to PLA. Finally, ensure your printer is placed in a location where the temperature is not lower than 15°C (50°F) and it is not subject to air drafts (such as in front of an air vent).
Following these steps will help you minimize the chances of a print failure due to the model losing adhesion.
Model looks soft and melted
The most common reason for models that look soft and melted, as in the image below, is the part cooling fan. If not enough cooling is applied to the print, the printed layers don’t have enough time to cool and solidify as expected.
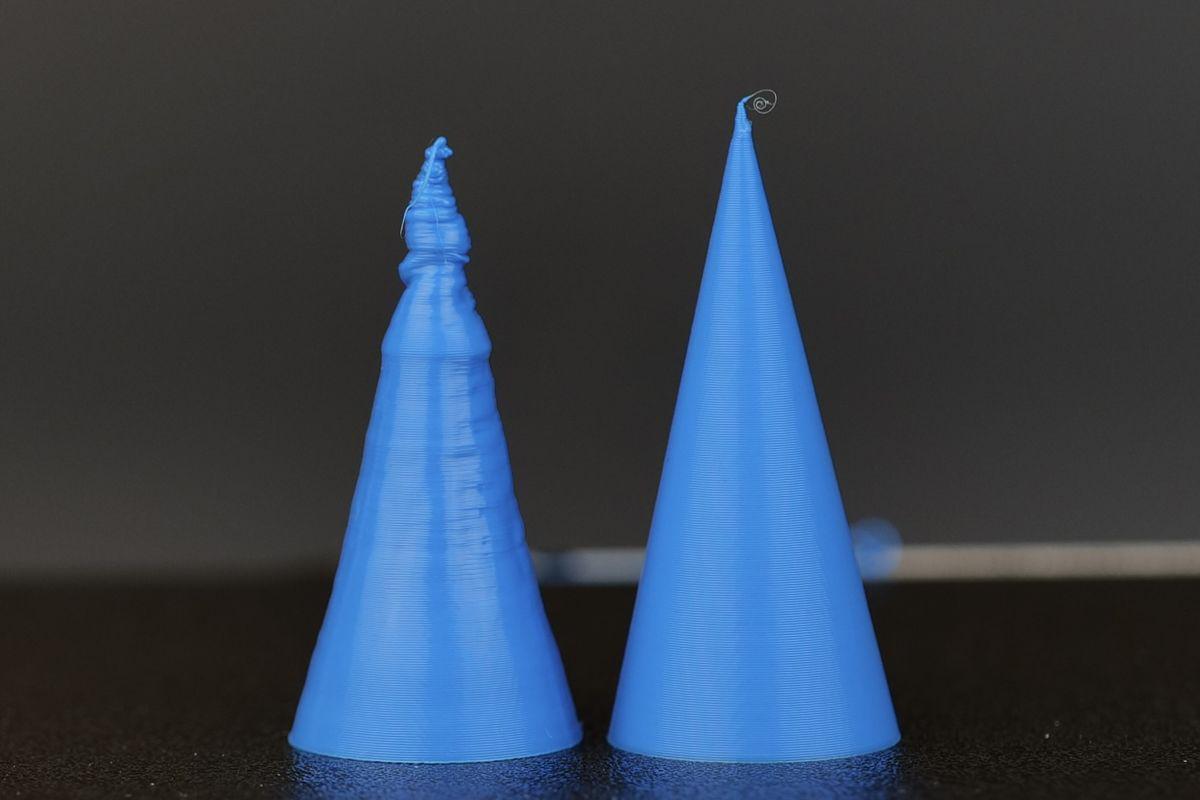
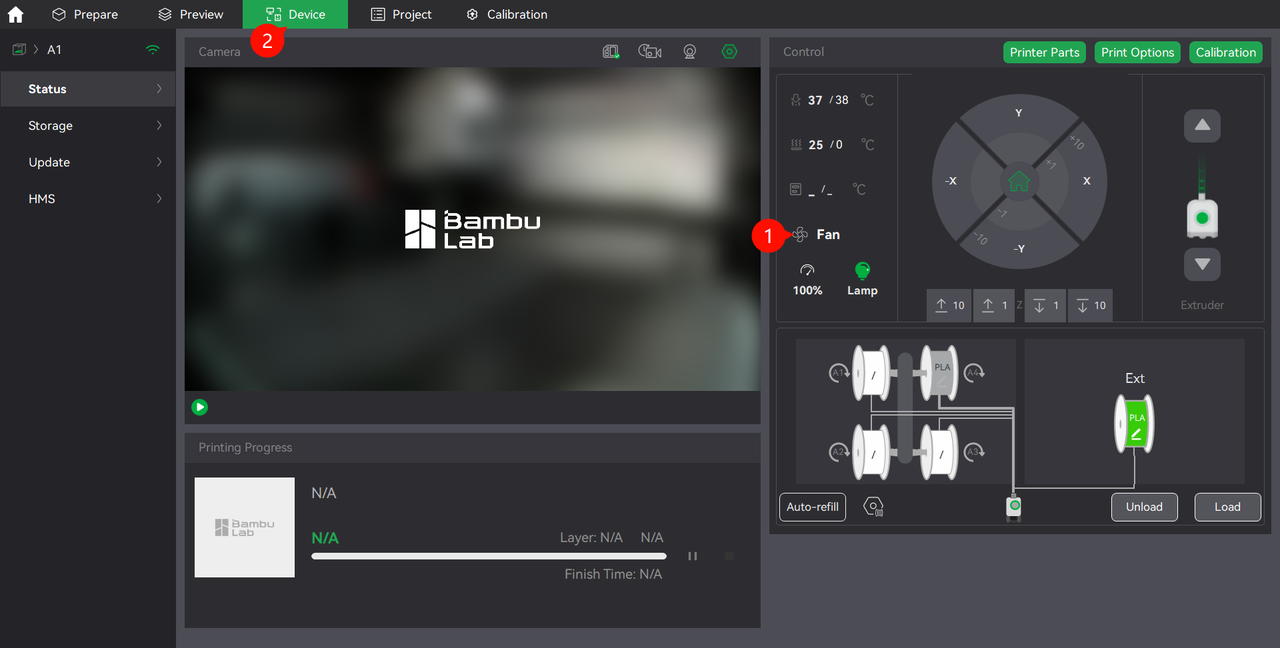
To address this problem, it is recommended to turn on the part cooling fan using the Bambu Studio controls under Device → Part cooling fan section. Turn the part cooling fan to 100% and confirm that the fan is spinning.
If the fan is spinning correctly, the issue is related to the printing profile and settings you have selected for your print.
If the fan is not spinning as expected, then the issue can be related to a faulty Part Cooling Fan, a bad wire connection to the fan, or something related to the Tool Head board.
Other possible causes include a print speed set too high, a hotend temperature that’s too high, or a minimum layer time that’s too low in the slicer. This Bambu Lab Wiki article covers the most probable reasons for this problem and provides additional solutions.
Filament not coming out of the nozzle – Nozzle is clogged
A common issue you might encounter during 3D printing is filament not extruding from the nozzle. The most frequent cause of this problem is a clogged nozzle, typically due to small particulates reaching the hotend that are slightly larger than the nozzle’s opening.
To resolve this, you can either replace the nozzle with a new one (the quickest option) or follow a guide to unclog it, which may take a bit more time. Of course, the replaced nozzle can be re-used after it’s unclogged, so it’s a good idea to have a spare for a quick swap.
Unclogging the nozzle is usually straightforward and often involves using a thin needle to push through the nozzle’s orifice to clear any debris. However, if the nozzle is old or has seen extended use, filament buildup inside the nozzle may be more stubborn and require extra effort to remove. You can try performing a few cold pulls to try and dislodge the clog.
To prevent clogs and keep the nozzle functioning smoothly, it’s essential to keep your printer and filament away from dust and debris. Regularly cleaning the nozzle using the cold-pull method is also recommended to ensure the interior remains free of obstructions.
Filament stops extruding during print – Extruder is jammed
In certain situations, the extruder can be jammed with a broken piece of filament or other filament debris. When this happens, the extruder will need to be disassembled to access the gears and remove the piece of filament that blocks the filament path.
A detailed guide on how to clean the extruder and remove any clogs from it is available on the Bambu Lab Wiki.
Filament wisps and strings
If your print has a lower quality, and there are small wisps and strings of plastic around it – commonly known as stringing – you might need to investigate what causes the issue and solve it.
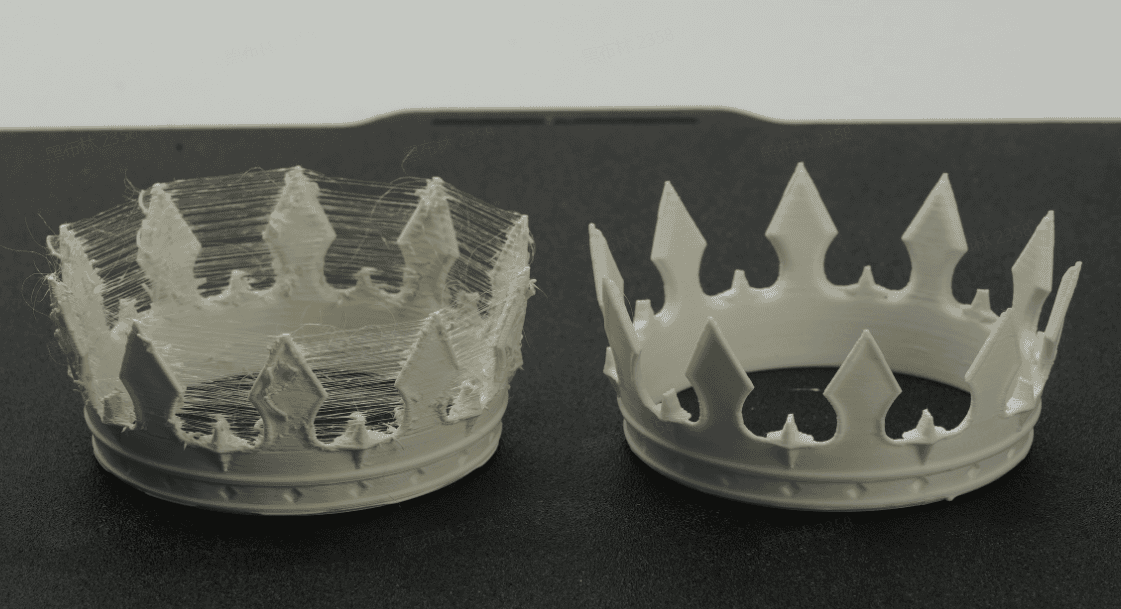
The most common reason for stringing is using filament that has absorbed moisture. Over time, the filament can absorb moisture, which will bubble inside the hotend during printing. When that happens, the flow of the filament is inconsistent, and the printer cannot accurately control how much filament is extruded, causing the issue shown in the image.
The solution in this case is to dry the filament according to the requirements of your filament type, then store it in a moisture-proof bag. A detailed guide on how to dry filament is available on the Bambu Lab Wiki.
Keeping the nozzle clean is also a good solution to stringing, as over time, the tip of the nozzle will gather filament around it, which will drip during printing and can cause small blemishes on the printed model. Simply heat the nozzle to around 220 °C and wipe the tip of the nozzle with a paper towel, while making sure not to touch it with your bare hands.
Small features of the model not printed
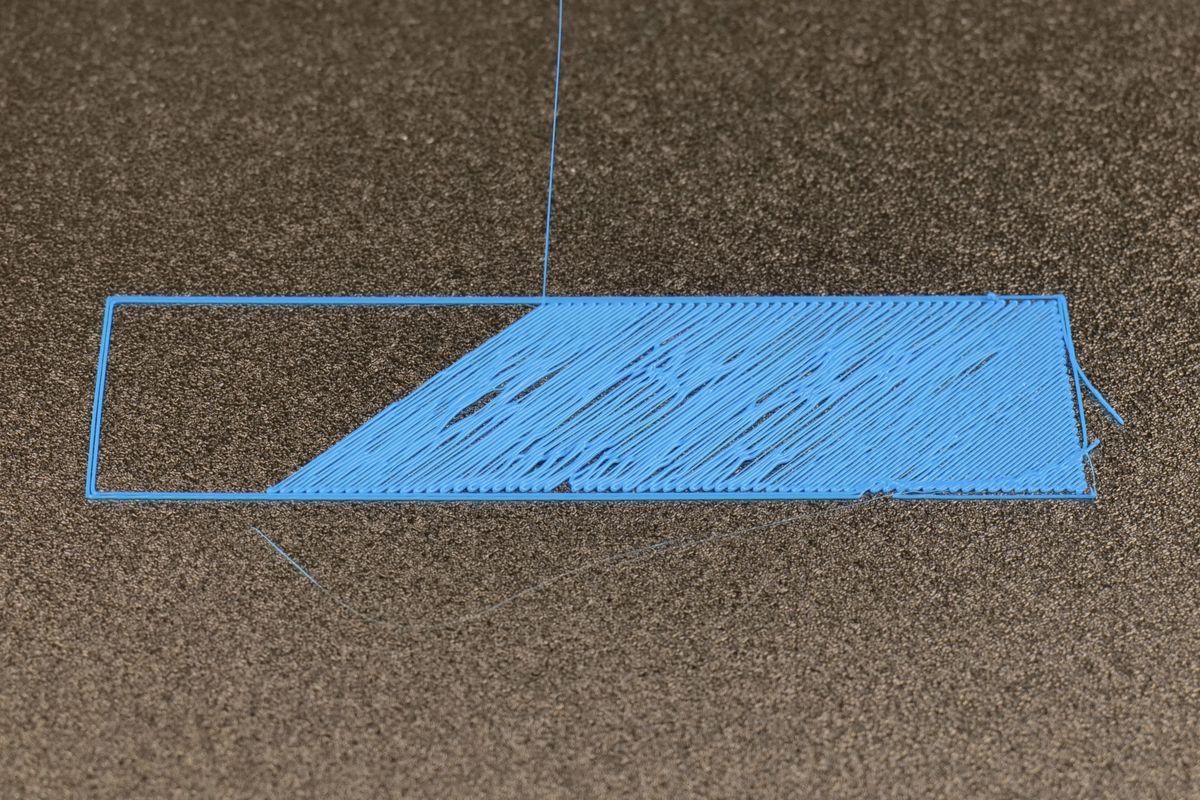
When printing objects that have small features or tiny details, you might find that some of them don’t print correctly or are completely missing from the print. This kind of issue occurs when the nozzle used is larger than the 3D printed feature.
In the example below, you can see a representation of small features not being printed.
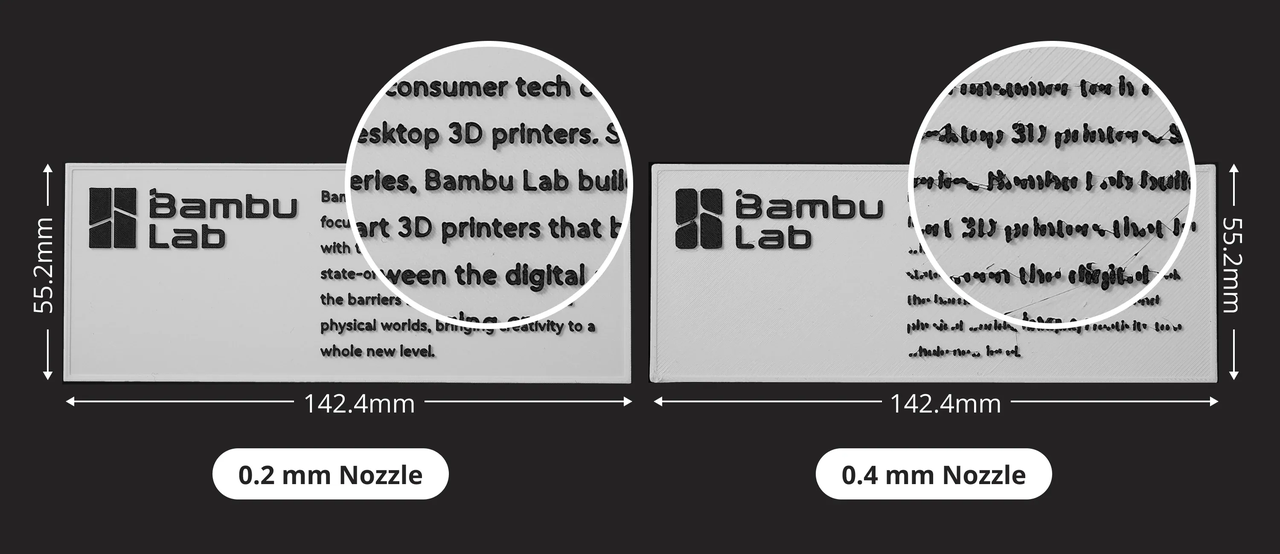
One way to try and solve this problem is to change the Wall generator setting in Bambu Studio from Classic to Arachne. This wall generator option has a different algorithm for printing, which can provide improved results for objects with small features.
If using this option doesn’t produce the expected result, it is recommended to replace the nozzle with a different one that has a smaller orifice. For example, if you tried printing with a 0.4 mm nozzle and the features are not correctly printed, you can try a 0.2 mm nozzle.
Other potential print problems and solutions
The Bambu Lab Wiki has a more detailed list of potential print issues and suggestions on how to solve the problem.