How to re-tension the printer’s belts
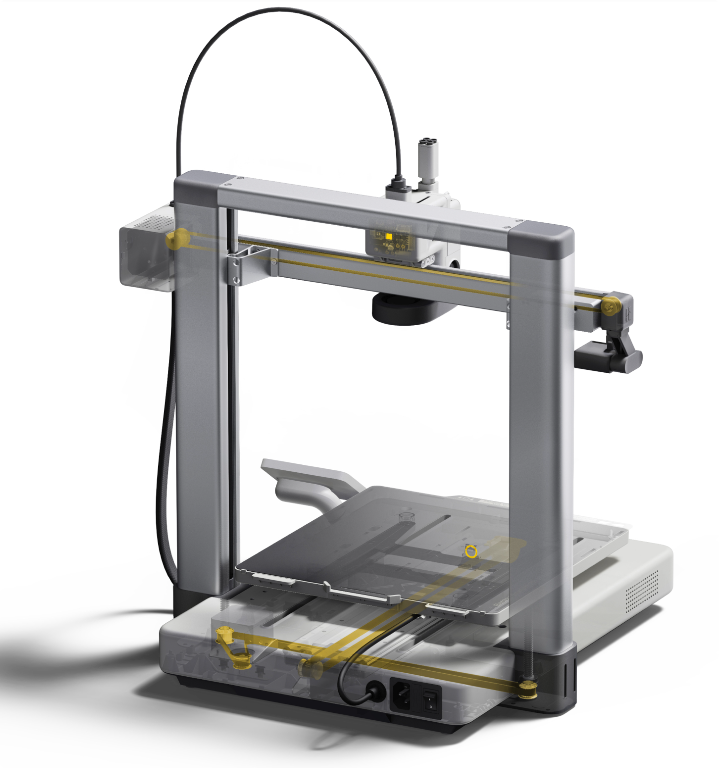
The A1 has an assisted belt tensioning system and comes pre-tensioned from the factory. However over time, the belts controlling the X and Y axes may loosen. When this occurs, the printer automatically detects the issue and notifies you with an on-screen prompt. The image below highlights the positions of the X and Y belts in yellow for easy identification.
It is highly recommended to always re-tension both belts at the same time to ensure consistency.
How to Tension the X-Axis Belt
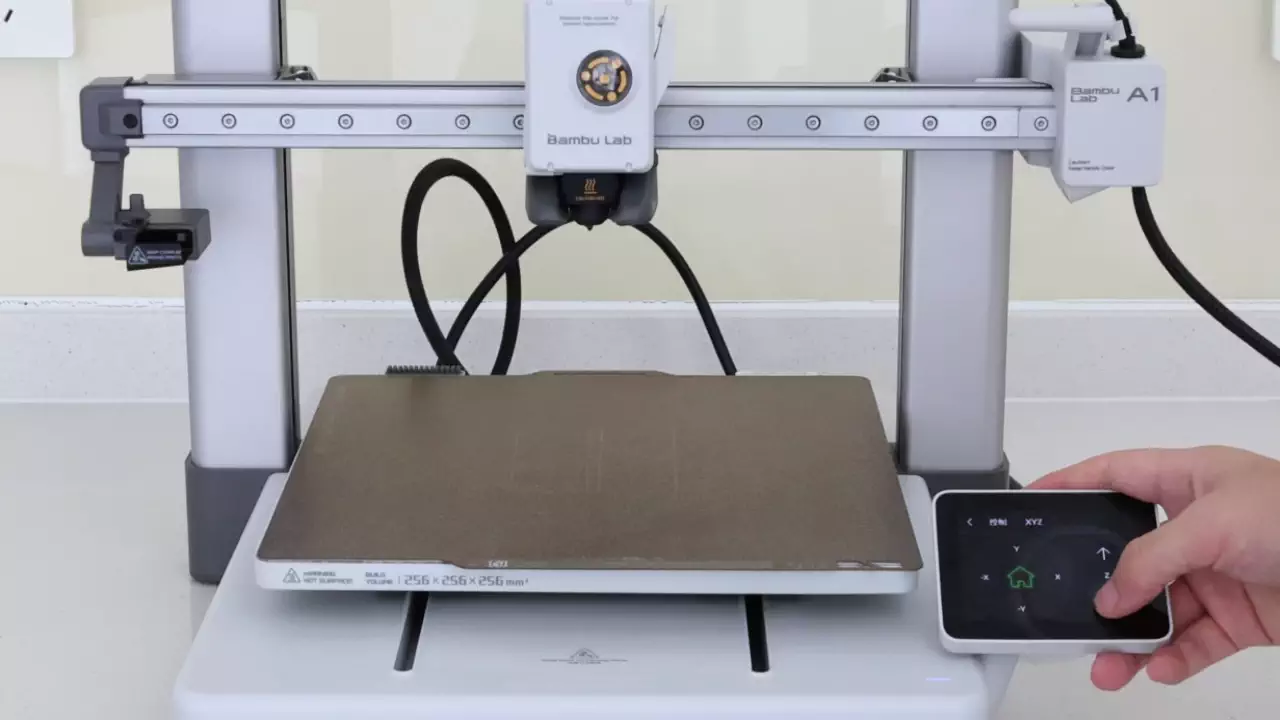
Use the printer’s screen controls to move the Z-Axis up about 100mm to prevent scratching the build plate during toolhead movement.
Using an H2.0 screwdriver, loosen the fixing screw at the back of the toolhead, but do not remove it completely.
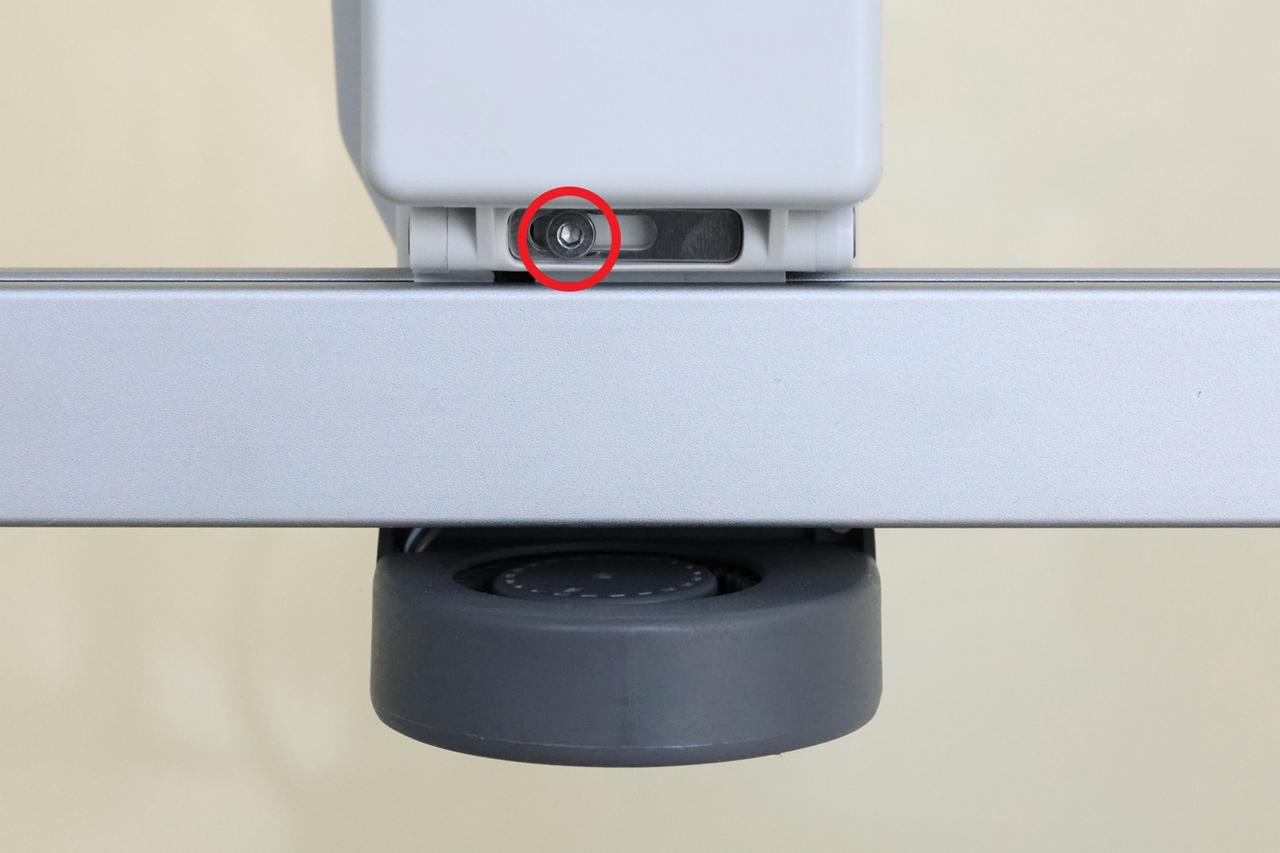
Hold the toolhead and move it left and right along the X-axis 3–5 times. This action allows the built-in tensioner to automatically adjust to the appropriate tension.

Retighten the screw at the back of the toolhead to secure the tensioner in place.
How to Tension the Y-Axis Belt
The process for tensioning the Y-axis belt is similar but requires additional steps:
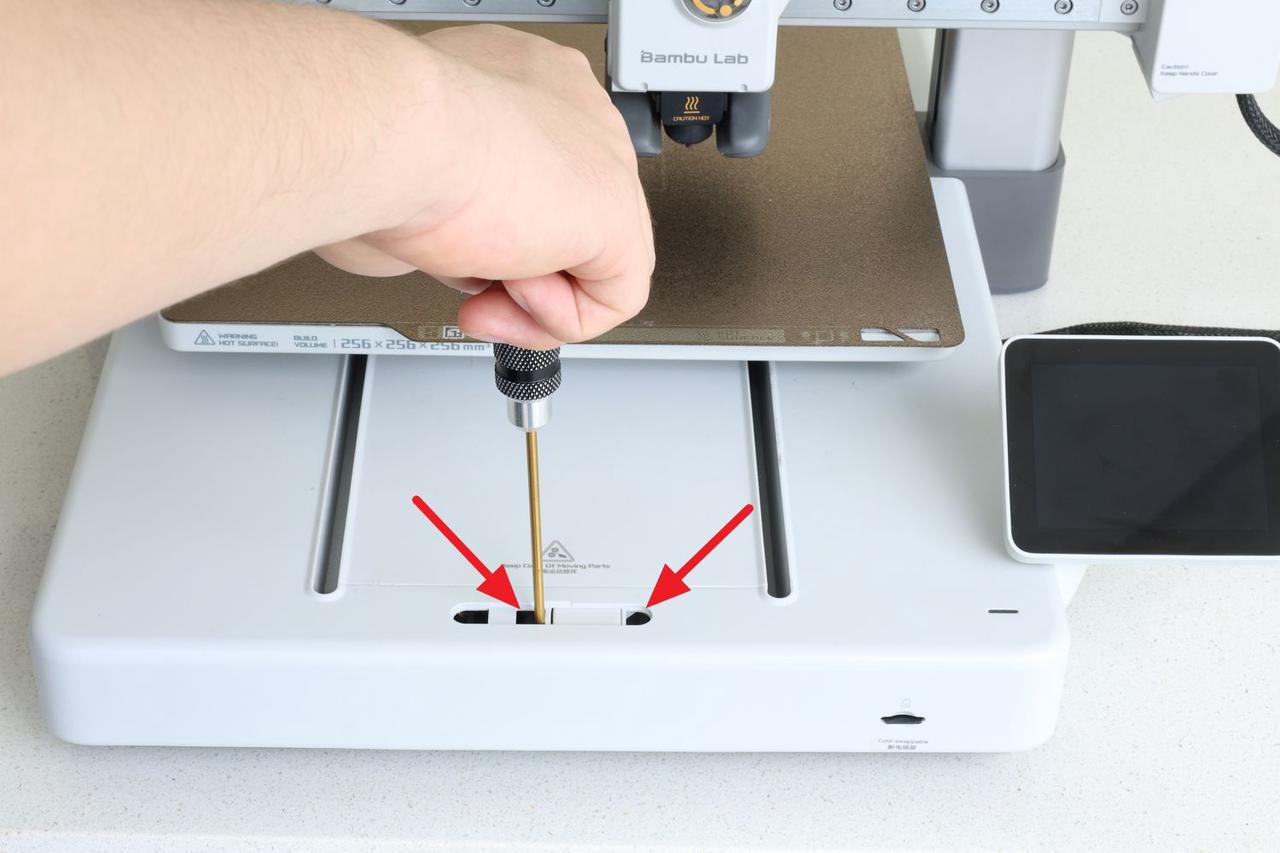
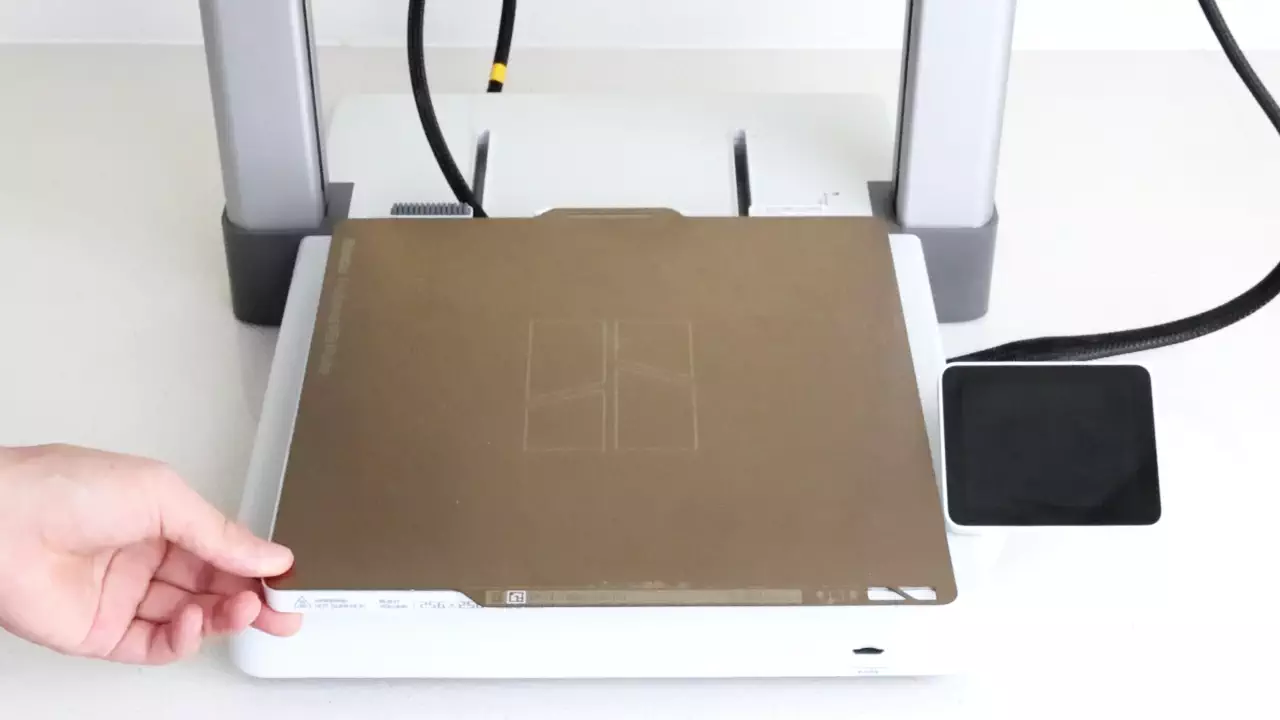
Remove the front cover of the printer to expose the Y-axis tensioner. Use an H2.0 screwdriver to loosen the two fixing screws of the Y-axis tensioner.
Note: Do not fully loosen or remove the Y-axis tensioner screws, as this may require reassembling the tensioner.
Push the hotbed (build plate) back and forth 3–5 times to allow the tensioner to automatically adjust to the proper tension.
After completion, retighten the two fixing screws to secure the tensioner and reattach the Y-axis tensioner cover.
How to Tension the Z-Axis Belt
The Z-axis typically does not require frequent tensioning due to its low-speed movement. If adjustment is needed, follow these steps:
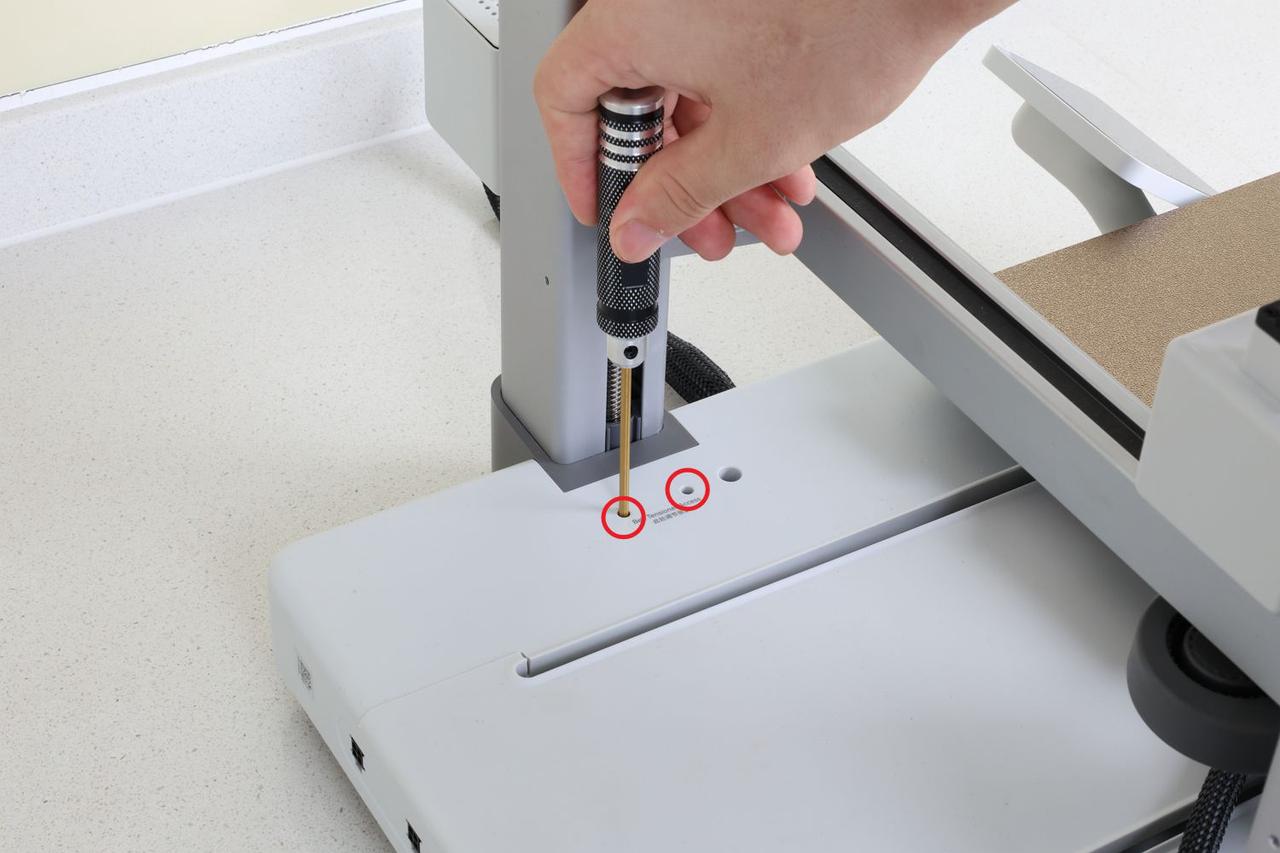
Use an H2.0 screwdriver to loosen the two fixing screws of the Z-axis tensioner on the right side of the printer.
Note: Do not fully loosen the screws to avoid detaching the Z-axis tensioner.
Use the printer’s screen controls to move the Z-axis up and down 3–5 times, allowing the tensioner to automatically adjust to the proper tension.
Re-tighten the two screws on the right side to secure the tensioner.
Don’t forget to perform the Calibration
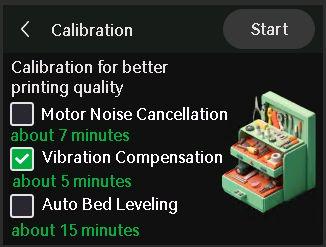
After completing the adjustments, don’t forget to perform a Vibration Compensation by navigating to Maintenance → Calibration in the printer menu. This allows the printer to measure the movement of the printer and the vibrations, which are changed once the belts have been adjusted.
Once the calibration process is done, you can return to printing.