How to replace the Filament Cutter in the Extruder
The A1 uses a Filament Cutter to cut the filament before each filament change. Over time, the filament cutter blade will become dull and require a replacement. It is recommended to replace the Filament Cutter every 10-15 spools of filament used (or less) to ensure the cutting performance is unaffected. If you encounter issues with the AMS filament retractions, we recommend replacing the blade for the best results. If the blade is sharp, the filament will be cut cleanly and should not cause problems during operation.
IMPORTANT!
Always power off the printer before performing maintenance on it or its electronics. Leaving it on can cause short circuits and lead to damage or safety hazards.””Always power off the printer before performing maintenance on it or its electronics. Leaving it on can cause short circuits and lead to damage or safety hazards.
Remove the old Filament Cutter blade
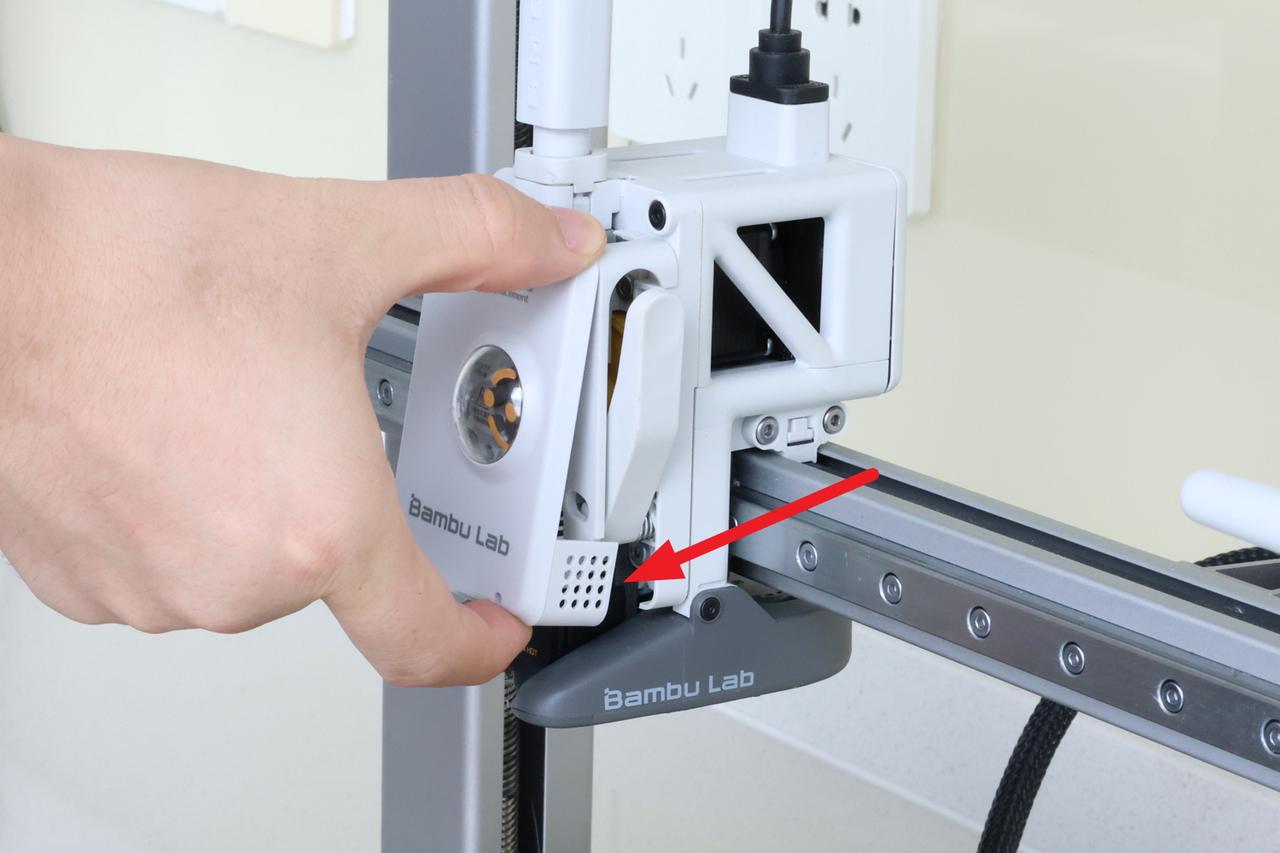
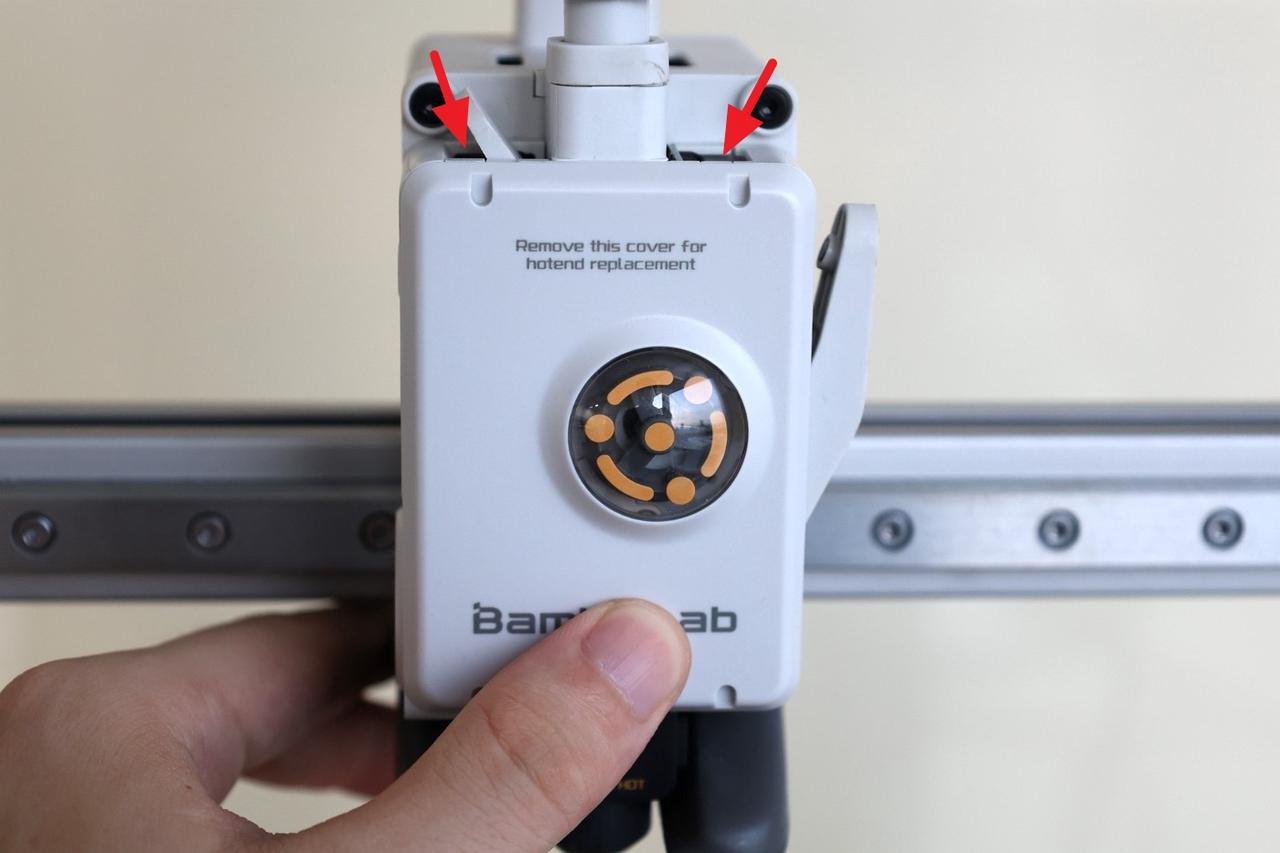
The first step in replacing the filament cutter blade on the A1 is to remove the toolhead front cover. Grab the base of the front cover and gently pull towards you.
The clips holding the cover in place will be released, allowing you to remove the it.
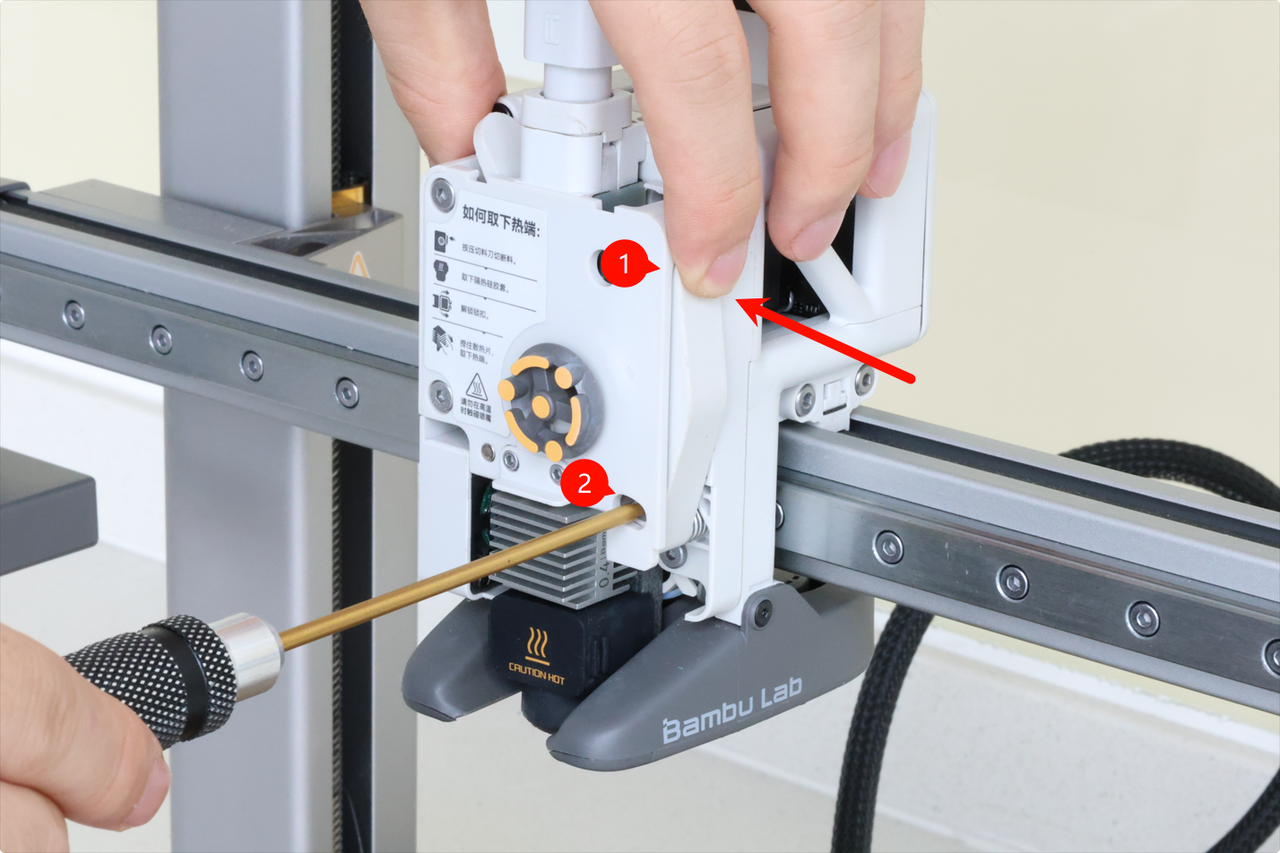
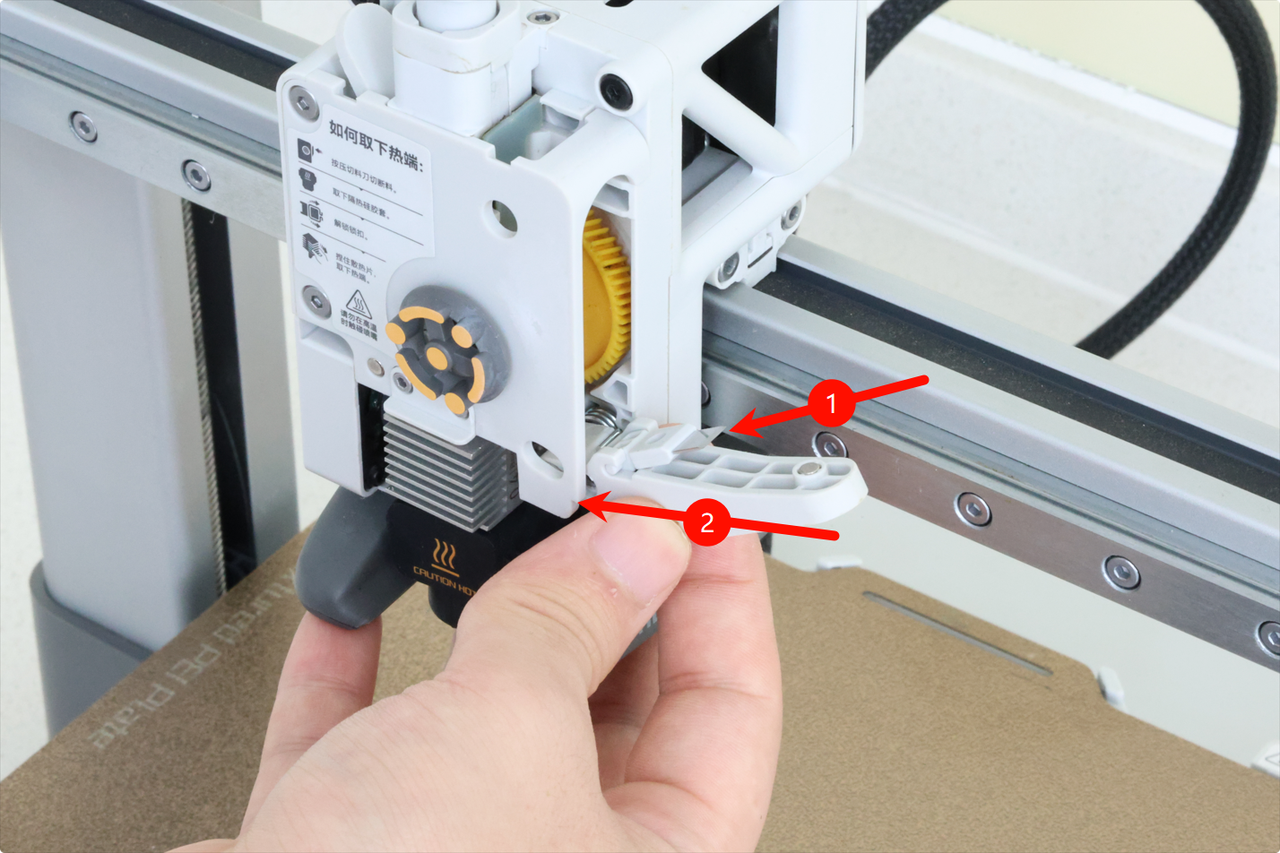
The next step is to release the filament cutter lever. To do it, start by holding the filament cutter pressed to allow for easy removal of the single screw holding it in place.
Keep holding the lever pressed until the screw is completely removed, then gently release the cutter.
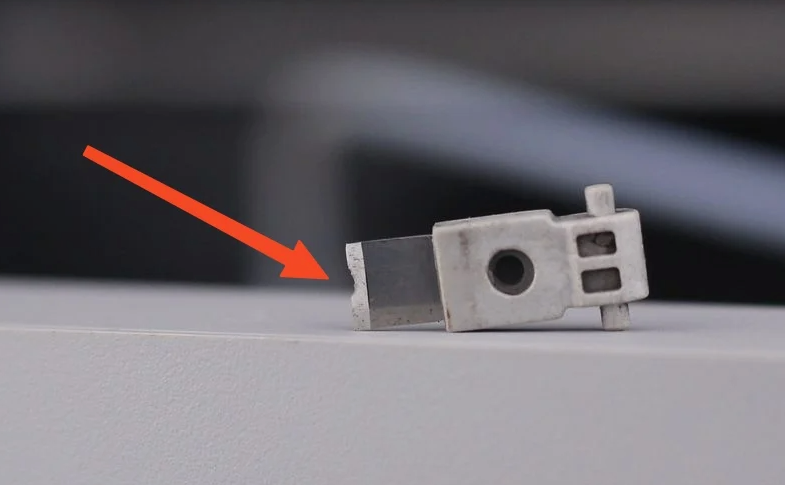
The final step is to remove the filament cutter blade from the lever.
Start by gently pushing the blade in the direction indicated in the image below, then remove it upwards.
Important! Even a “dull” blade is still very sharp, and can easily cut you. Please proceed with caution!
Optional – Clean the extruder gear
We also recommend cleaning the metallic extruder gear and the yellow gear before proceeding with installing the new filament cutter.
Over time, small filament debris can become stuck on the extruder gears. Cleaning them at this point will ensure smooth operation in the future.
A can of compressed air can be used to blow out any debris that could be present inside the extruder and around the gears.
Install the new filament cutter blade
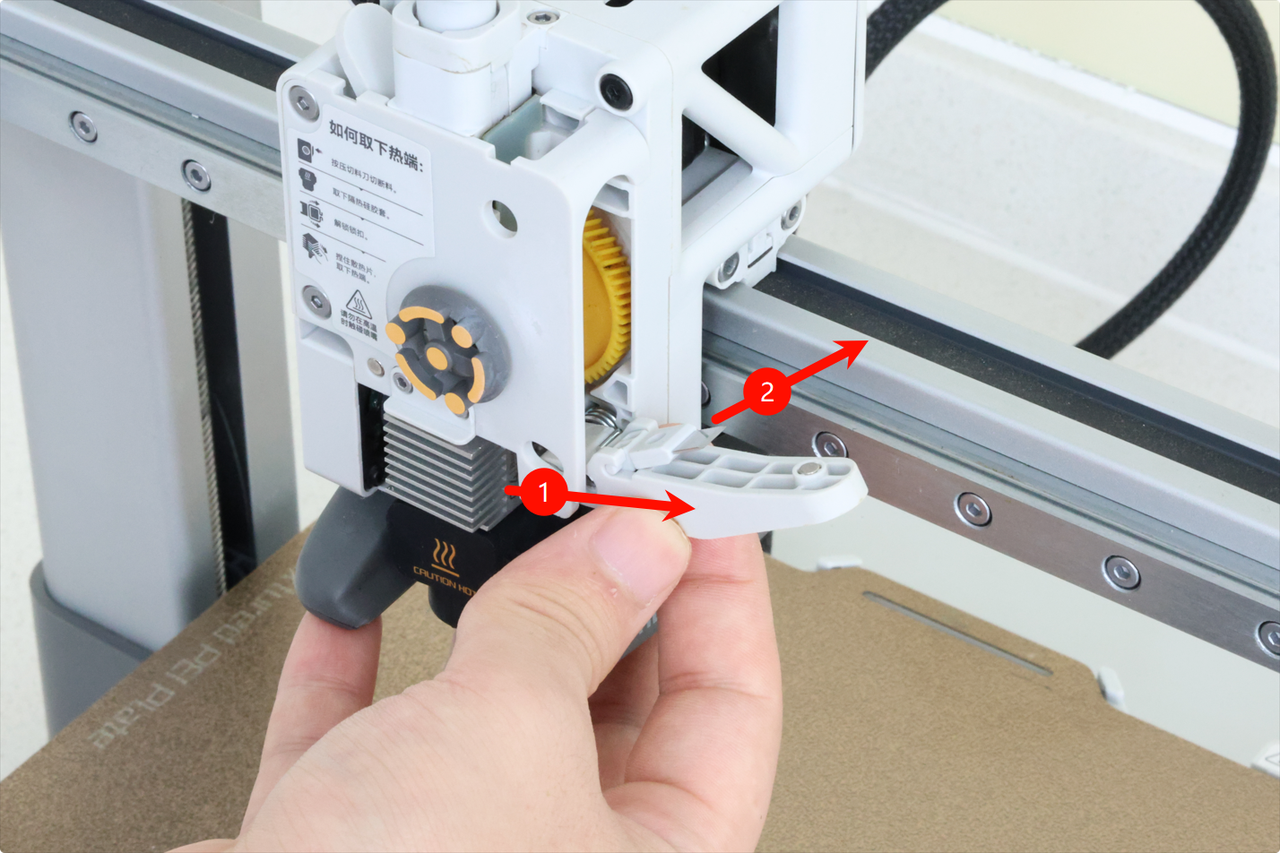
Installing the new filament cutter blade is easy. Simply align the blade with the filament cutter to slot it in place.
Then, gently push towards the direction shown in the image below to click it in place.
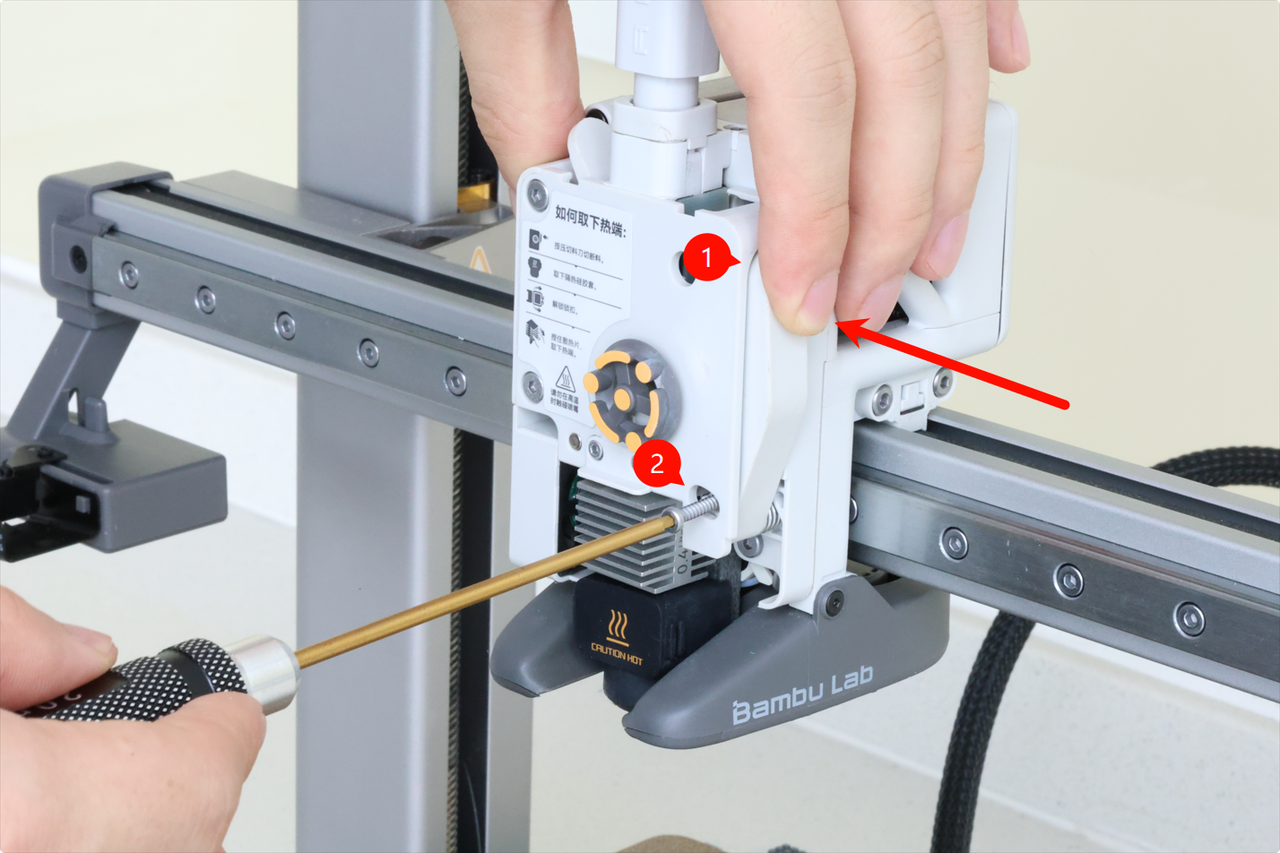
With the blade installed on the lever, we can lock the filament cutter in place.
First, align the blade with the extruder hole where the blade will slide into.

Next, push on the filament cutter lever and hold it in place while you re-install the screw.
Make sure not to overtighten the screw to avoid damaging the plastic threads.
The toolhead front cover can now be re-installed. Simply attach it to the top of the toolhead by aligning the clips, then gently push on the bottom side.
You will hear the clips click into place when the installation is complete.
To ensure everything works as expected, press the filament cutter lever a few times and ensure the motion is smooth and the lever returns to the initial position.
This will ensure smooth operation during use.