Printer Placement, Initial Setup and Auto-Calibration
Printer Placement
For the best printing experience, the printer should be placed on a flat, stable surface in an environment with a temperature between 15°C and 30°C (~60-85°F). If the temperature is too low, prints may struggle with adhesion and detach from the plate, while layer bonding can also become weaker. In hotter environments, filament can soften before reaching the hotend, increasing the risk of extruder or nozzle clogs.
While the printer is equipped with an active exhaust fan that pulls hot air out of the chamber to prevent such issues, in warmer environments, this may not be enough to prevent clogs. We will cover this in more detail in a dedicated chapter.
Position the printer in its final location before running any calibration, as moving it afterward can affect calibration accuracy. The surface on which the printer is placed must be sturdy and stable, capable of supporting the printer’s weight without wobbling or shifting.
Initial Setup and Binding the printer to your Bambu Lab Account and Handy App
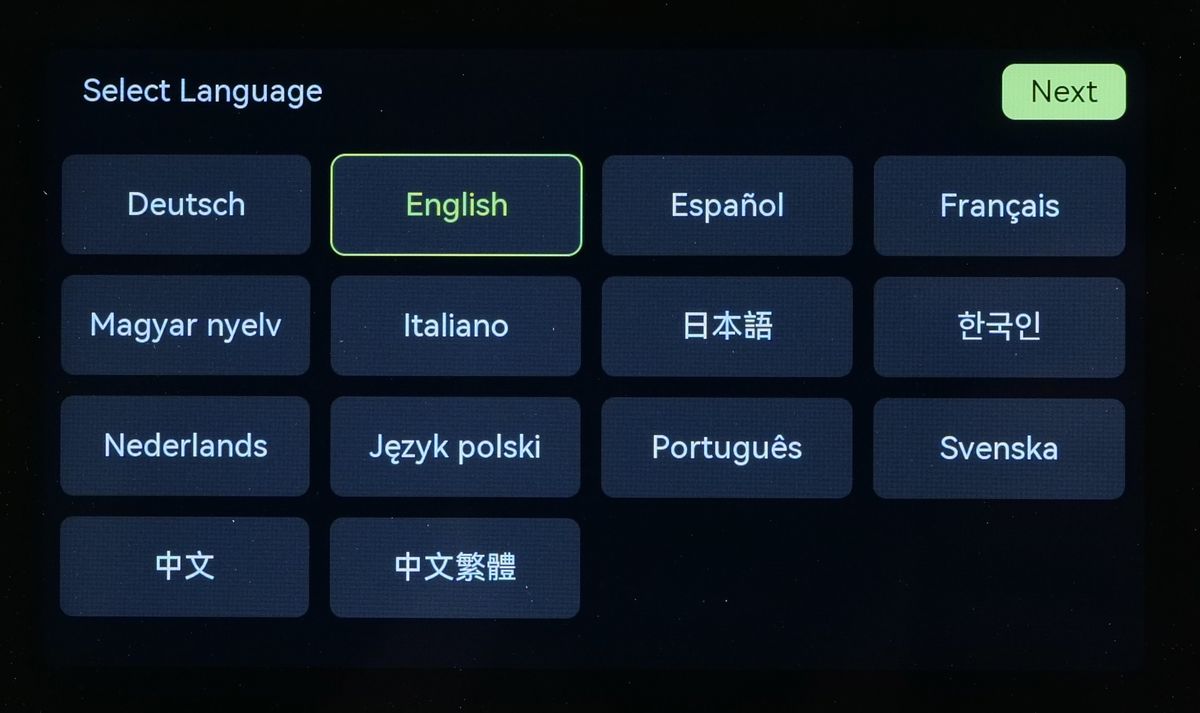
Once the printer has been placed to its final location, you can start it and begin the initial setup. The first screen will ask you to select the language used in the printer’s interface.
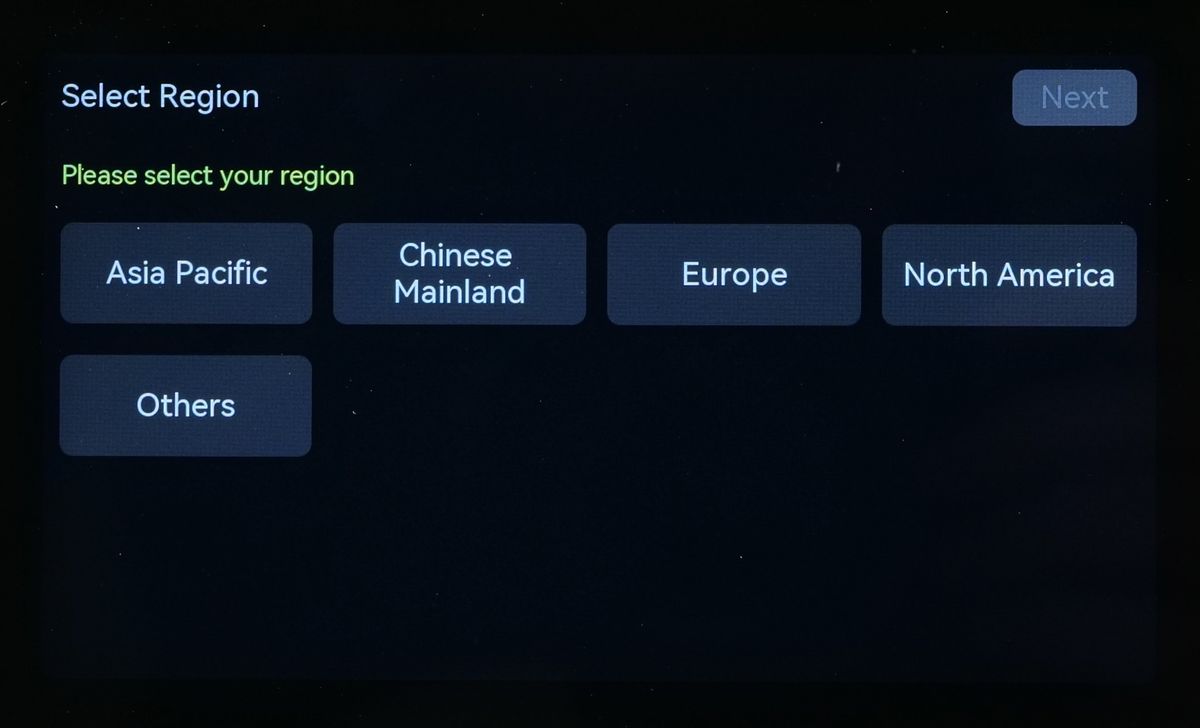
Next, the printer will ask you to select the region where you are located . This is important for the next step.
Once the region is selected, you are prompted to connect the printer to a network. In this step, select your 2.4 Ghz Wi-Fi network, enter the credentials, then tap Next.

If the network was connected successfully, a QR code will be displayed on the screen, allowing you to bind the printer to your Bambu Lab Account.
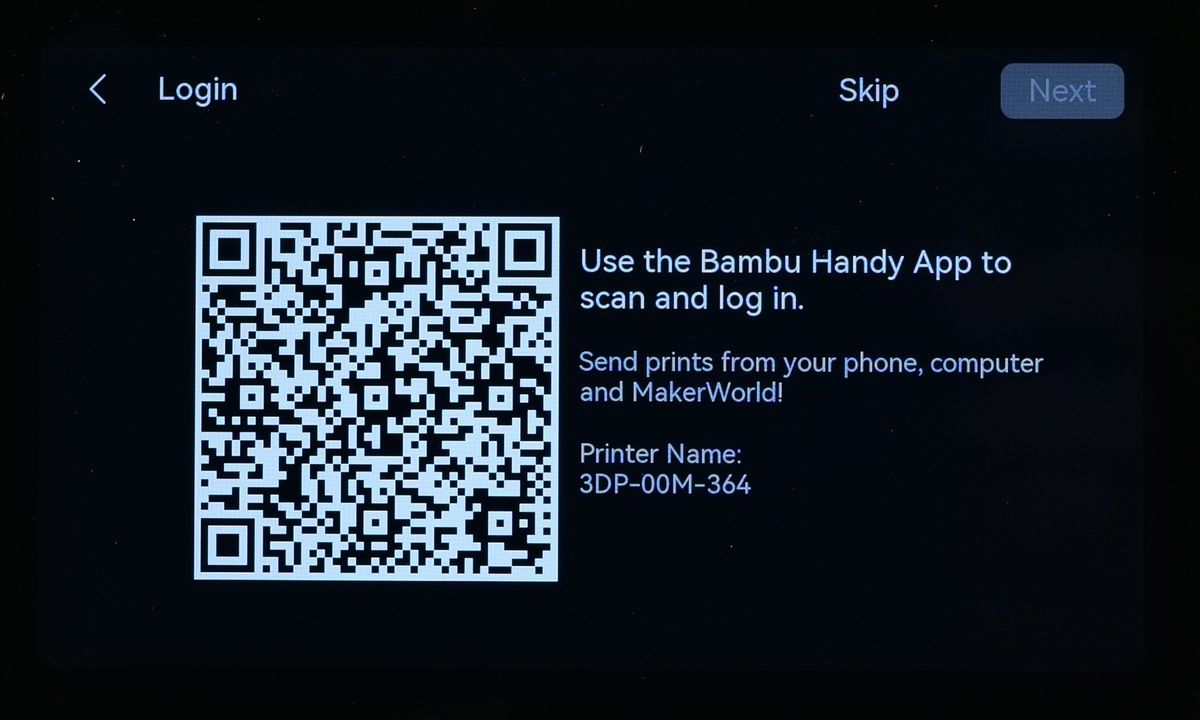
You can bind your printer using Bambu Handy, unlocking multiple benefits such as remote monitoring, remote printer control, starting new prints, and seamless firmware updates. Using Bambu Handy brings the convenience of managing your printer from anywhere with ease.
First, make sure you have installed the the Bambu Handy app from the App Store (for iOS devices) and Play Store (for Android devices). Once installed, you can create a Bambu Lab account.
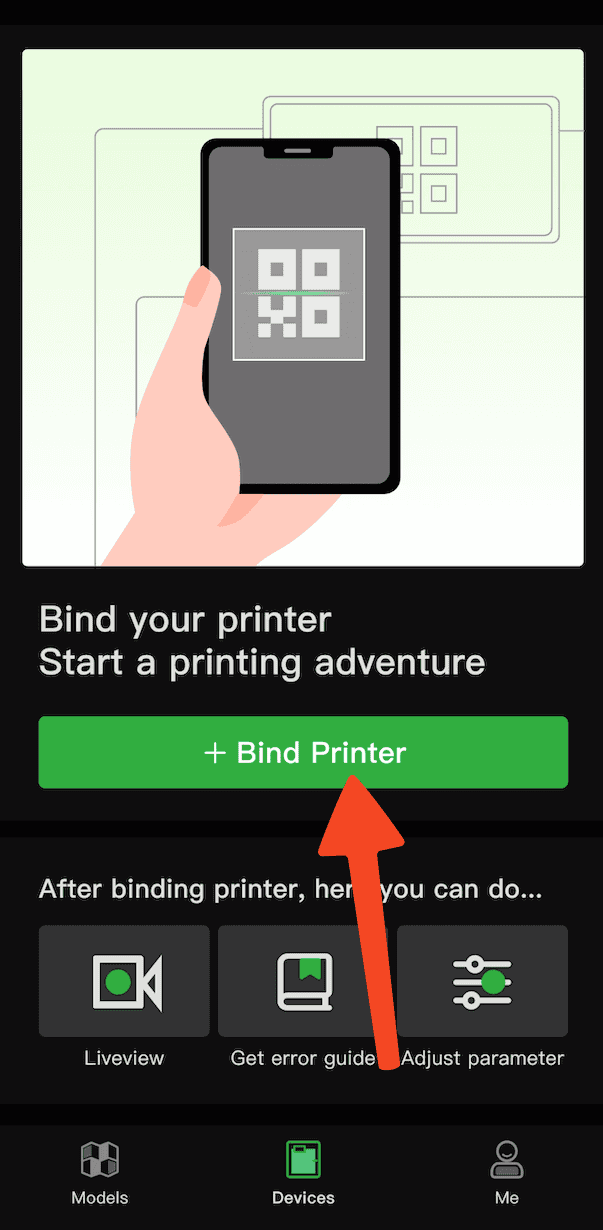
Once you are logged into Bambu Handy, tap on the Devices button, and the following screen will show up, where you will need to tap on Bind Printer.
After tapping on the Bind Printer button, the camera on your phone will open, to allow scanning the QR code displayed on the printer. At this step, simply scan the QR code displayed on the printer.
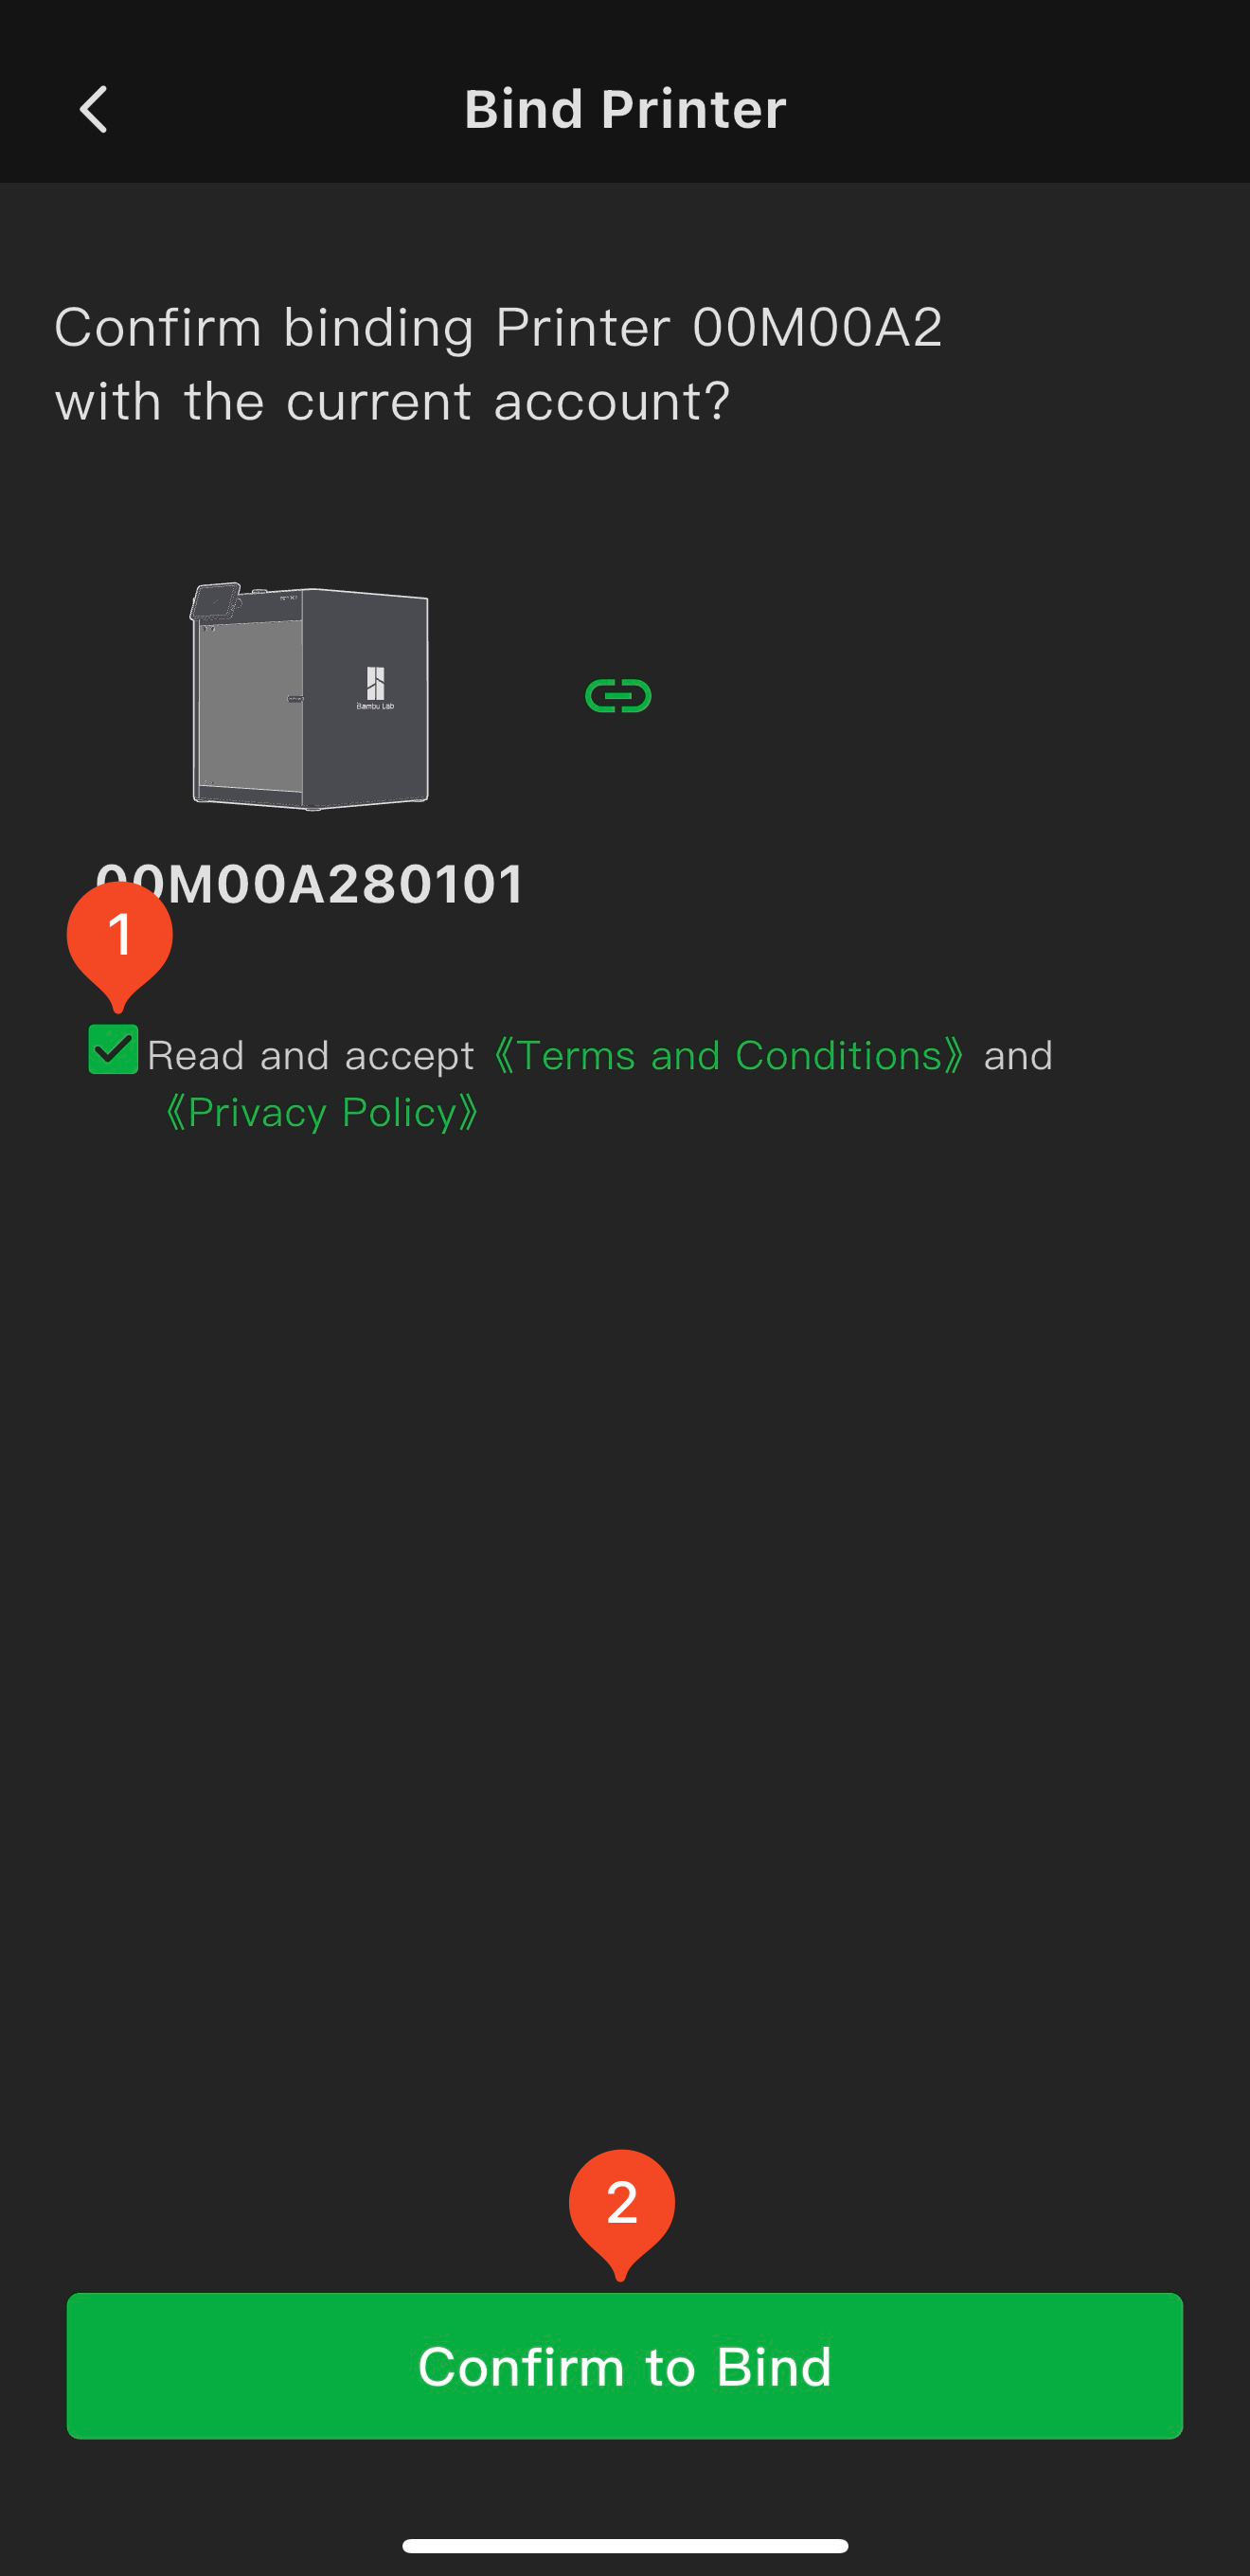
Once scanned, this screen will show up in Bambu Handy, where you can confirm the binding process. Read and accept the terms and conditions, then tap Confirm to Bind.
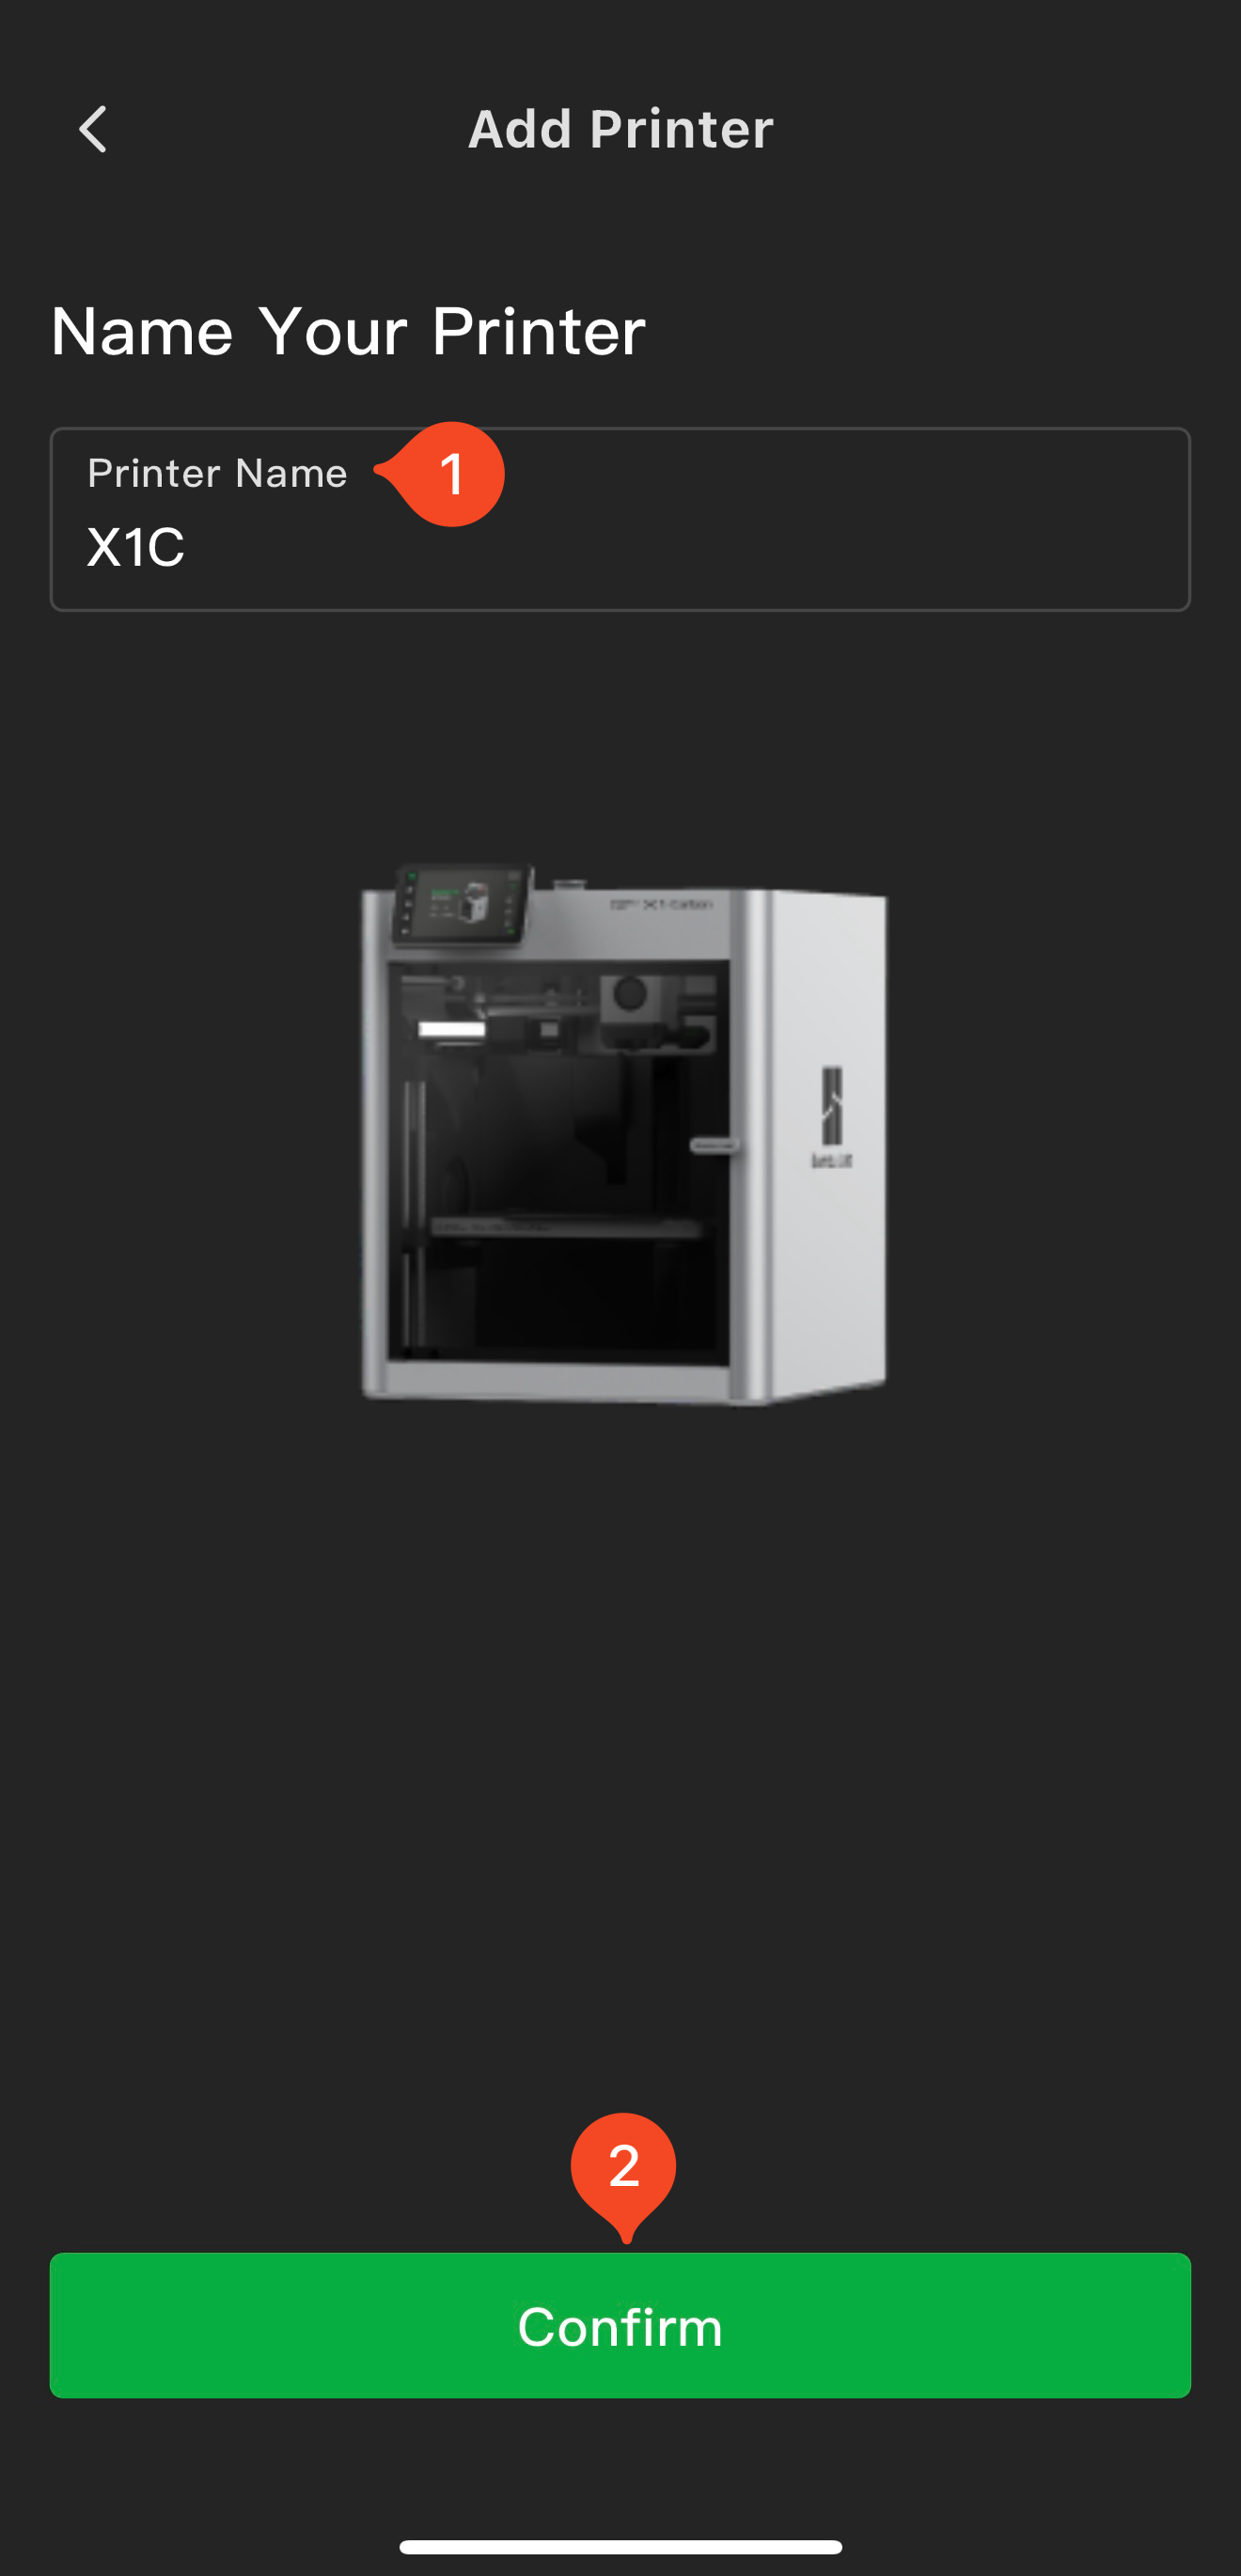
Next, you will be asked to set a name for your printer, then confirm it with the on-screen button.
That’s it! Your printer is now connected to your Bambu account! Tap Next to continue the set-up wizzard.
Of course, you are also free to use the printer completely offline if you choose to do so, and not connect it to the network. In that case, you can skip the connection process and select Setup later.
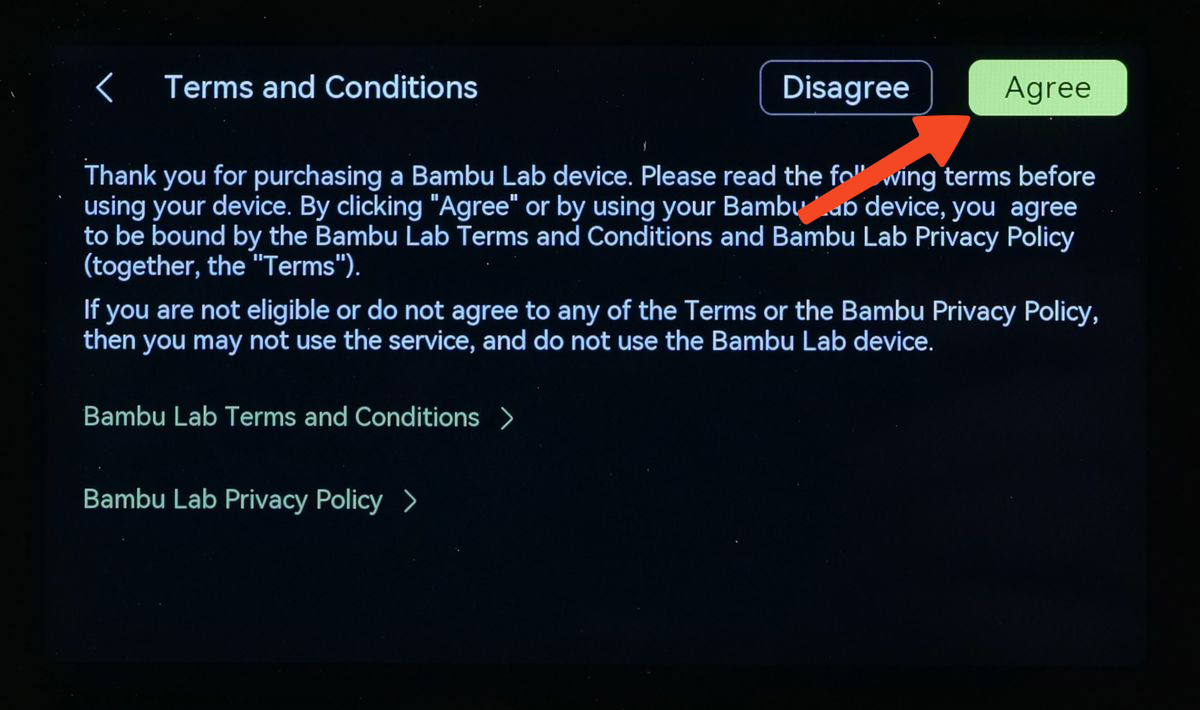
In the following step, you will be asked to read the Terms and Conditions, and to move forward you need to tap Agree.
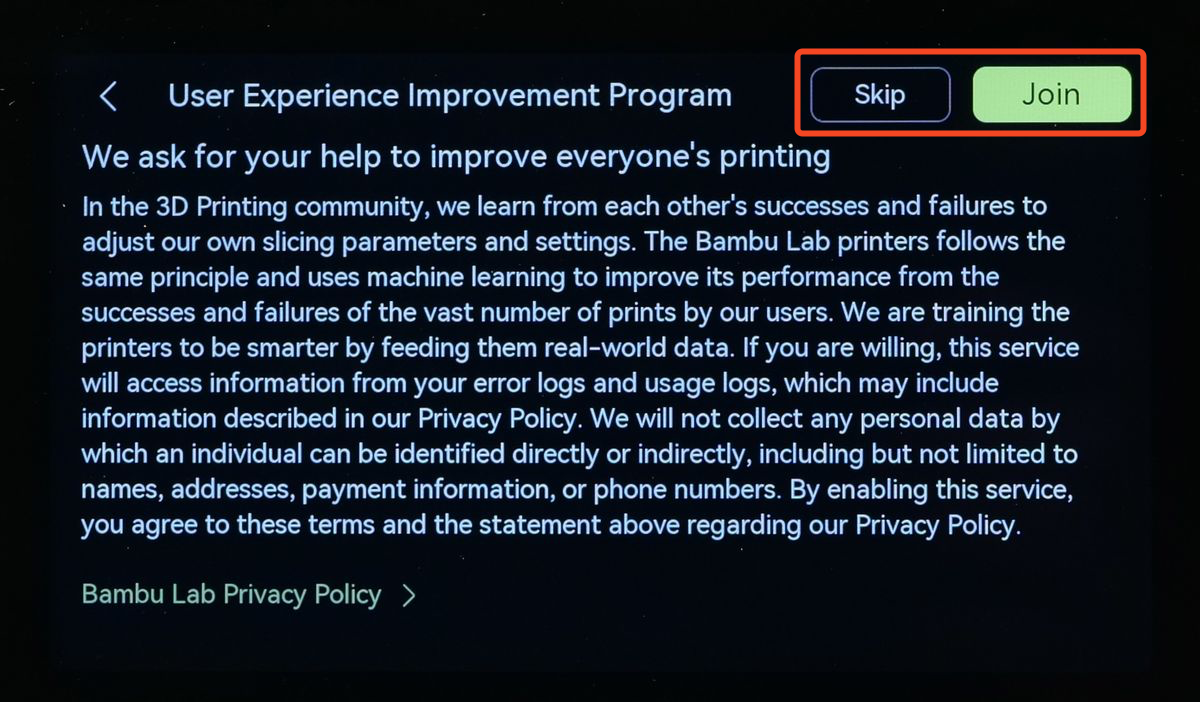
There is also a suggested User Experience Improvement Program you can join. If you choose to participate in this program, you can help further improve everyone’s printing experience by allowing us to collect device error and usage logs, according to the Privacy Policy. Tap Join if you wish to participate in this program, or Skip if you don’t want to join. You can always change this setting later from the printer’s menu.
The final step before calibration is to confirm the screws holding the heatbed in place during shipping are removed. If you followed all the steps during setup, you can safely tap Next. But it doesn’t hurt to double check.

Auto-Calibration
What is Auto-Calibration?
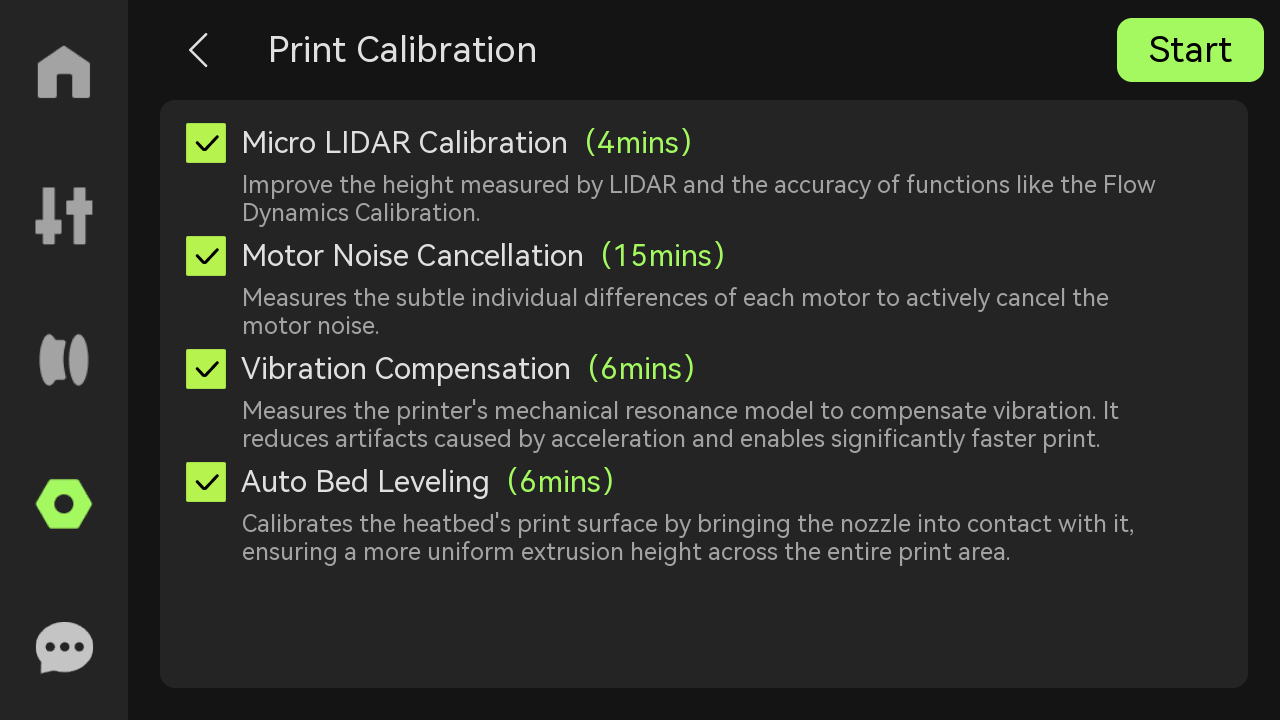
Auto-Calibration is a feature that automatically adjusts key printer settings, such as performing bed leveling, vibration compensation and motor noise using various sensors to ensure optimal printing conditions without manual intervention. This automation simplifies the setup process, reduces user error, and ensures consistent print quality by maintaining accurate measurements over time. As a result, users can save time, focus on design, and achieve better print results with minimal hassle.
How to perform the Initial Auto-Calibration?
The Auto-Calibration process is integrated into the printer’s Setup Wizard which shows up when you start the printer for the first time, and it comes right after the Binding step. Ensure that all options displayed are enabled, then select the Start button to proceed.
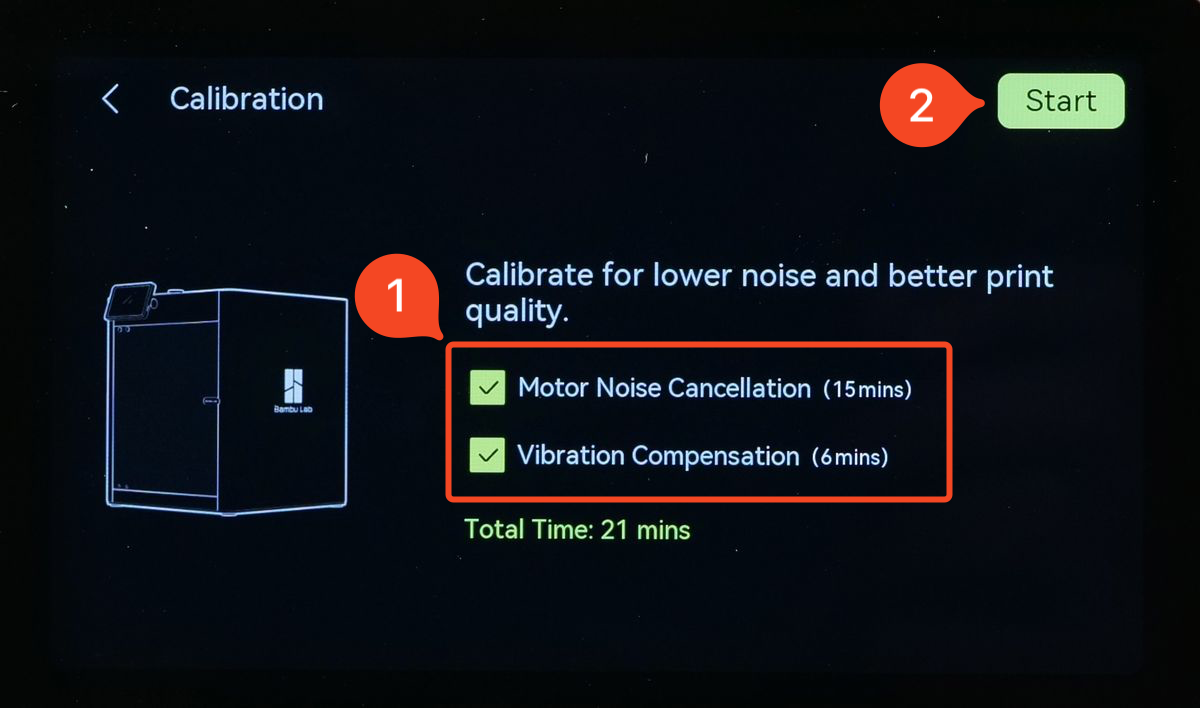
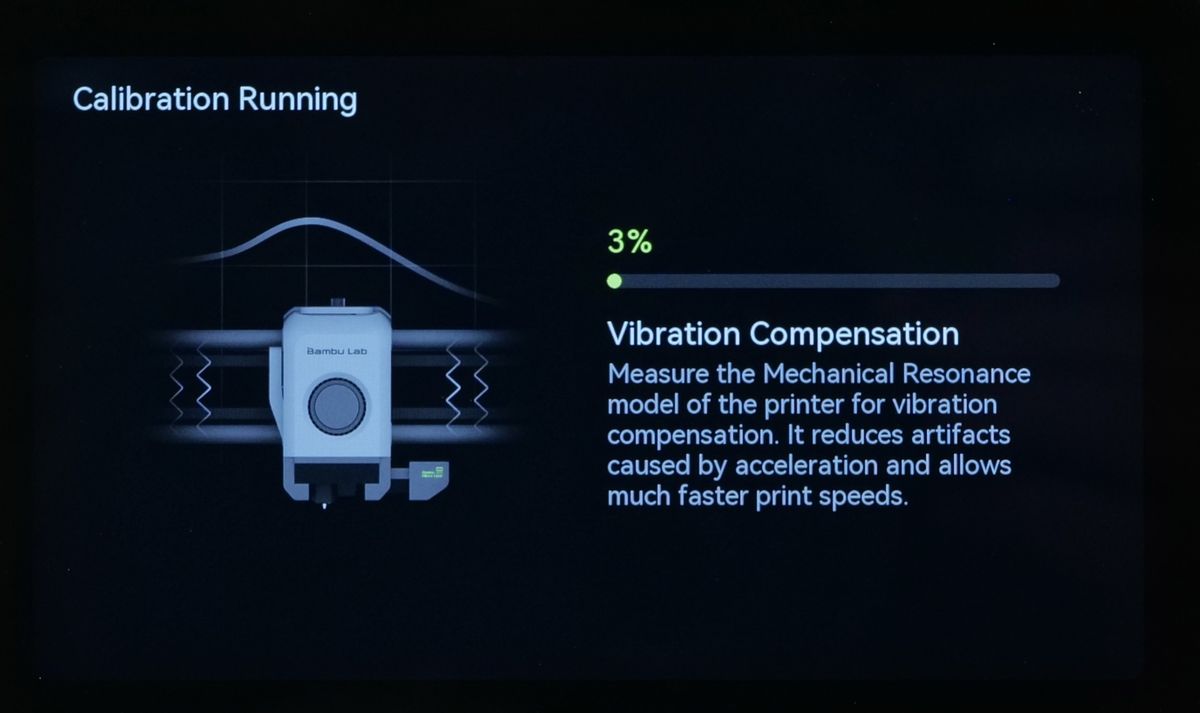
The printer will begin the automated calibration procedure. It will start with the Vibration Compensation which measures the mechanical resonance of the printer, to determine the appropriate compensation values. This feature allows fast high-quality printing.
The second step will perform the Motor Noise Cancellation calibration, which measures the subtle individual differences between each motor, to make the printer quieter during operation.

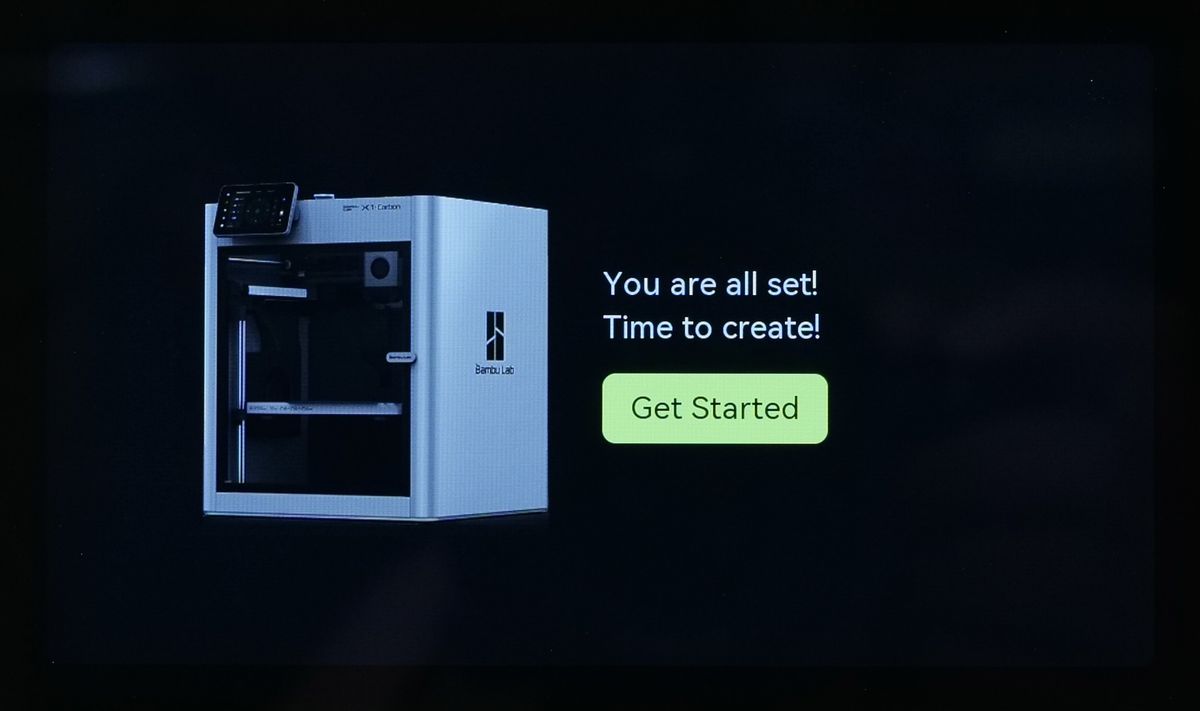
Once completed, the following message will show up, and you will be able to load filament and start your first print.
How often do you perform the X1C Auto-Calibration?
The Auto-Calibration procedure should be repeated when there is a decrease in print quality, after maintenance has been performed, or when the printer location changes.
It is also recommended to perform the calibration after installing a new firmware update, as new features could be added.
You can do this procedure easily from the printer’s menu. Simply navigate to Settings → Print Calibration to initiate the automated procedure.
❗❗❗ Important: In order to allow you to start the first print as soon as possible, the initial calibration process does not include the Noise Cancellation feature. The entire calibration takes around 26 minutes. We strongly recommend to perform a new Auto-Calibration process once you complete your first print and perfrom any firmware updates, to make the printer quieter during operation.