Loading Filament and Starting the First Print
In this chapter, you will learn how to load the filament from the spool holder (if you don’t have an AMS unit already connected) and start the first print.
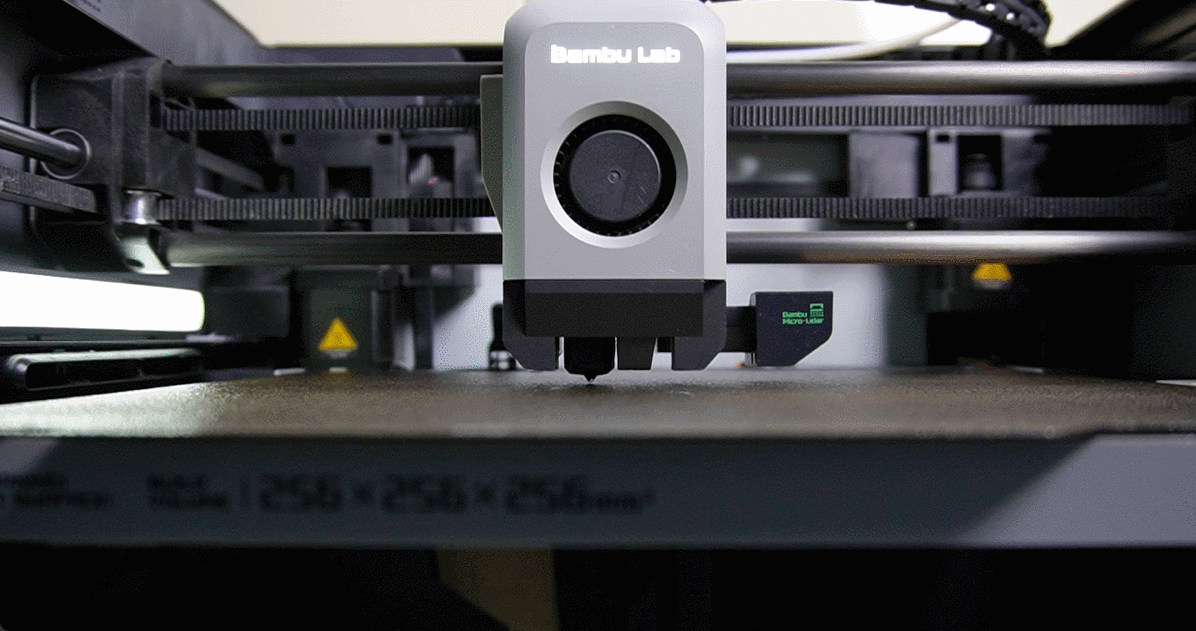
Keep the build plate clean
When setting up the X1C, avoid touching the build plate surface with your fingers, to prevent contamination. If you touched the surface, it is recommended to wash the build plate with warm water and detergent. Simply take the build plate and wash it with dishwashing detergent, then dry with a clean paper towel, as this will ensure a successful print.
Loading Filament from the Spool Holder
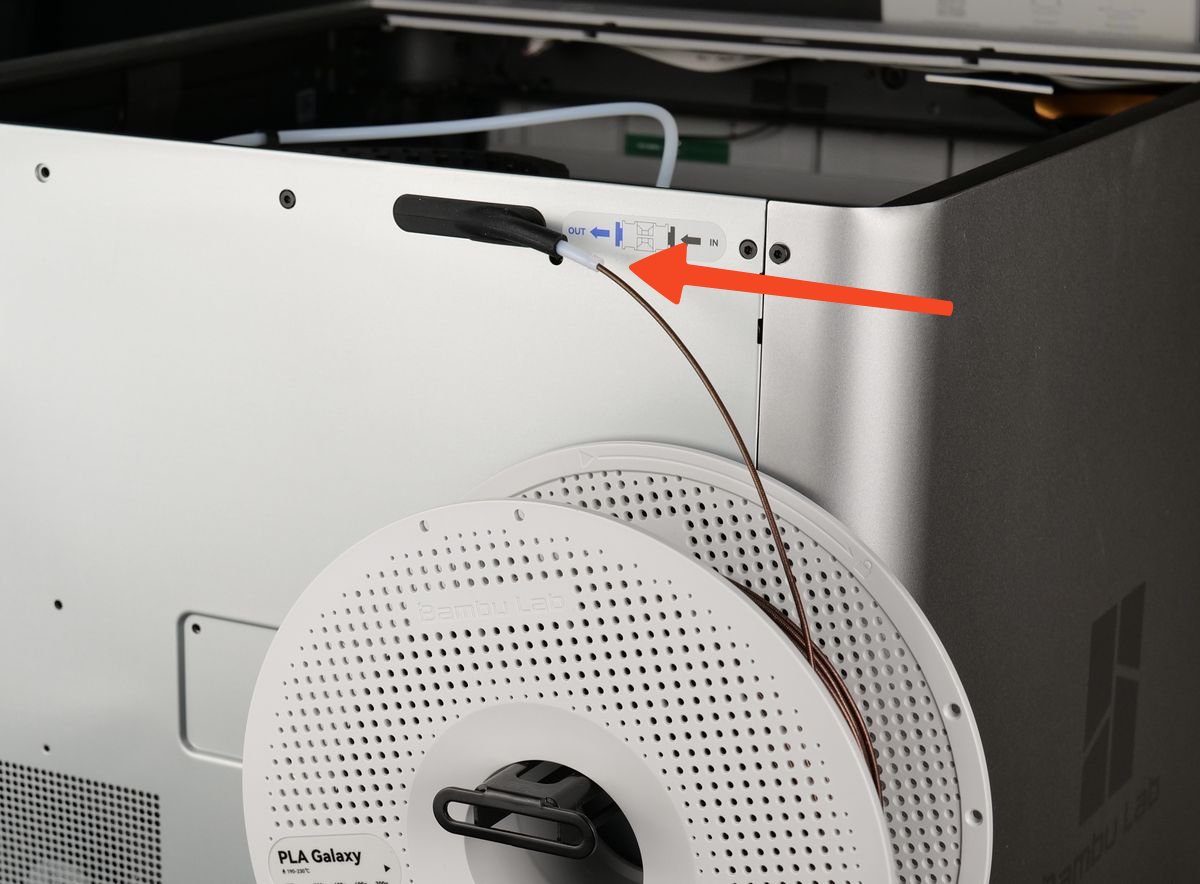
Begin by unsealing the filament spool included with your printer, and attaching it securely to the spool holder. Before proceeding, remove the small piece of tape that holds the filament tip in place on the spool.
Next, carefully insert the filament tip into the PTFE tube located at the back of the printer. Ensure that the filament feeds smoothly without kinks or snags for a reliable loading process. Push the filament until it reaches the extruder, and you feel that the filament cannot move further.
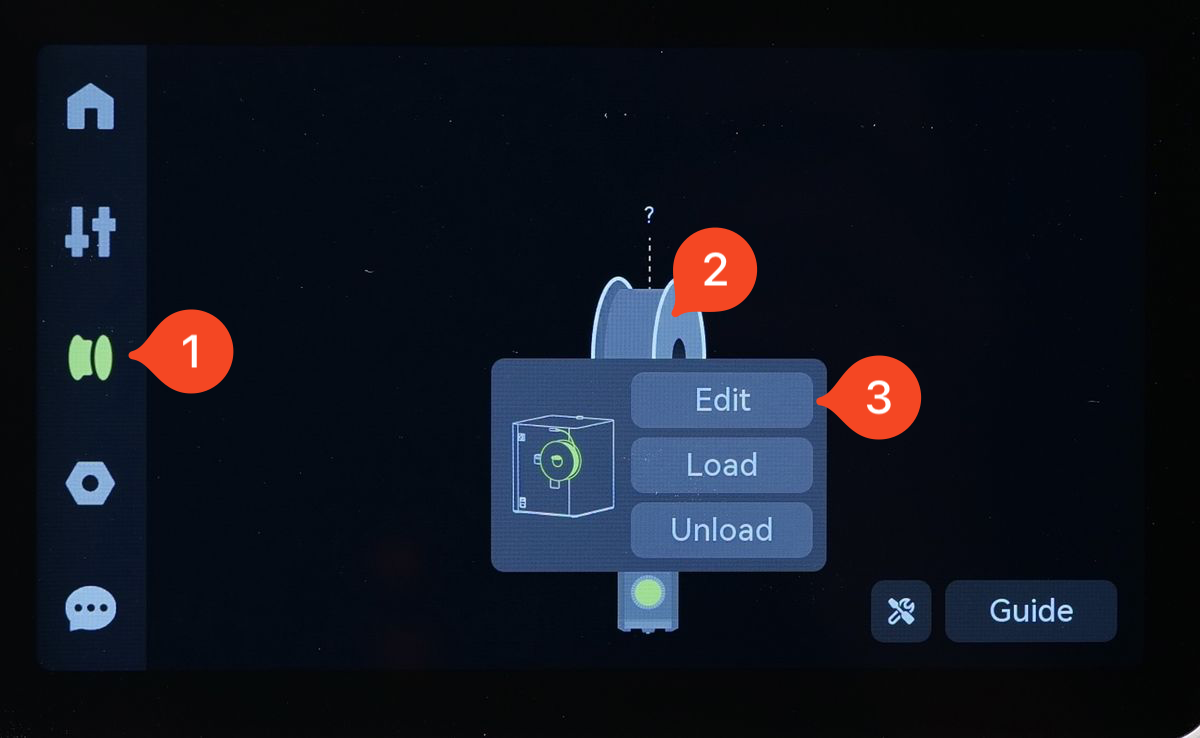
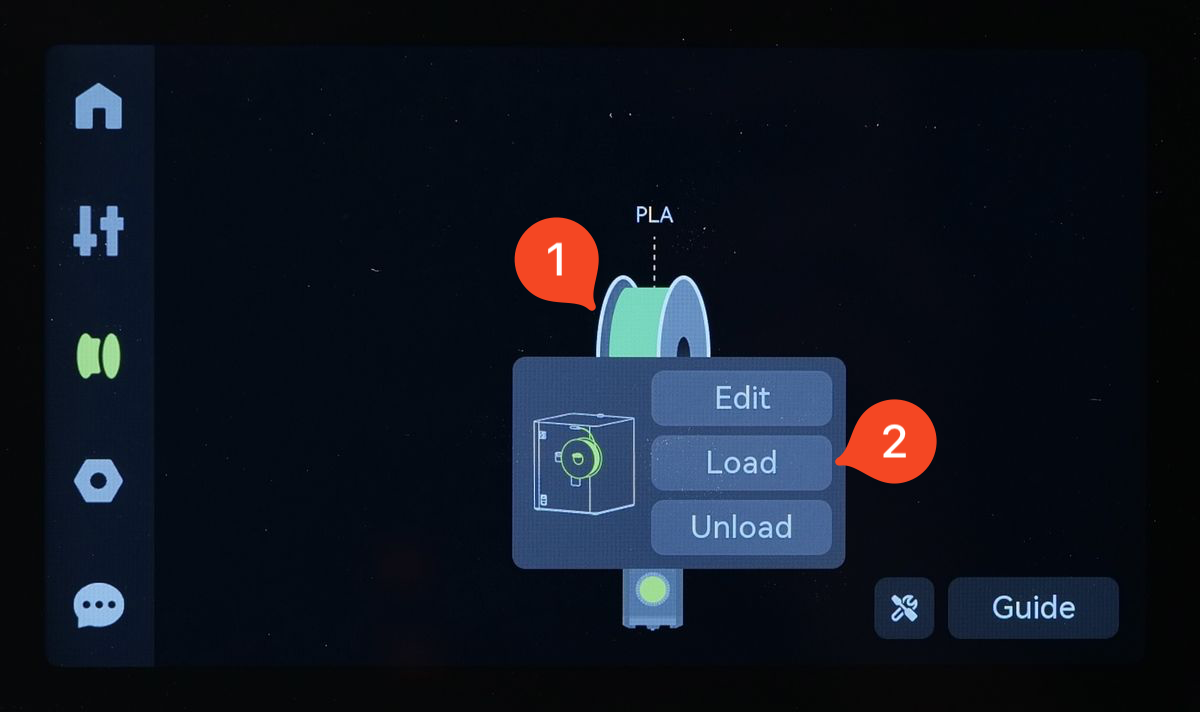
Next, navigate to the Filament menu, tap the spool then select Edit.
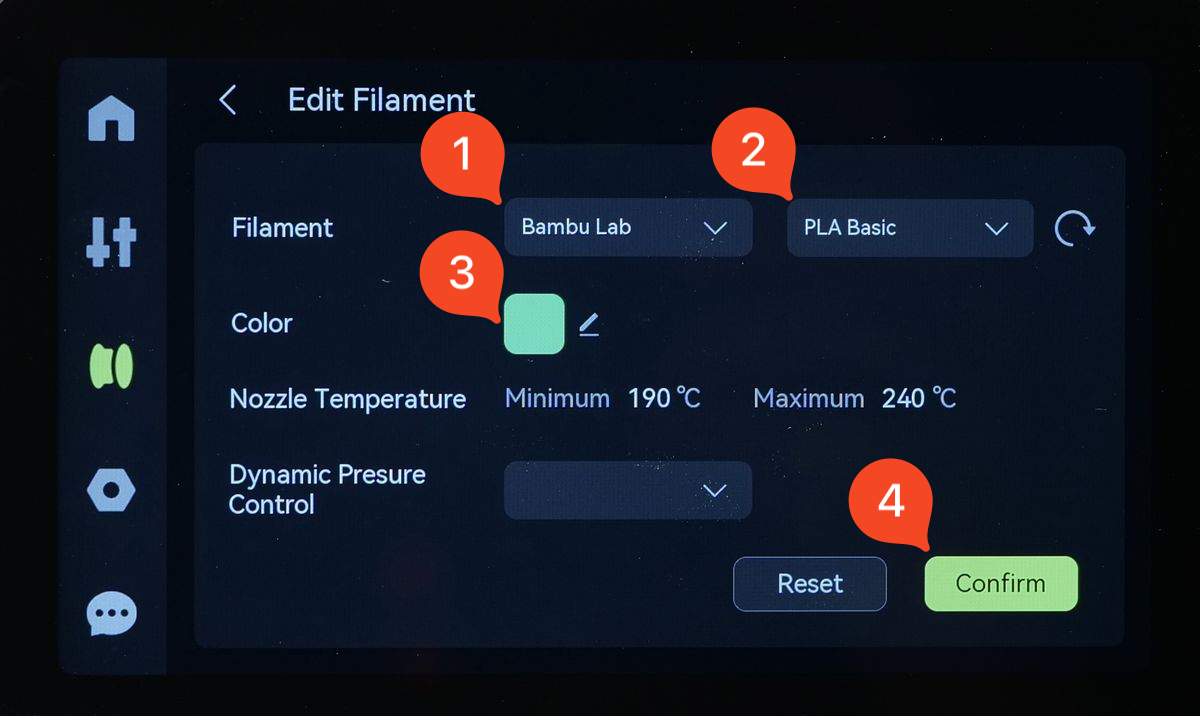
In this step, you need to tell the printer what kind of filament will be manually loaded. We will use Green Bambu Lab PLA Basic in this example, so the selection will be as shown in the image below:
- Filament Brand: Bambu Lab
- Filament Type: PLA Basic
- Color: Green
- Confirm the selection.
With the filament type configured, all you need to do is to load the filament. Simply tap the spool of filament, then tap Load.
At this point, the printer will automatically begin the filament loading process. The hotend will heat up to the appropriate temperature, and the extruder will start pulling the filament through the system, preparing it for printing.
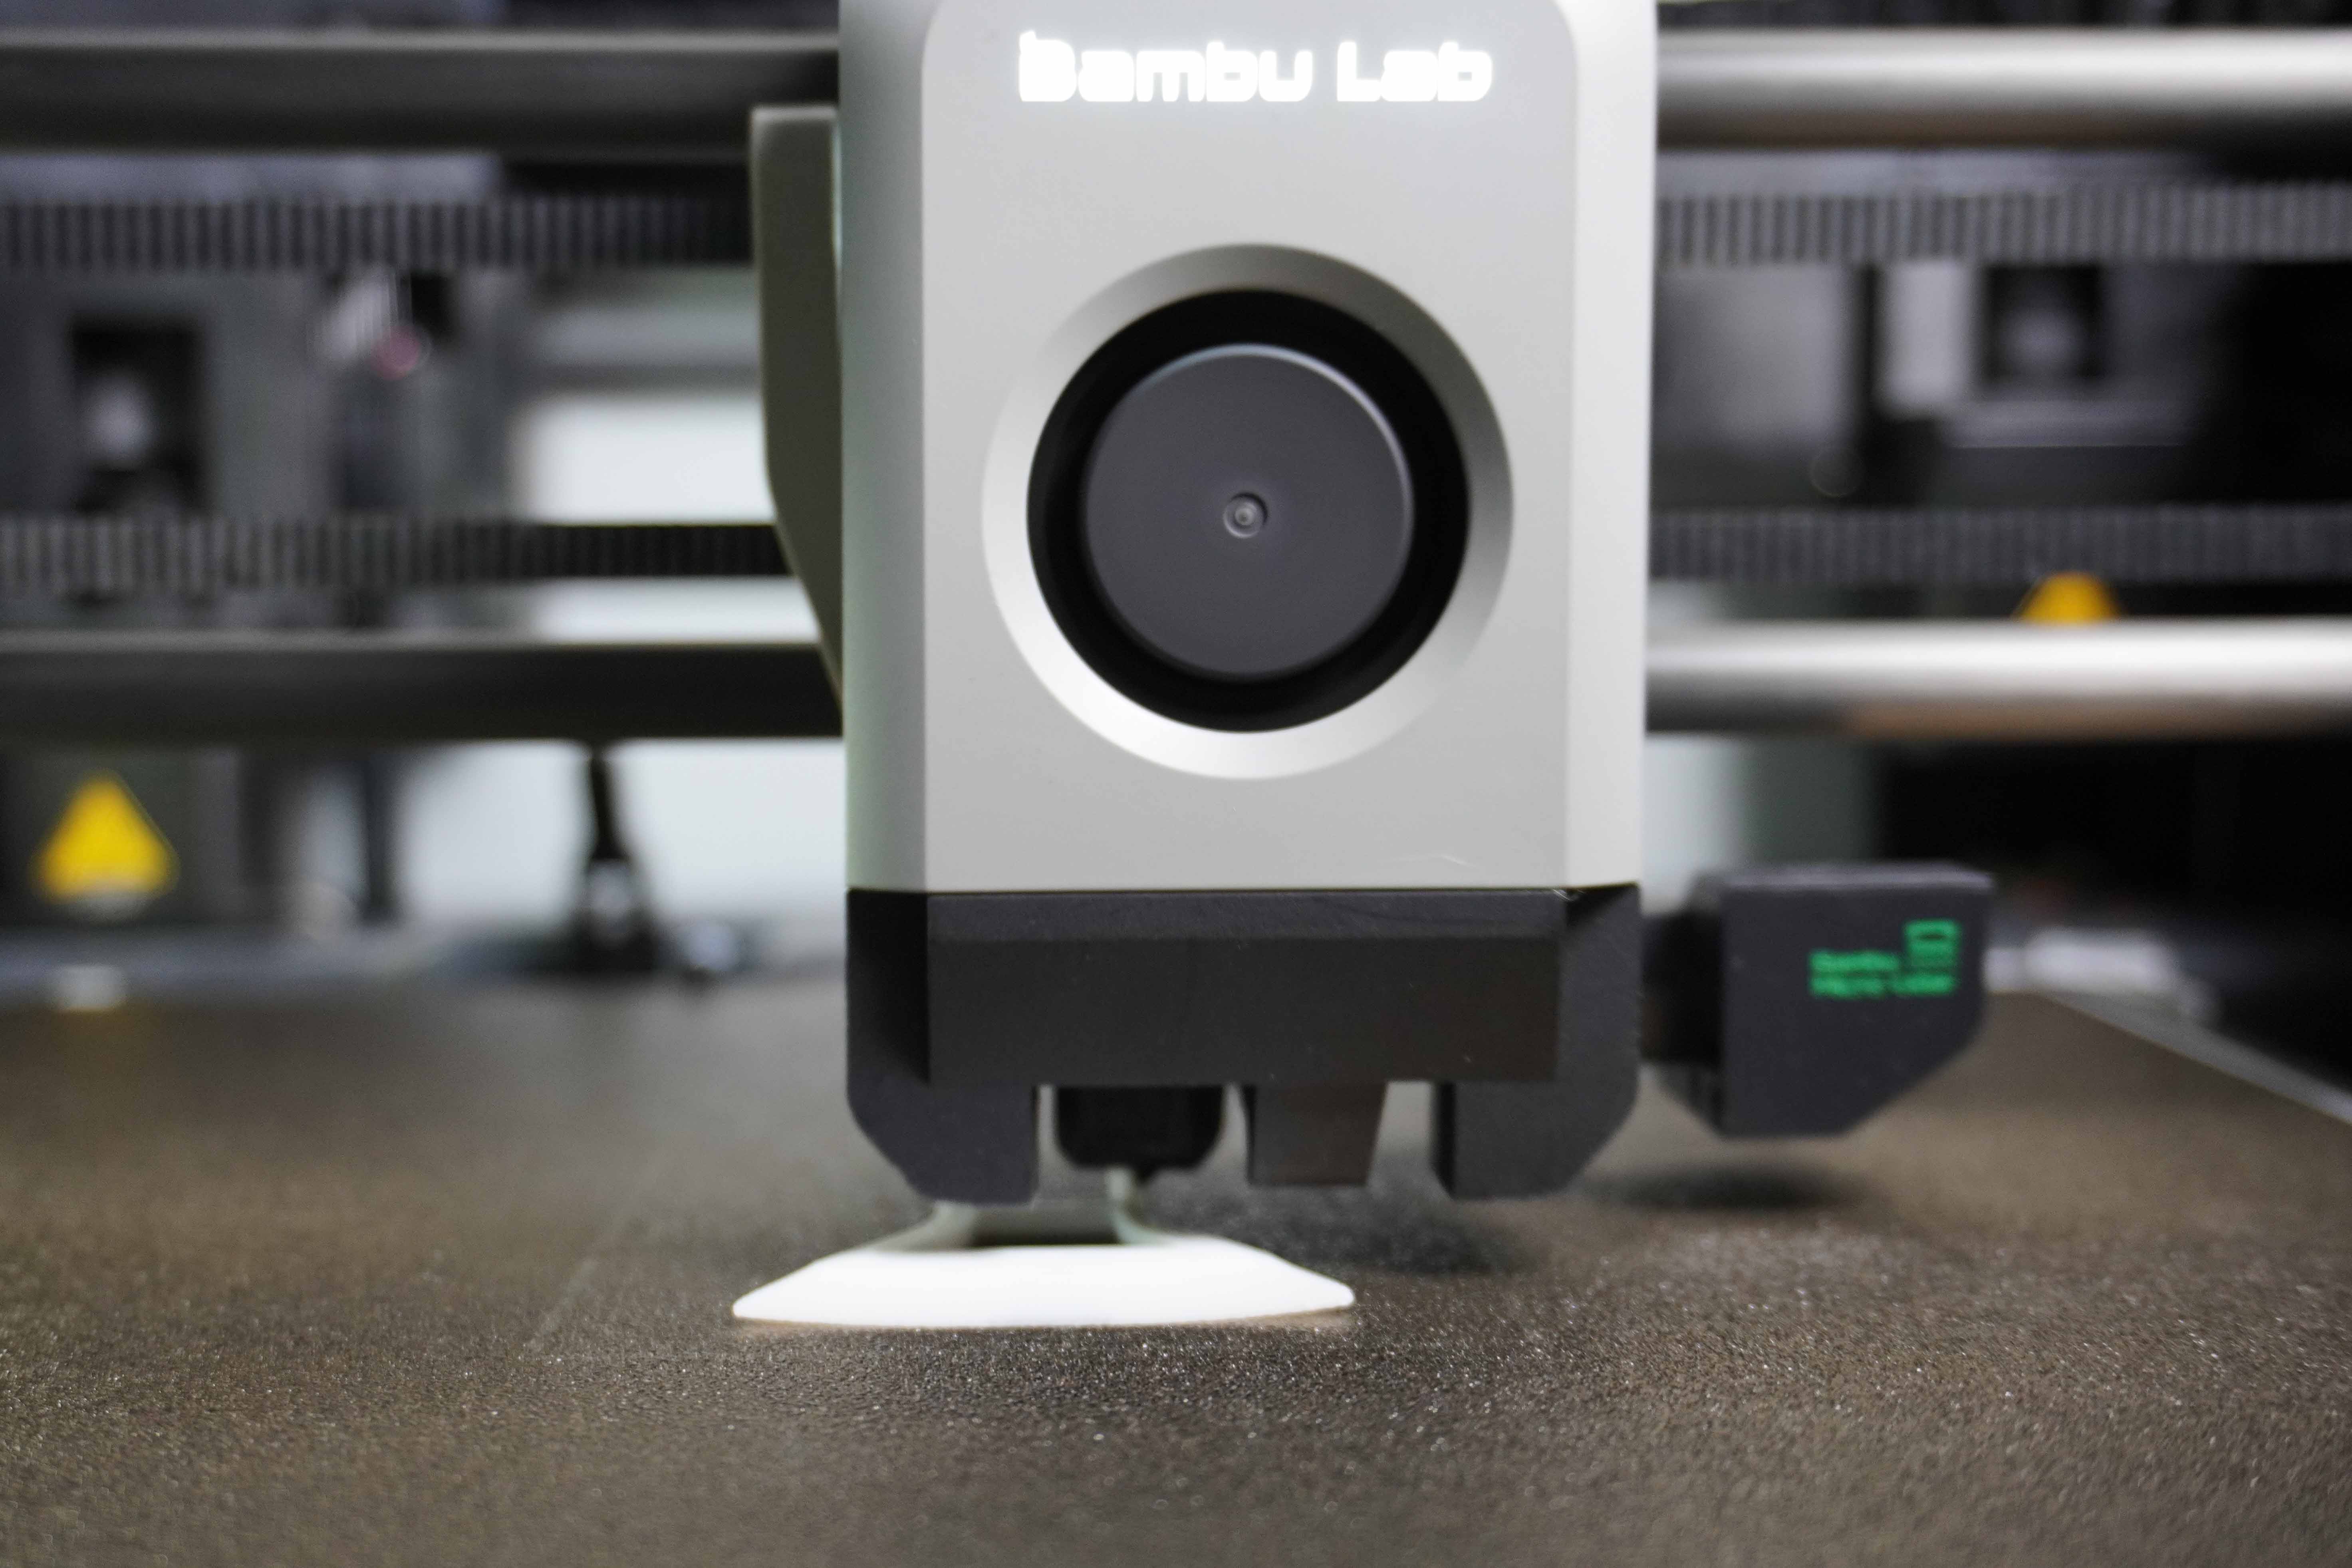
At the same time, observe the nozzle tip and check if filament is being extruded. This confirms that the filament has successfully reached the hotend and is ready for printing.
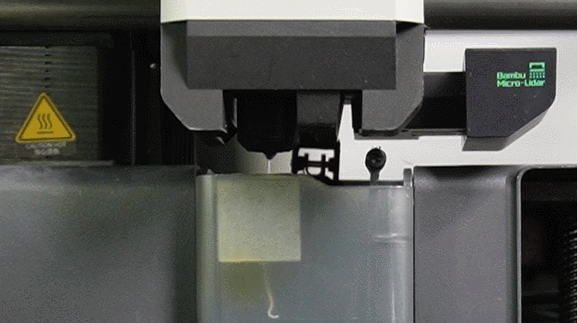
Once the filament begins extruding, the printer will continue to push out a bit more to ensure the nozzle is primed for a smooth flow. This marks the completion of the loading process. Your printer is now ready, and you can start your first print!
Starting the first print
The filament is loaded, so you are ready to start the first print!
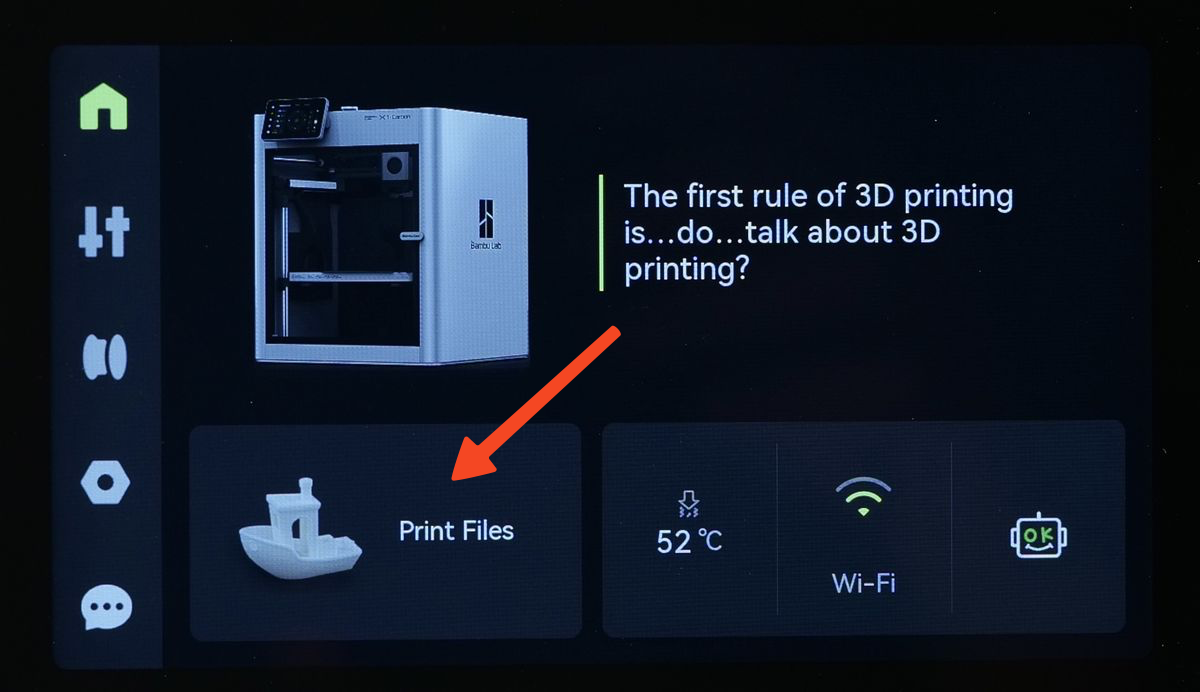
Tap the Print Files button to open the list of pre-loaded models.
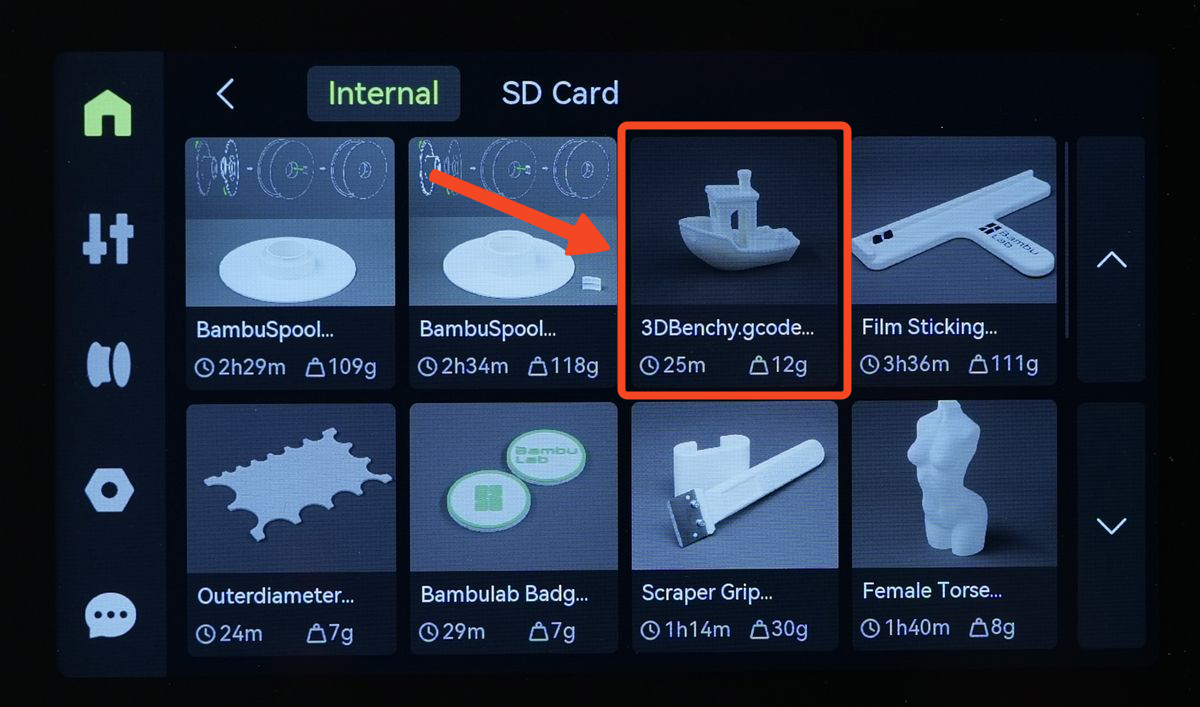
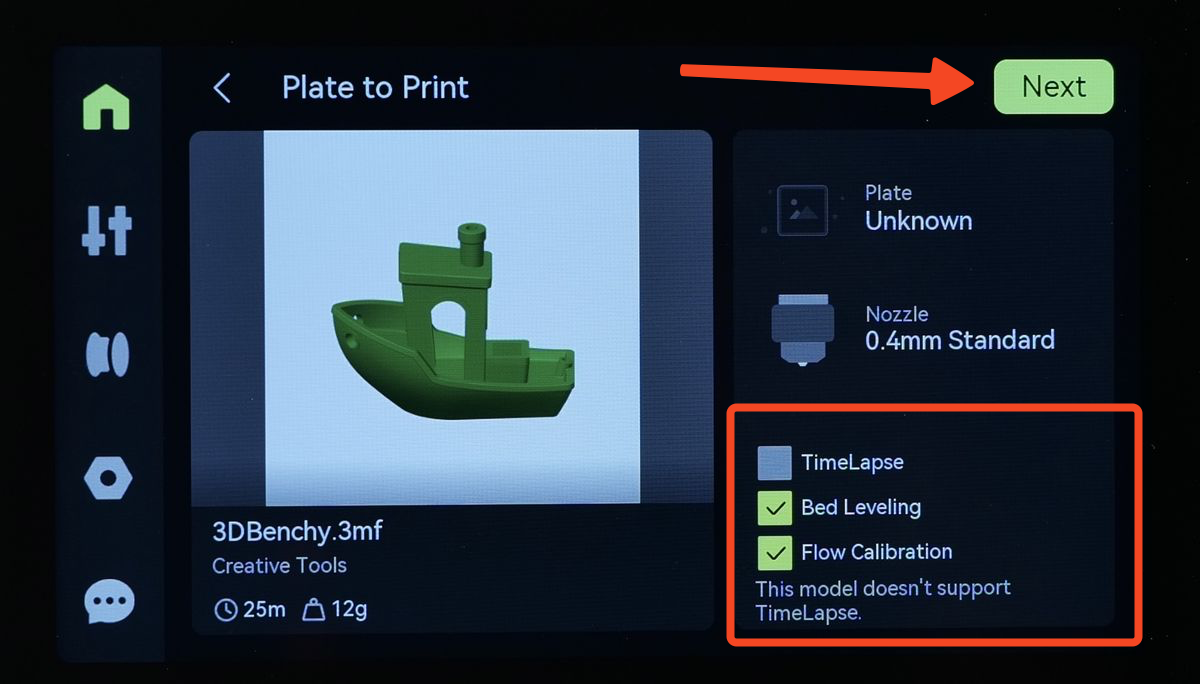
Select the 3D Benchy file.
On the next screen you will have options for enabling TimeLapse (which can be enabled if you have a MicroSD card installed), Bed Leveling and Flow Calibration. For the first print, it’s best to keep everything set to default, and simply tap Next.
An additional screen might show up informing you that the filament should be loaded from the spool holder, or from the first slot of the AMS (if connected). Once confirmed, simply tap on Print.
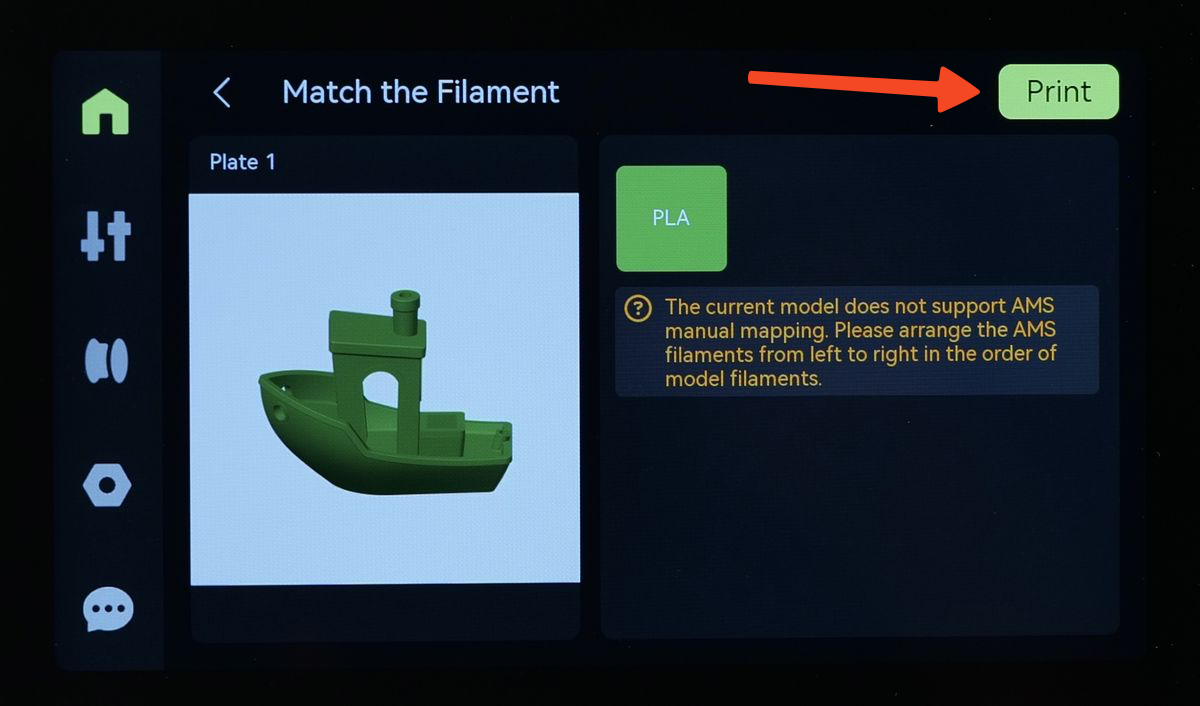
That’s it! The printer will start preparing to start printing.
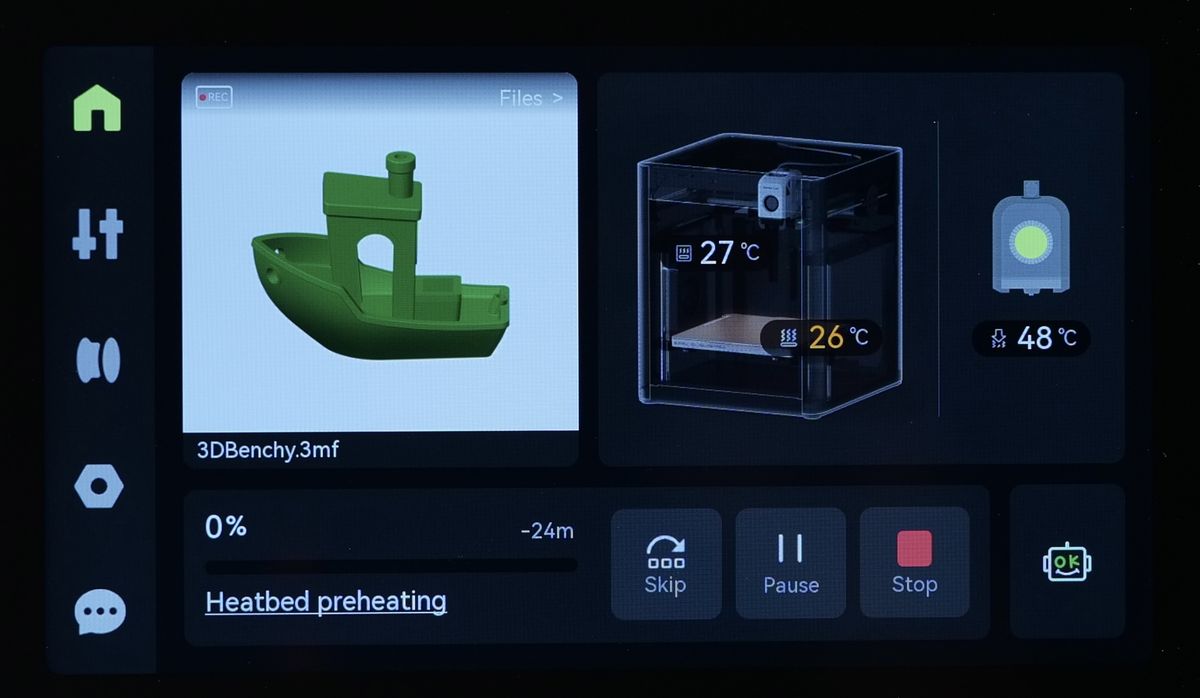
Before printing begins, the printer will perform its pre-print operations. It will move the printhead and heatbed to their home positions and begin purging filament to ensure a smooth flow.
Once purging is complete, the nozzle will be wiped at the back of the build plate to remove any excess filament. This step is crucial to prevent leftover filament from interfering with bed leveling, ensuring a precise first layer.
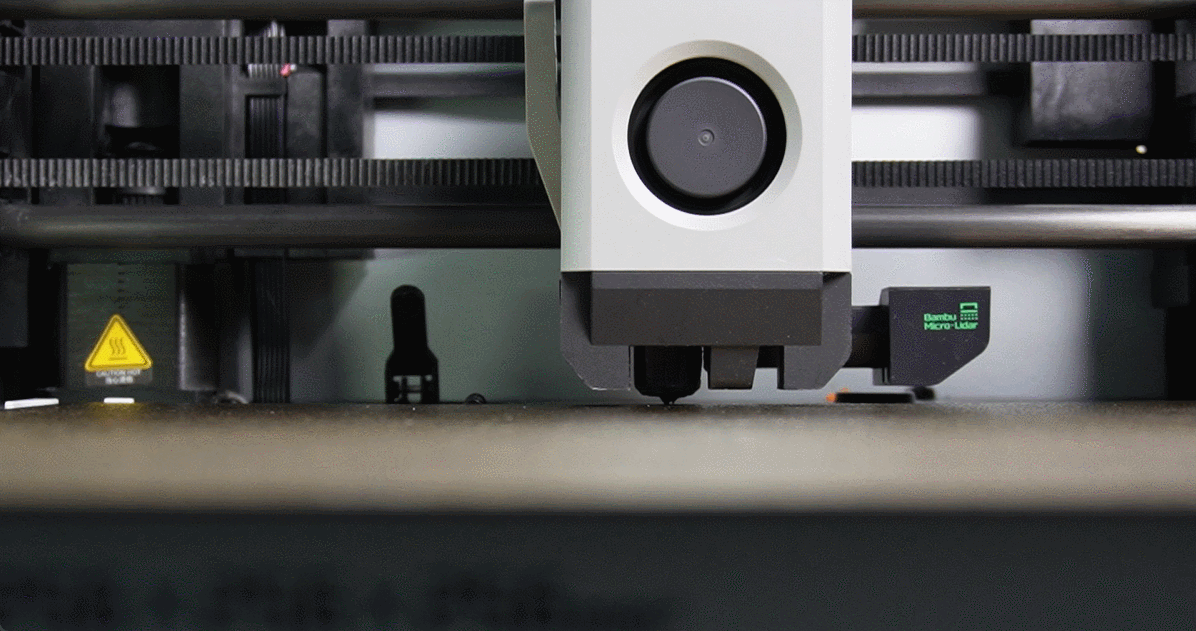
Please note that this is a normal part of the pre-print process. Over time, you may notice small scratches on the wiping section of the build plate. This is expected and does not affect print quality or adhesion, so there is no need for concern.
Once the heatbed reaches the expected temperature, the printer will start the bed leveling sequence.
When all the pre-print calibrations are done, the printer will start the new print job.