Starting a print from Bambu Studio and Bambu Handy
How to start a print from Bambu Studio?
The slicing software Bambu Studio can send sliced files directly to the printer via Wi-Fi. The steps are as follows:
1. Import the 3D model, adjust the settings, and click the Slice button.
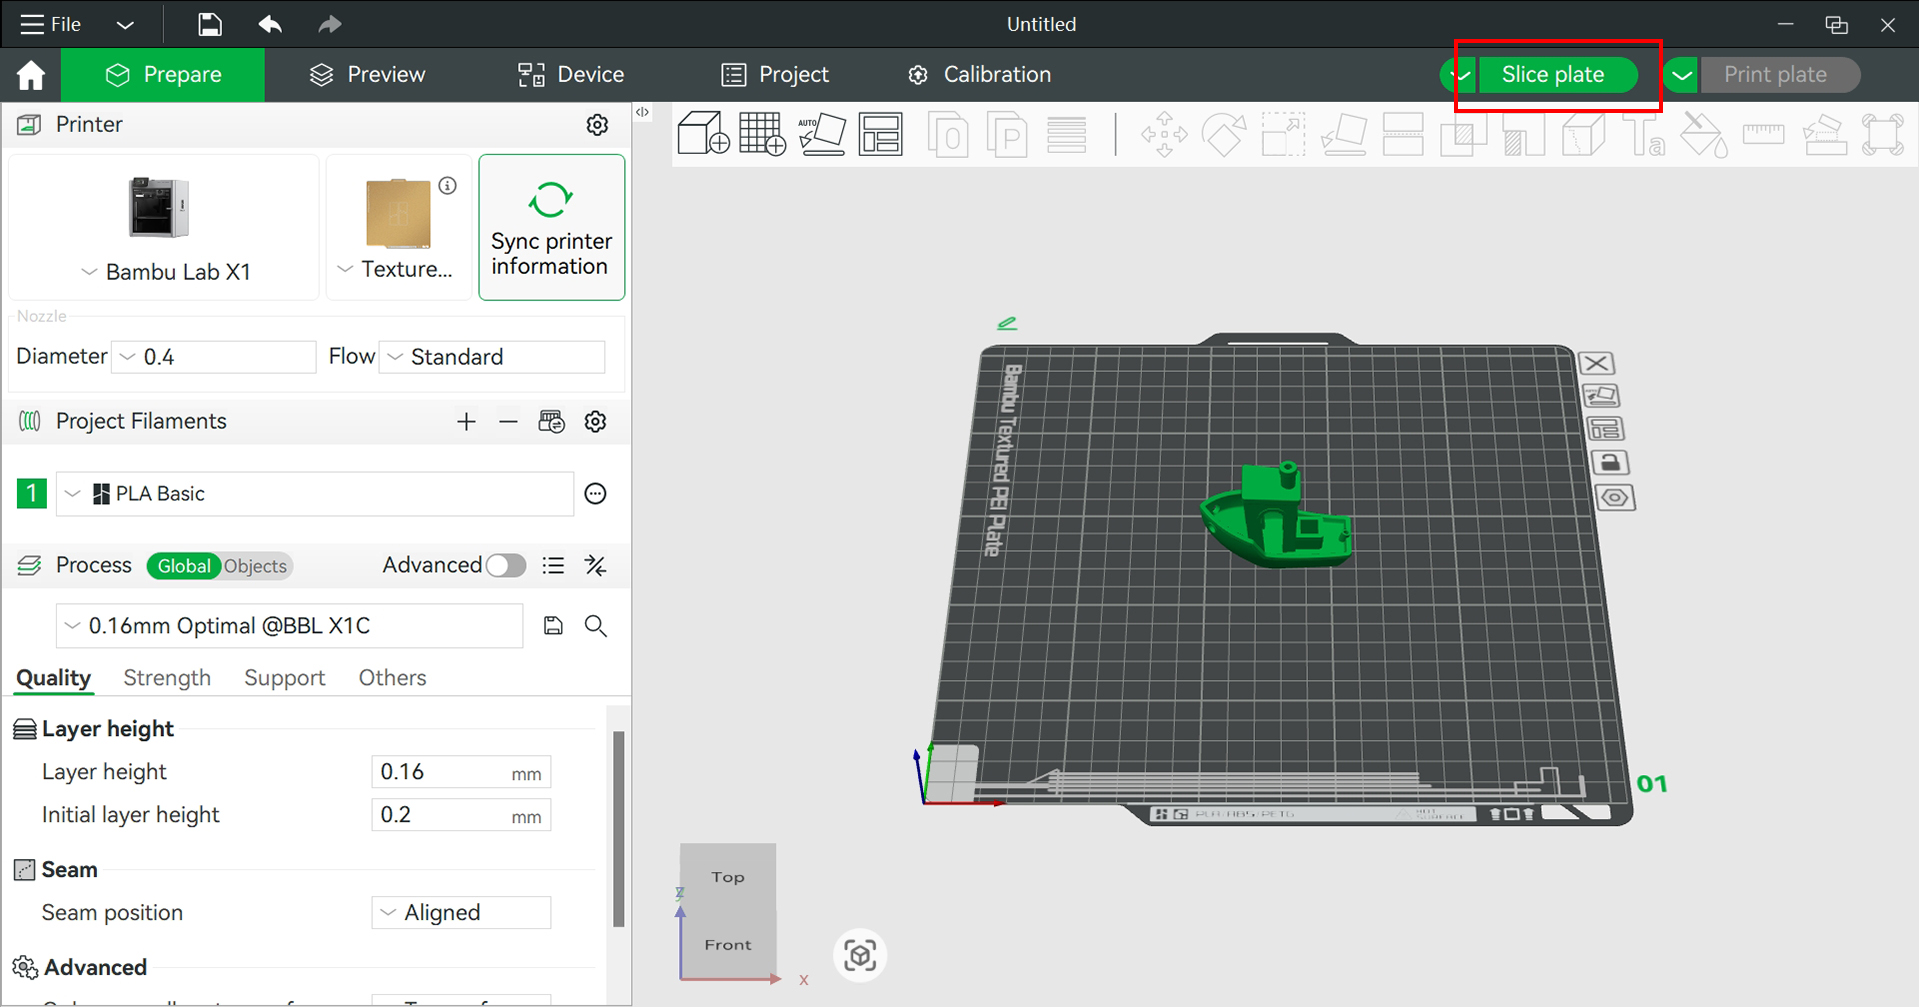
2. Once slicing is complete, click the Print button. In the pop-up window, select your printer and choose whether to enable or disable calibration options for the print.
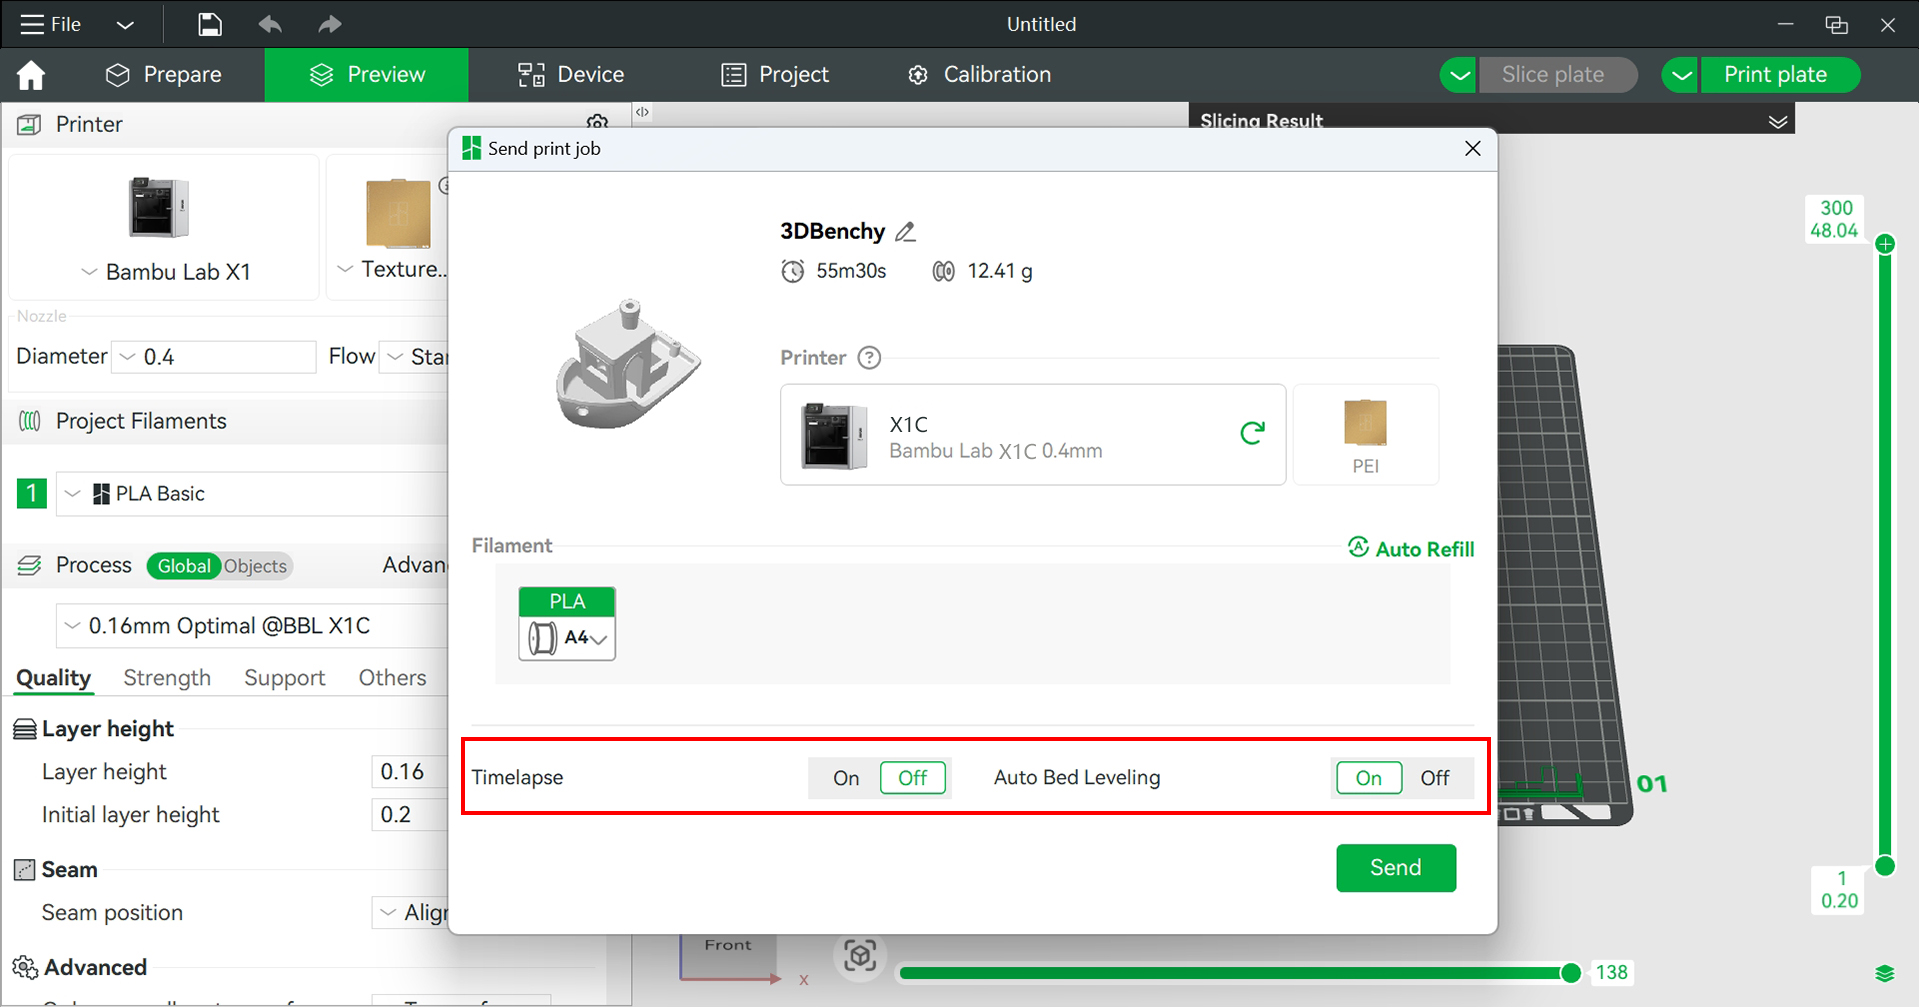
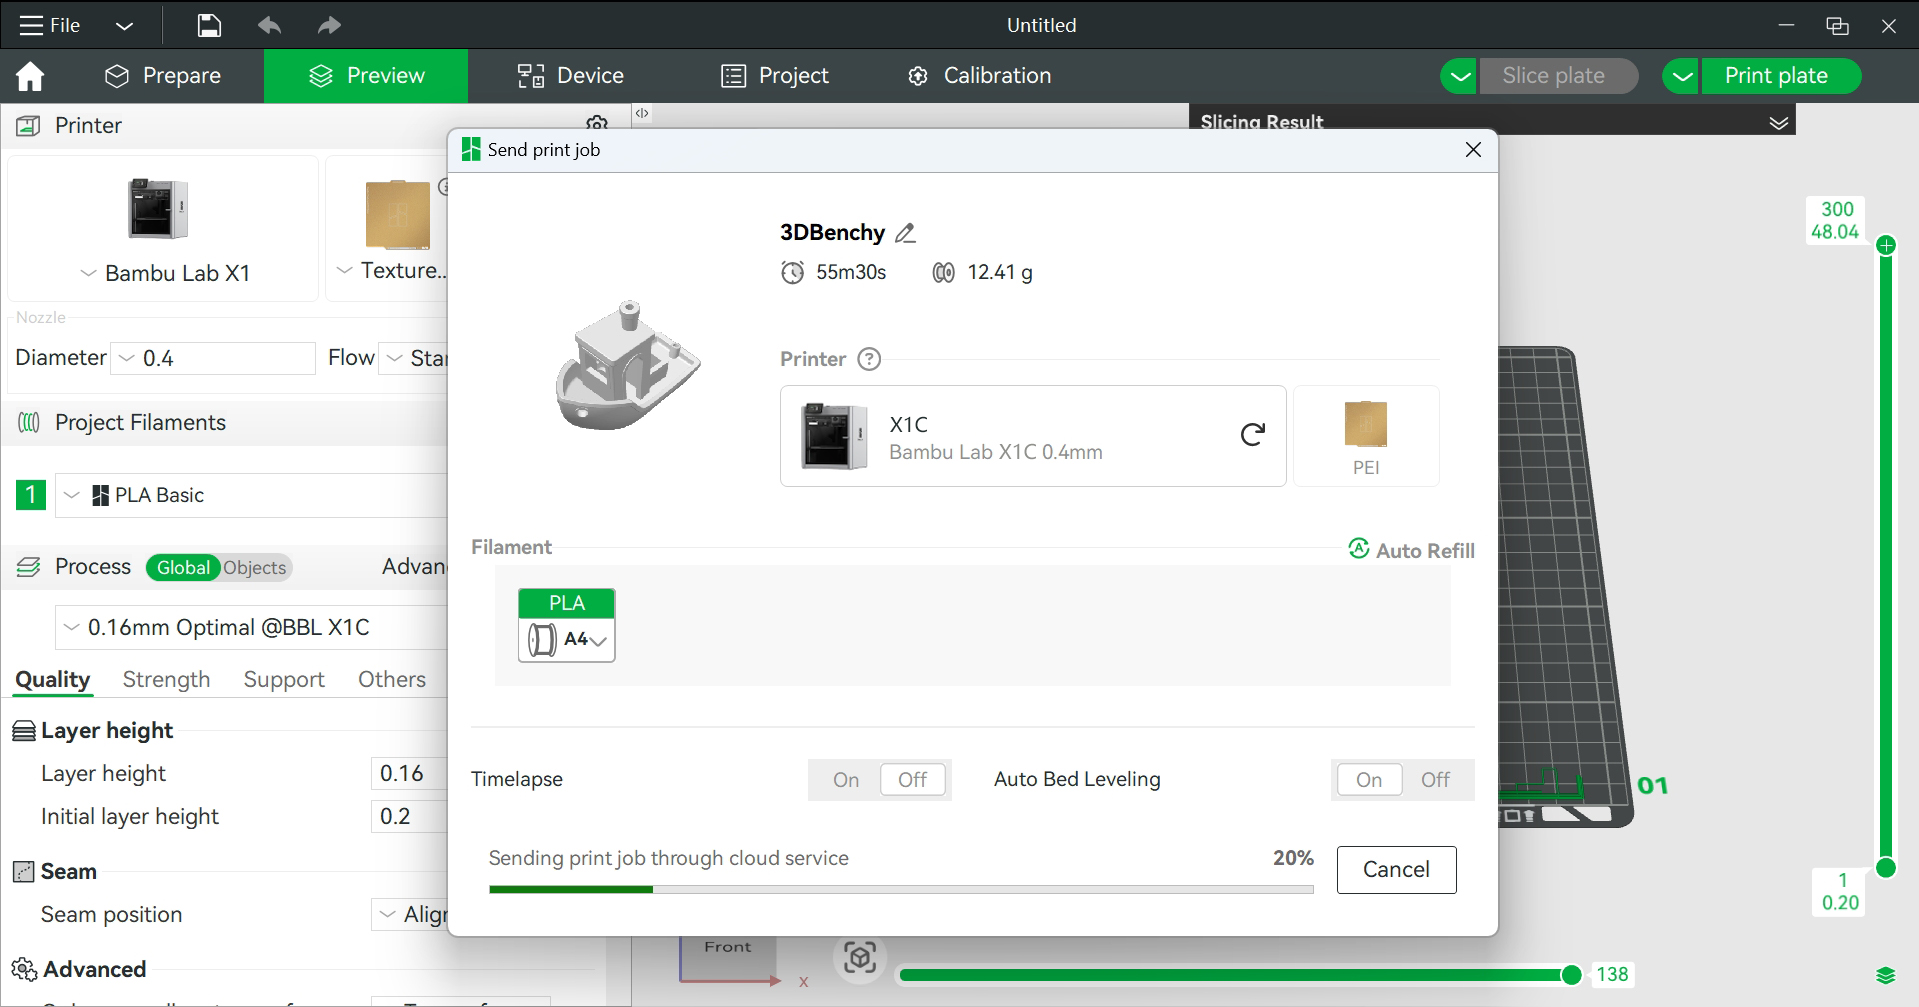
3. Click the Send button to transmit the file to the printer and start the printing process.
You can monitor the printing process from the “Device” menu in Bambu Studio, and also control certain printer functions during printing.
For more details, please refer to the video below:
How to start a print from Bambu Handy?
If you’re new to 3D printing or simply want to print something cool without adjusting settings in Bambu Studio, Bambu Handy is the perfect solution. With Bambu Handy, you can effortlessly browse a vast collection of free models available on MakerWorld directly from your mobile phone—anytime, anywhere.
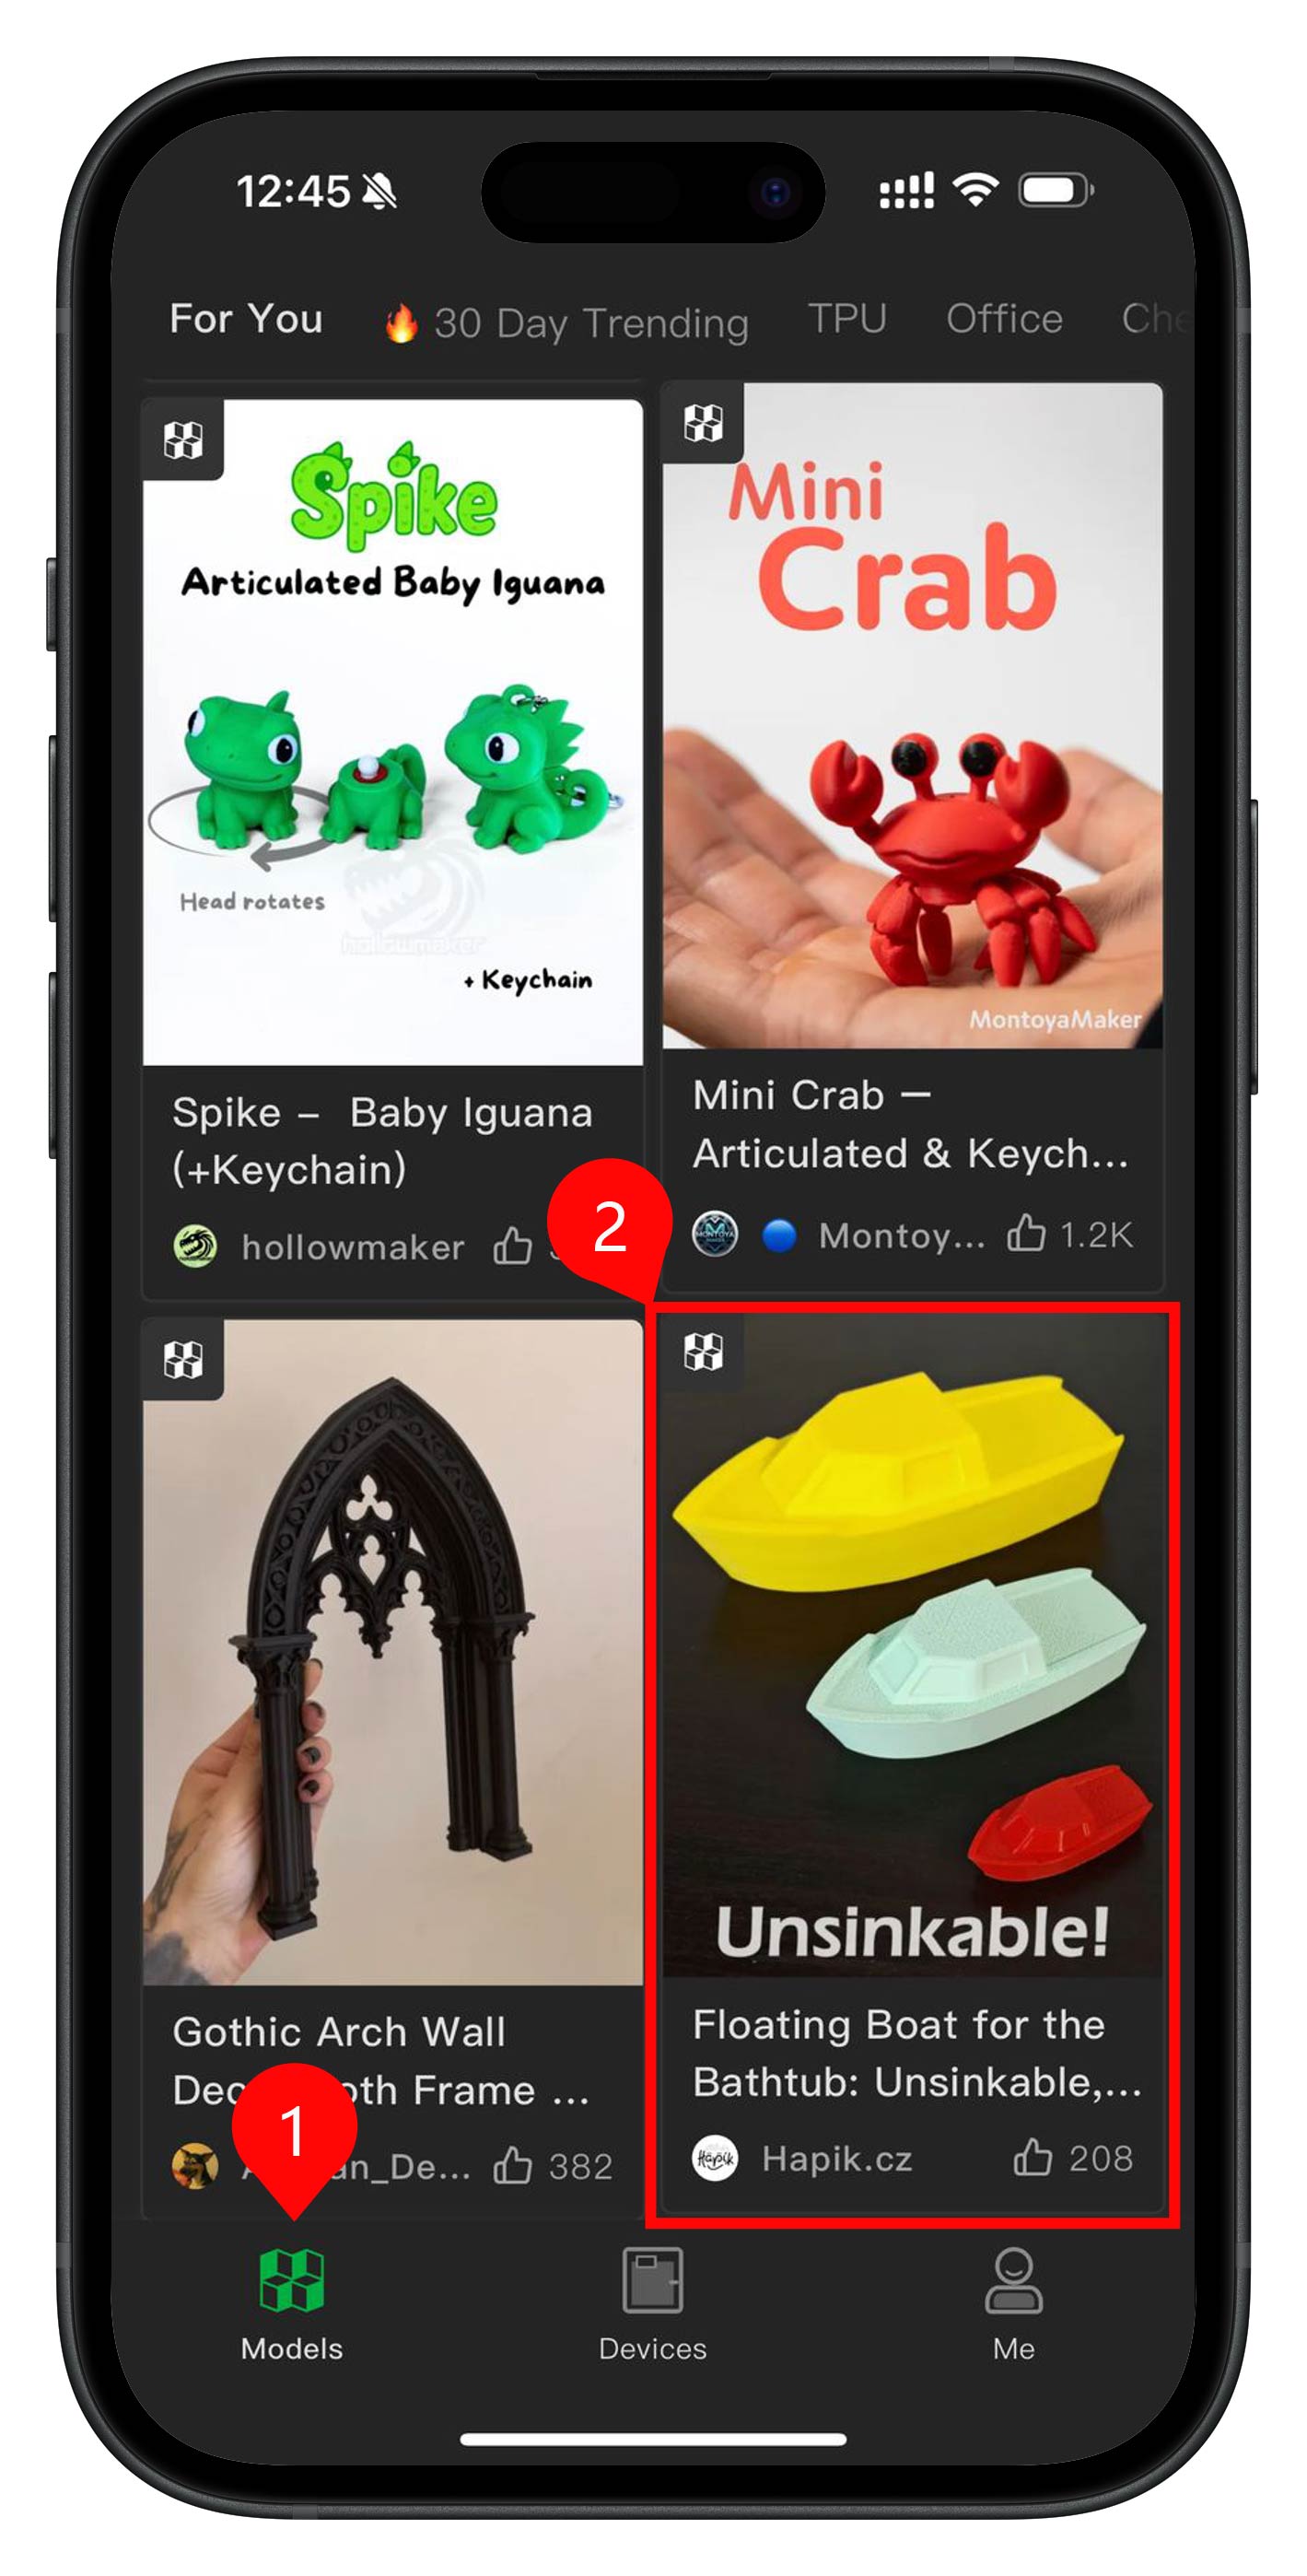
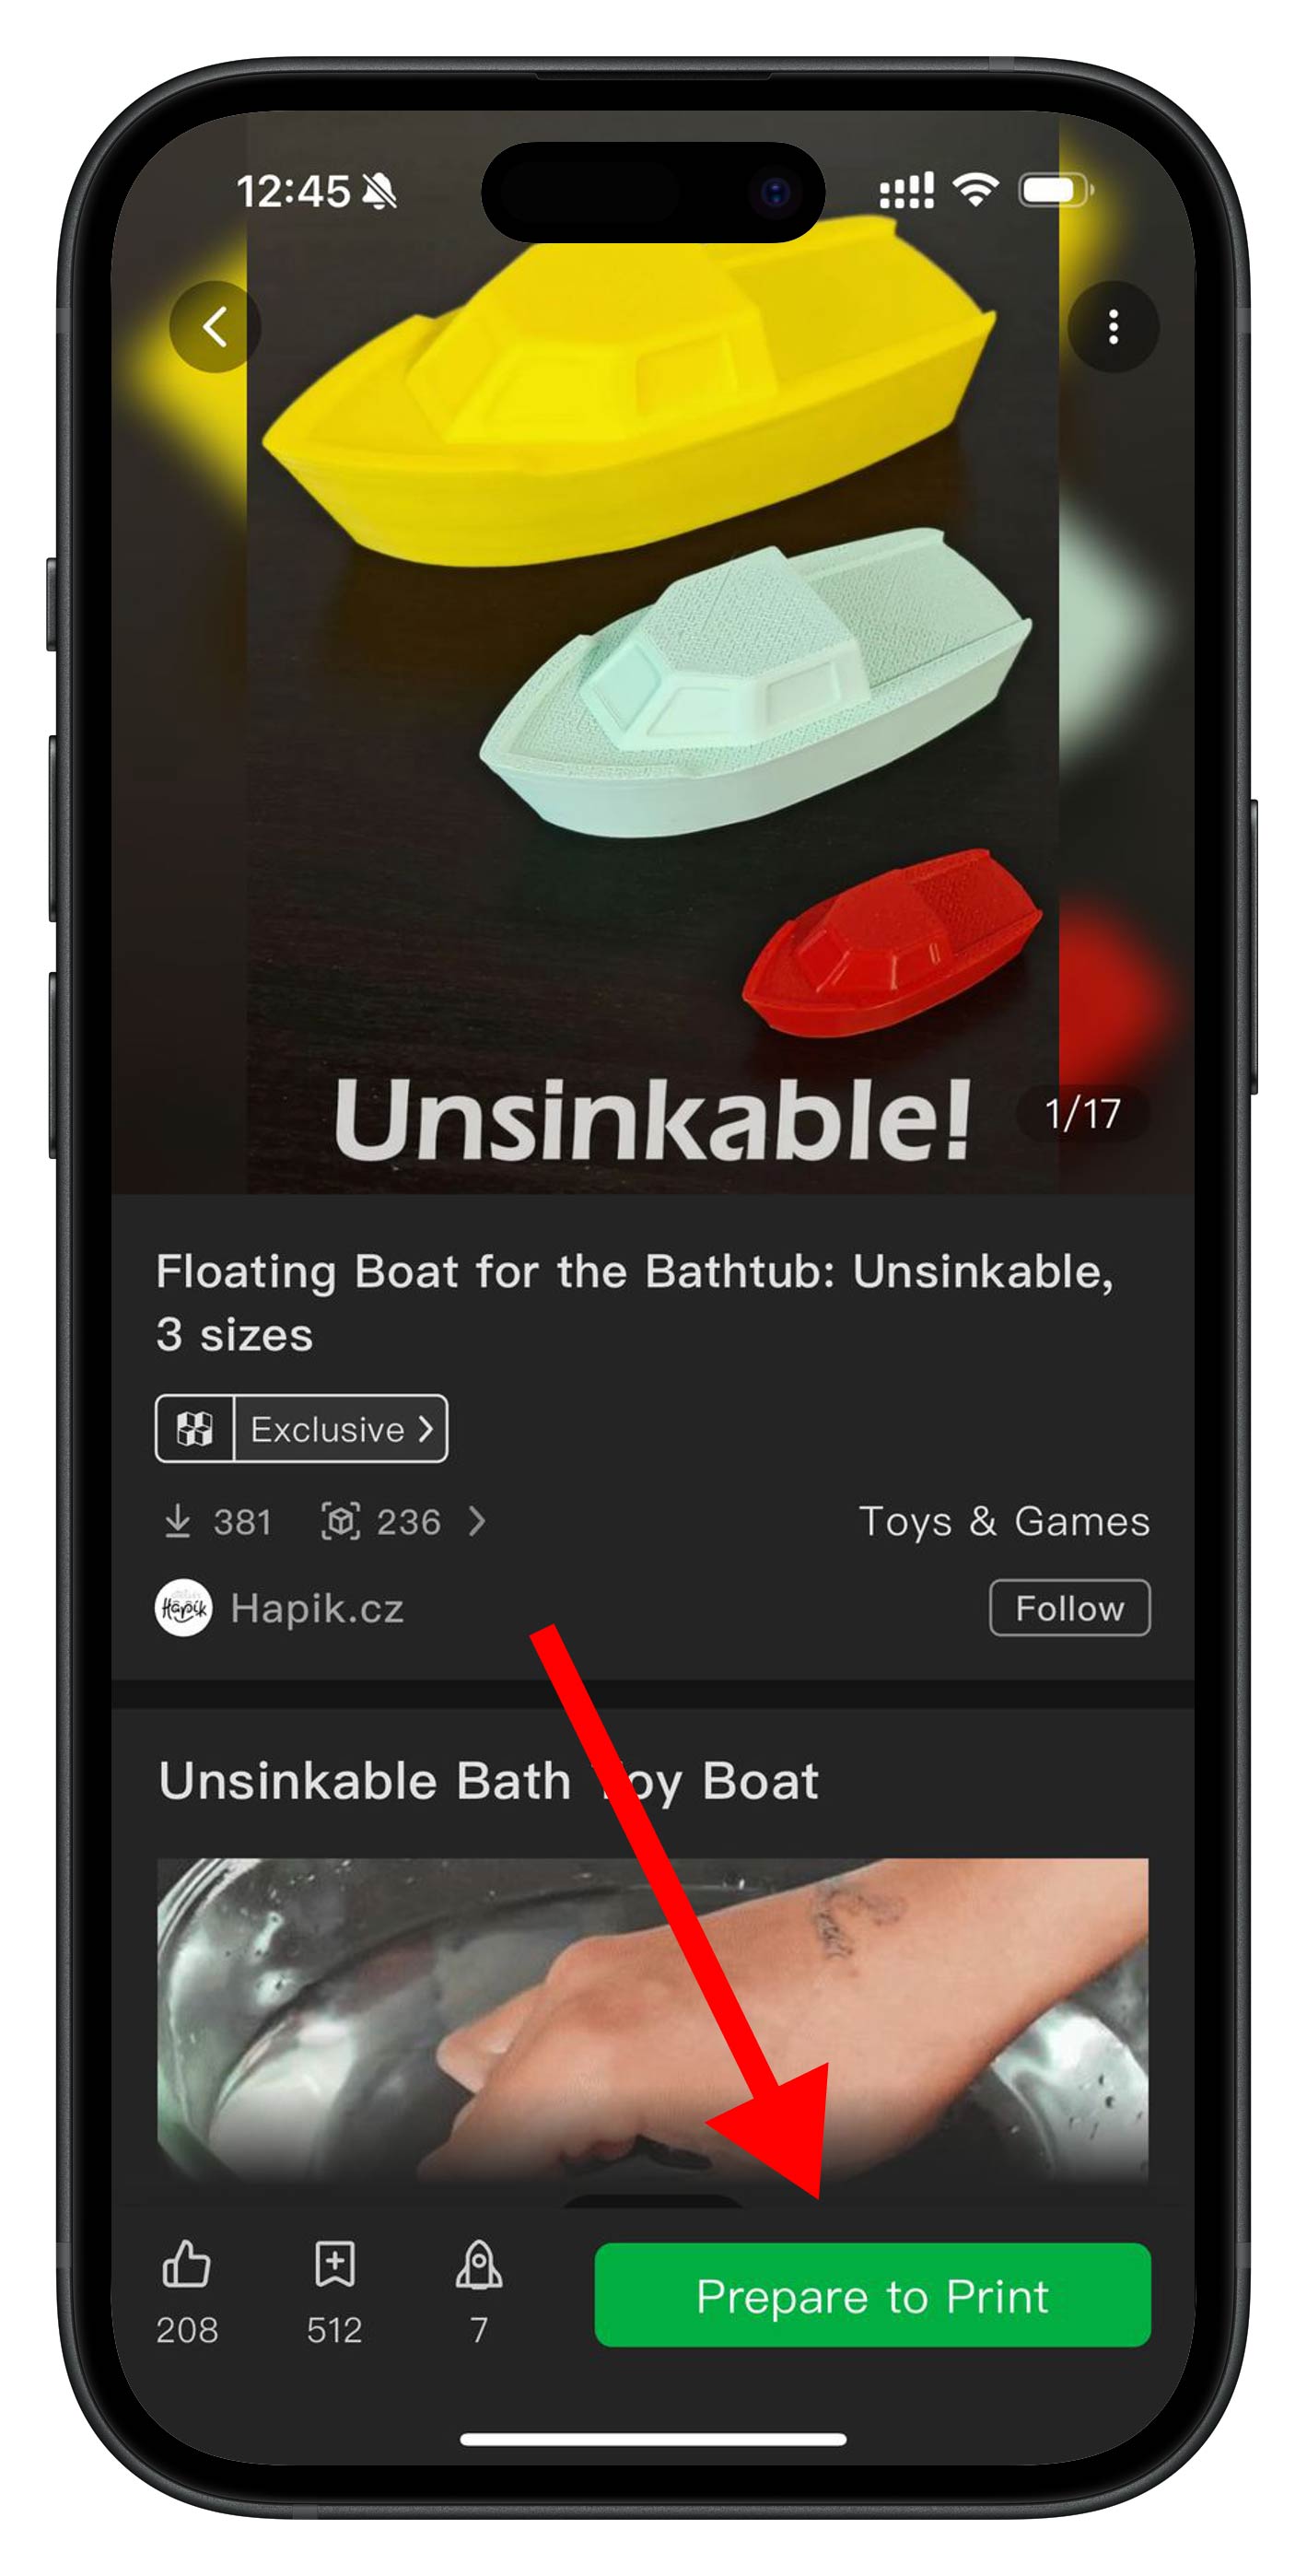
Getting started is easy! Just open the Bambu Handy app and navigate to the Models tab to explore and print with ease. Once you find a model you like, simply tap on it.
You’ll be taken to the model’s page, where you can find detailed information, including recommendations for how to print it, suggested filament types, and other useful tips to ensure a successful print. When ready, simply tap the Prepare to Print button.
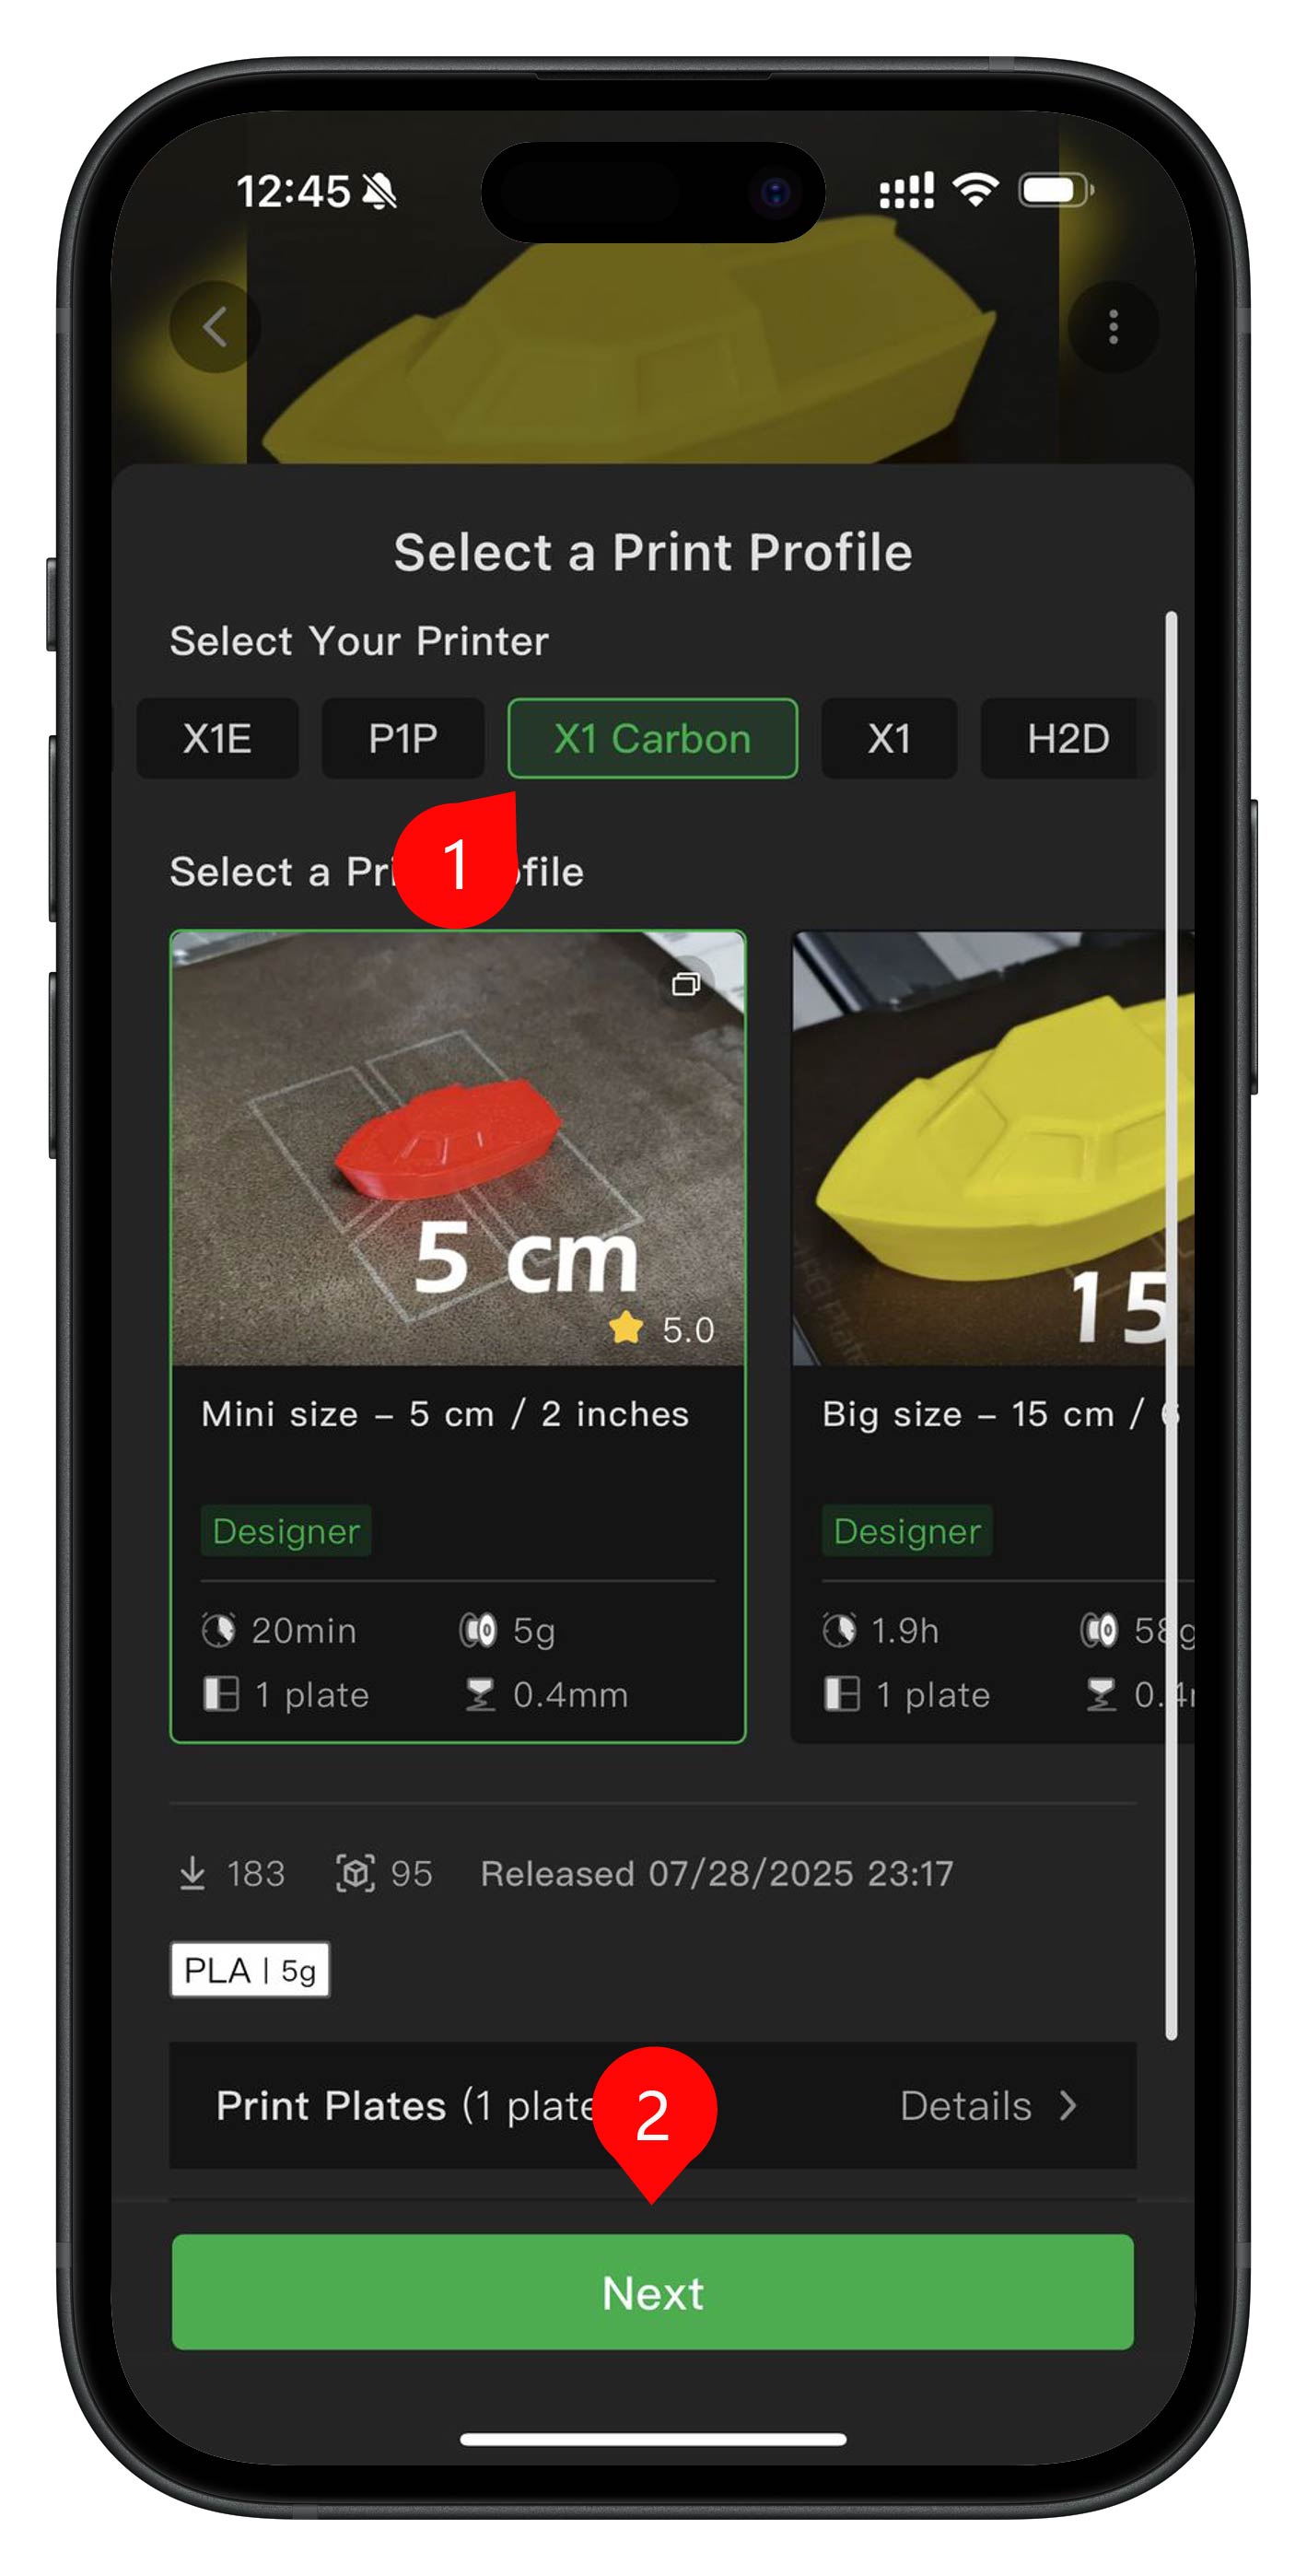
A list of profiles will show up. Select your printer in the top section (X1C for this example) then tap on Next.
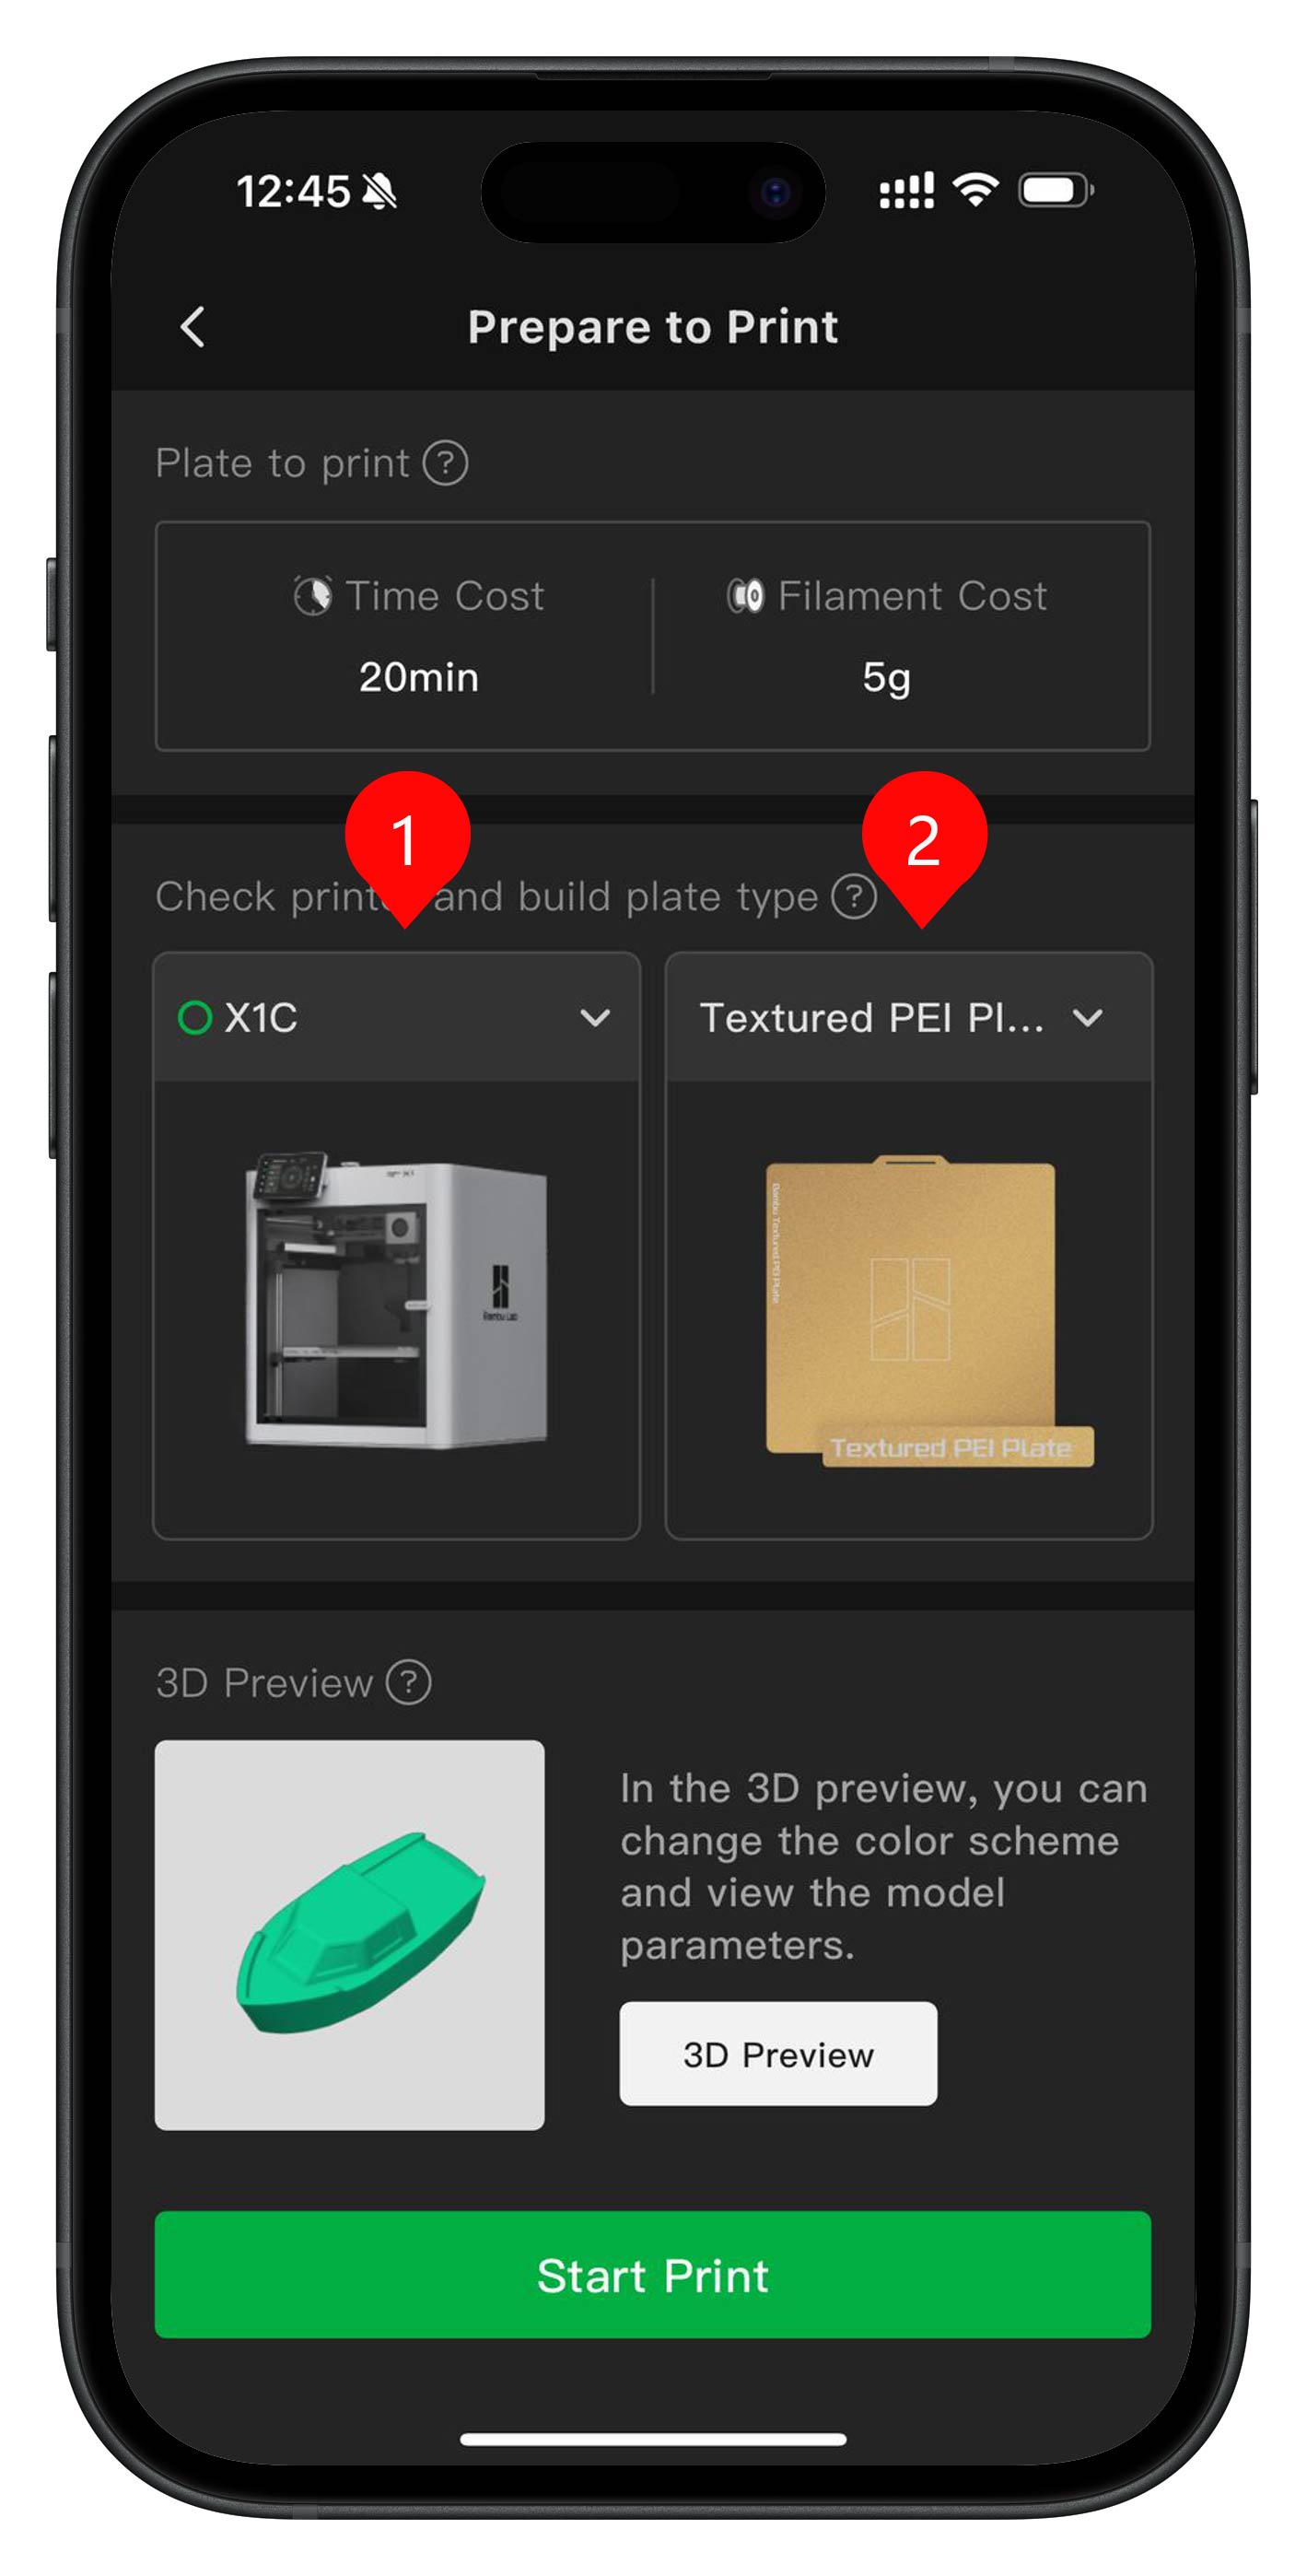
Next, you’ll need to select your printer model and the build plate type installed on your printer. For this example, choose X1C and Textured PEI Plate. Before printing, ensure your plate is clean if needed, and always use a plate that is compatible with the filament you’ve selected for the best results.
By default, the printer will use the previously loaded filament. However, if you want to switch to a different filament, you can select it in the options, by scrolling down. For this example, Bambu Lab Basic PLA filament has been used. Make sure the selected filament is compatible with your build plate and print settings for the best results.
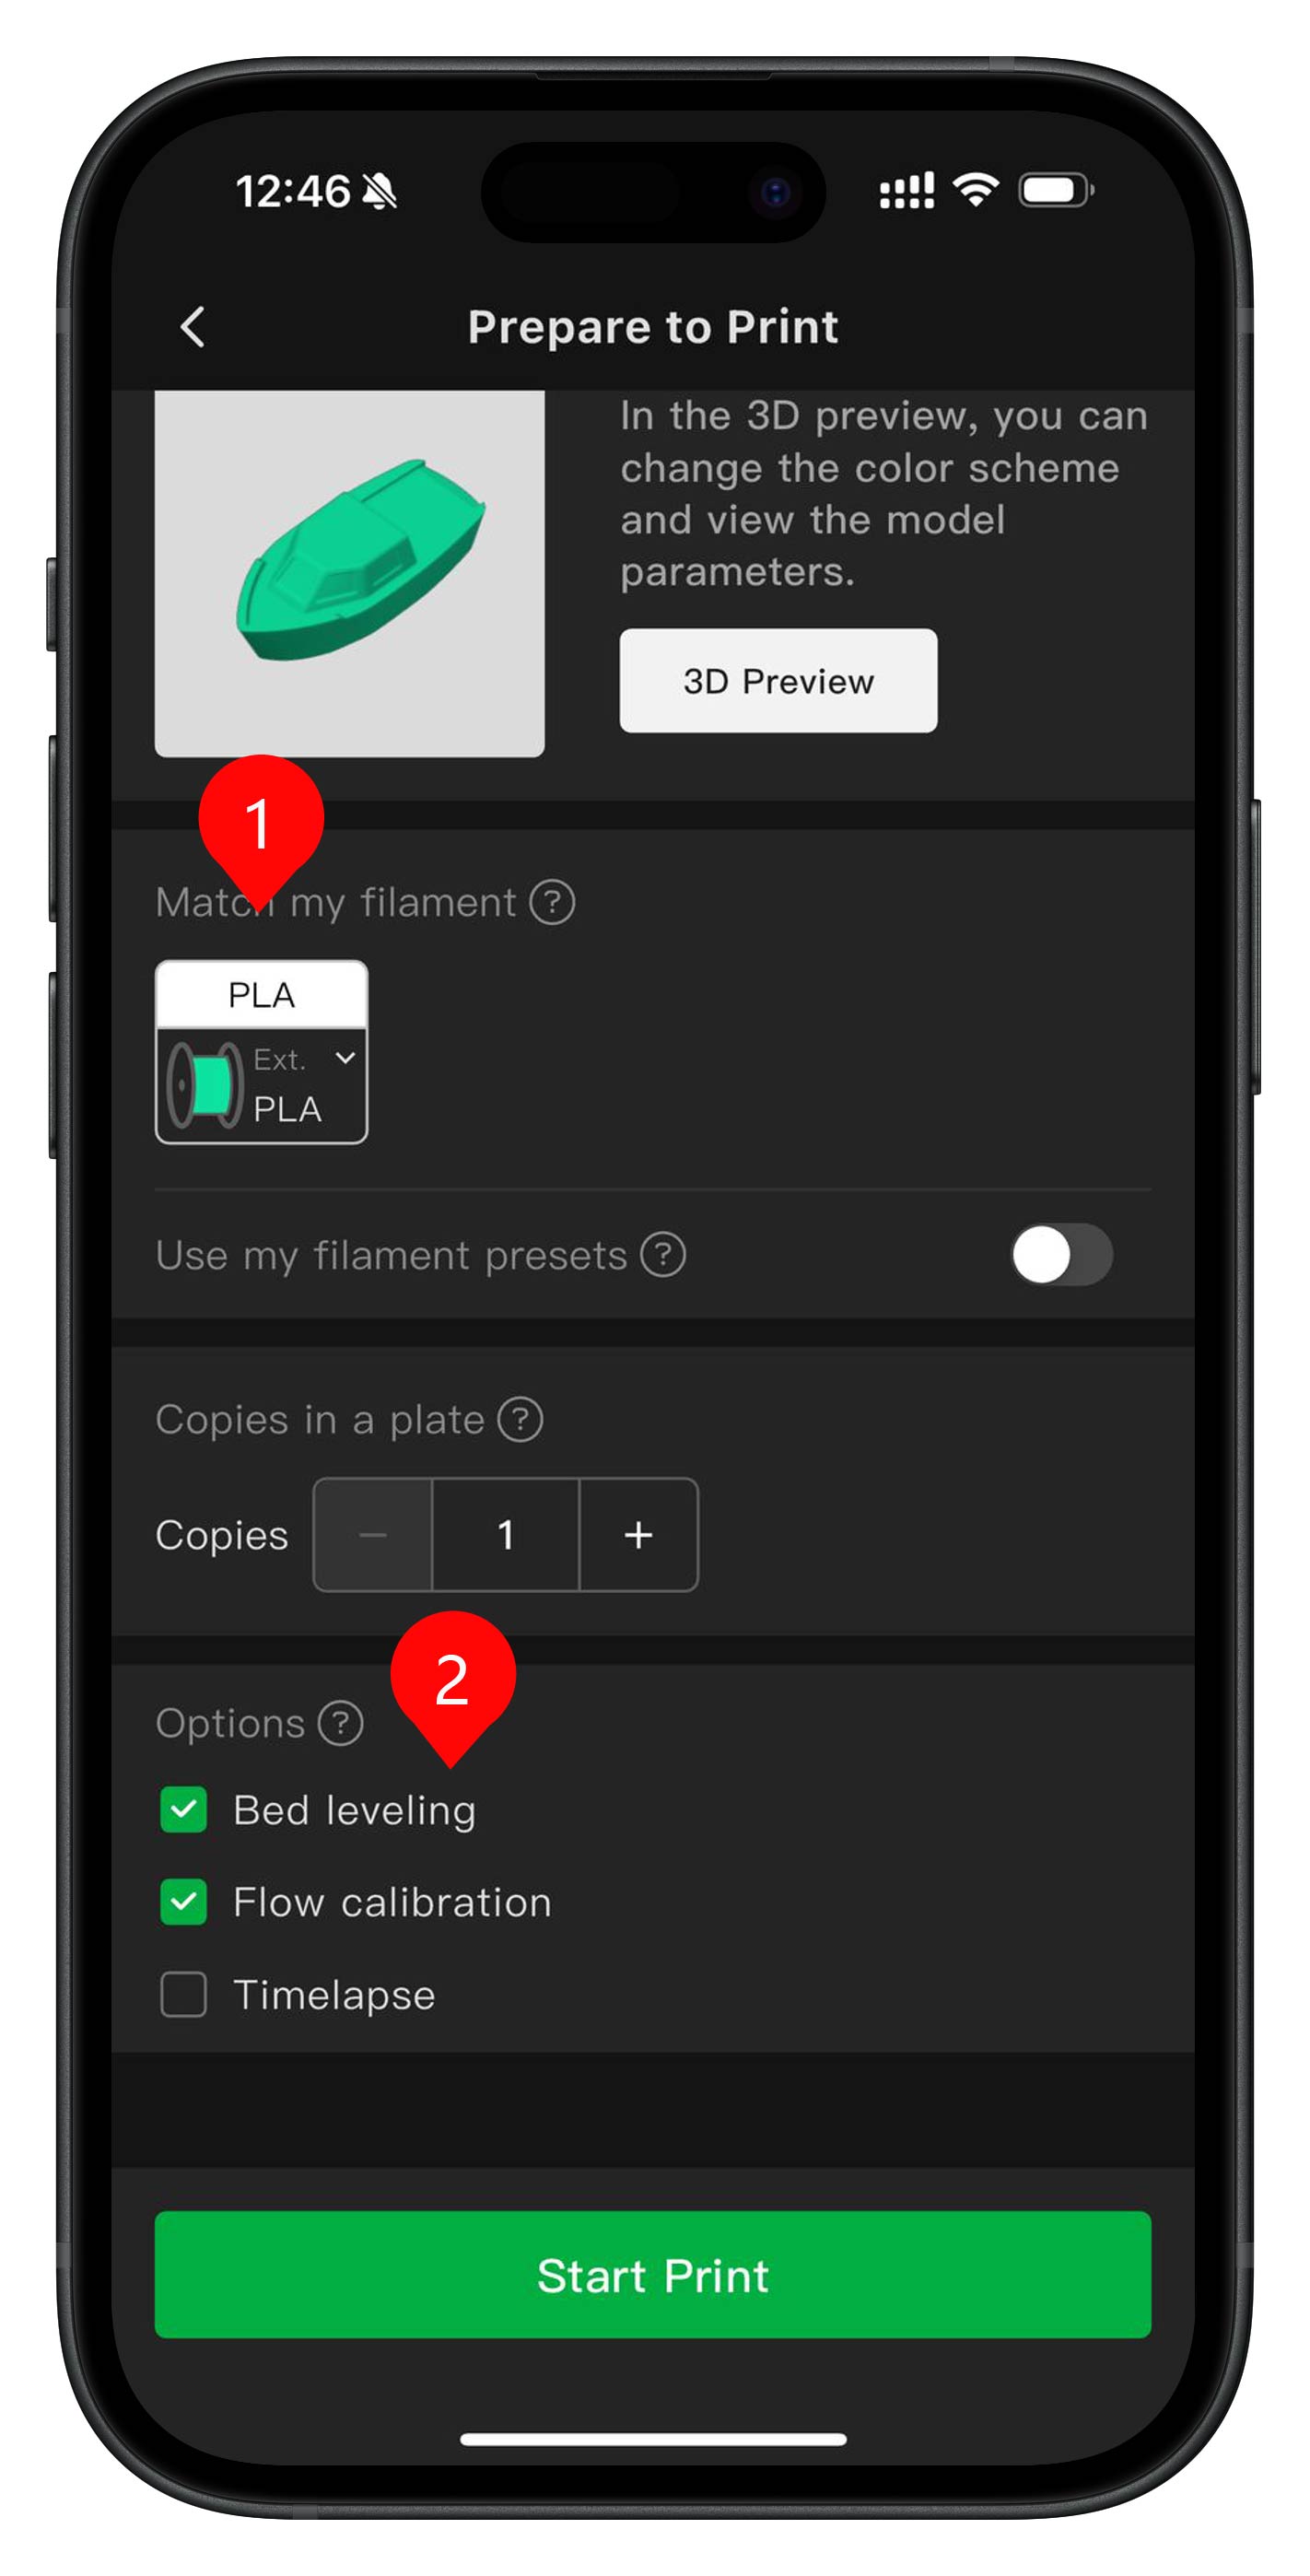
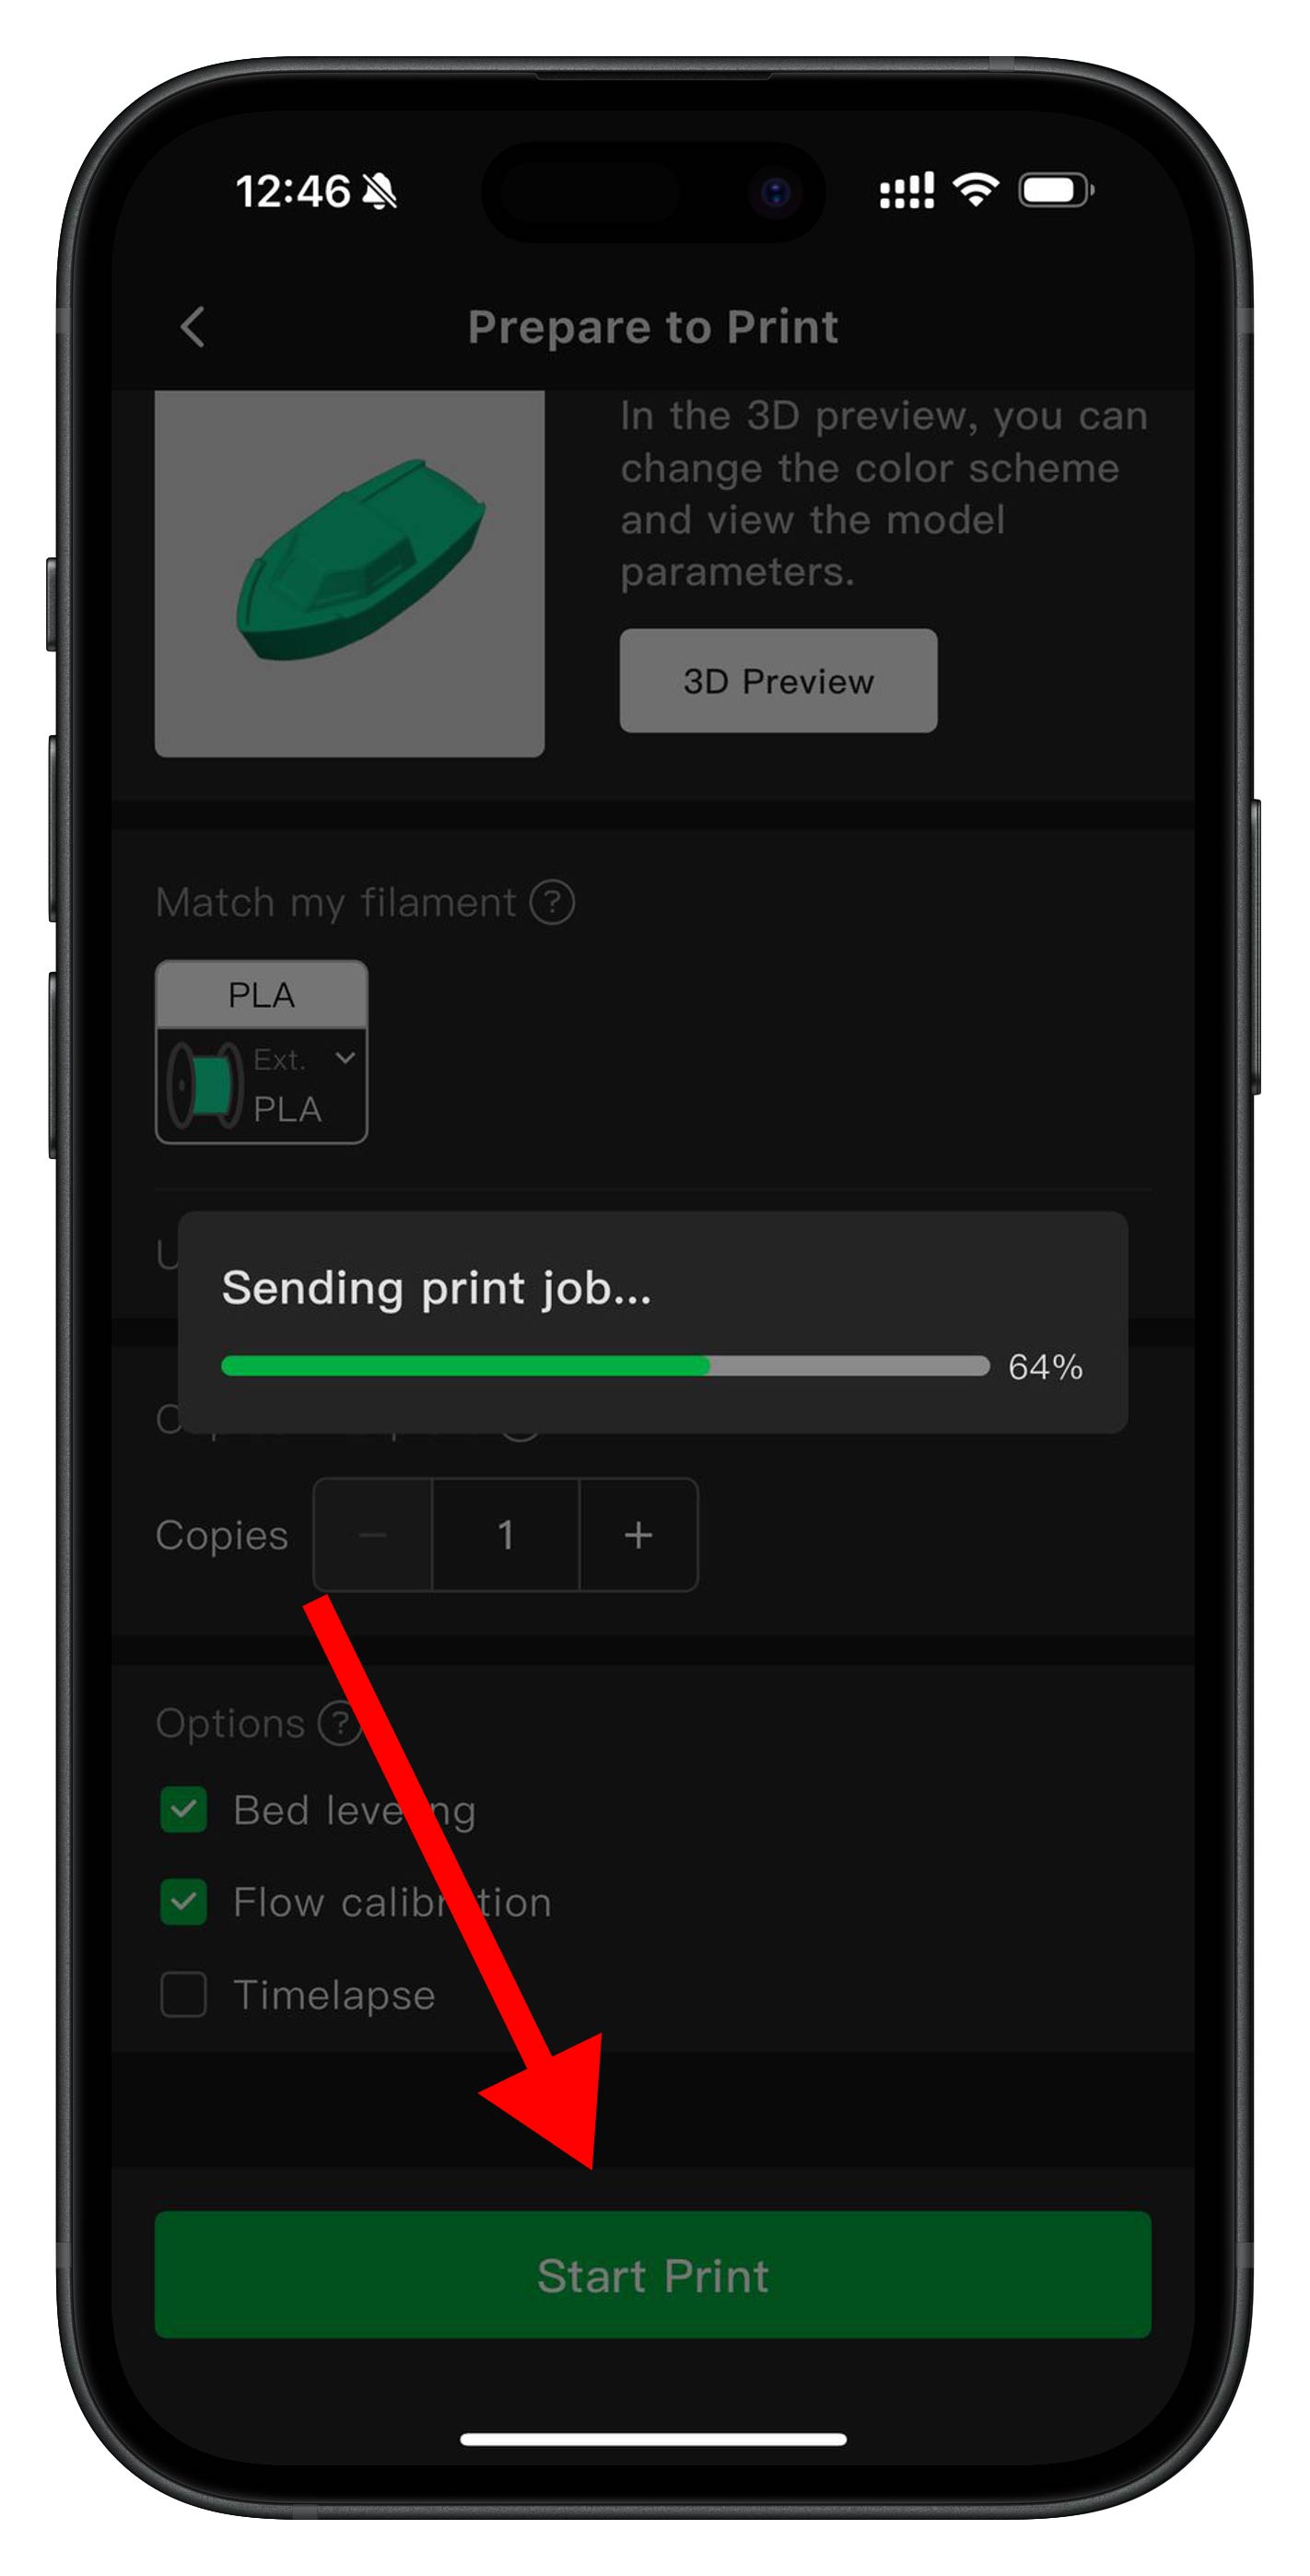
That’s it! Easy, right? Now, just tap the Start Print button. The Handy app will send the printer task.
Once the print task is sent, the X1C will automatically handle the rest. It will begin by downloading the processing file and preparing for printing. This includes heating the nozzle and heatbed, performing a quick calibration check, and prepping the filament before starting the print.
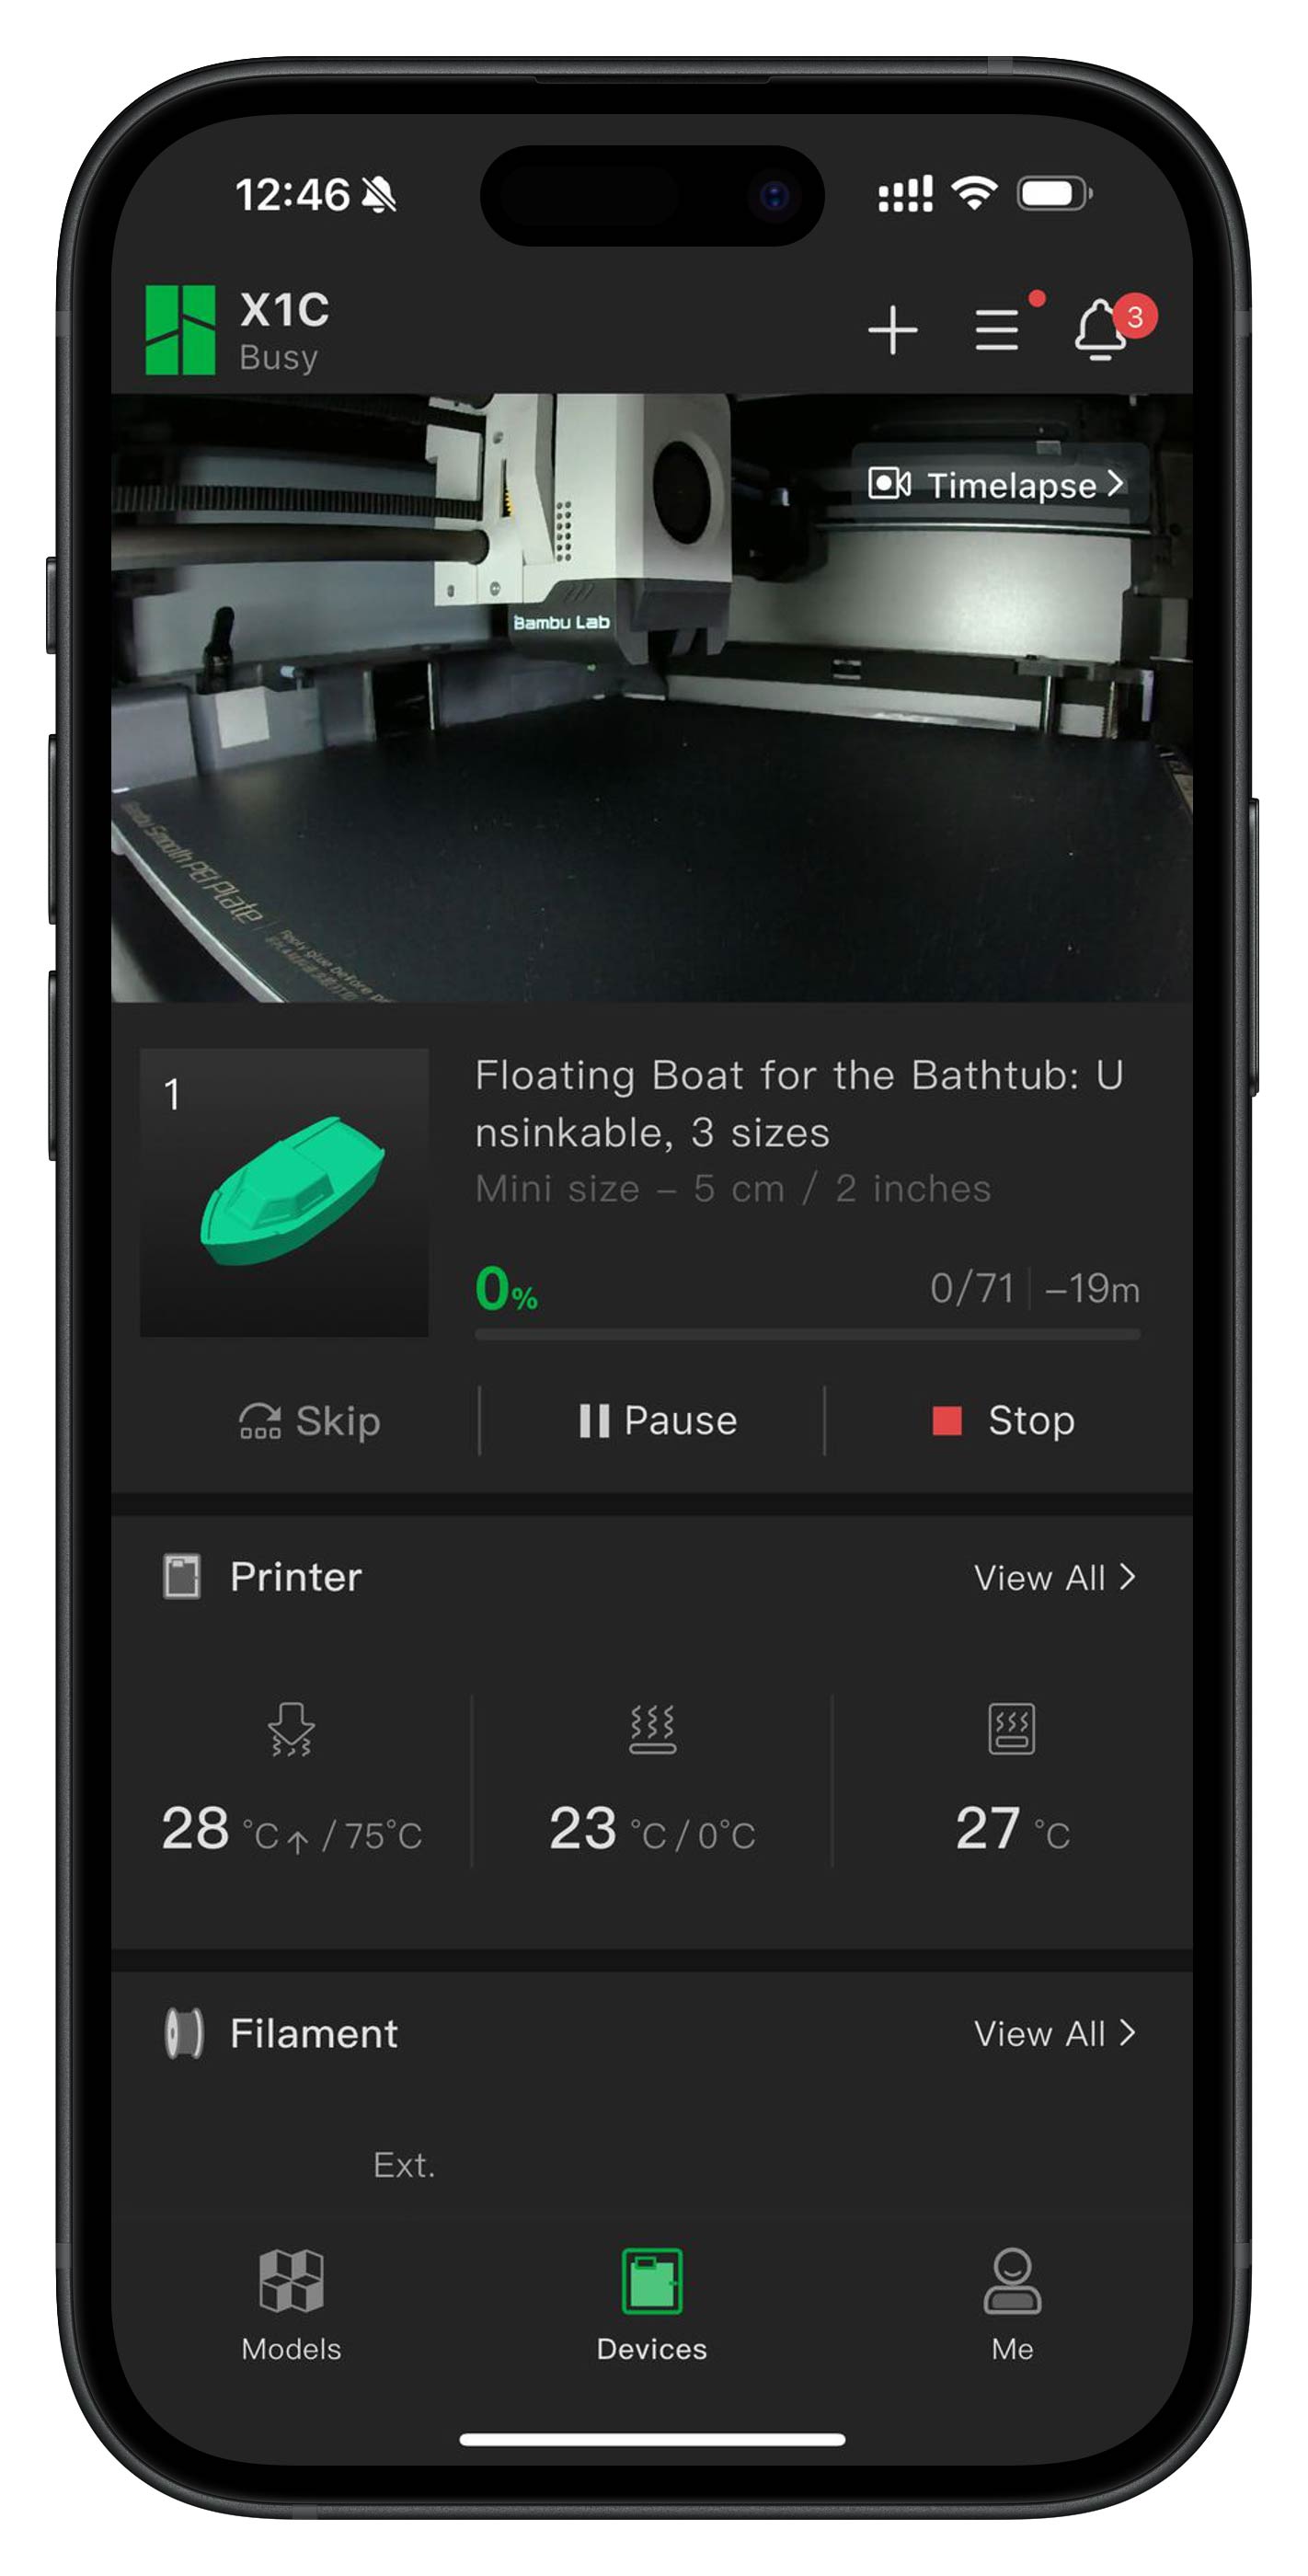
Sit back and watch your X1C bring your model to life!