Nozzles: Materials, Size, and How to Replace Them
There are four different nozzle sizes available for the A1: 0.2 mm, 0.4 mm, 0.6 mm, and 0.8 mm. The nozzle size represents the diameter of the orifice at the tip of the nozzle through which filament is extruded. Each size affects the level of detail and speed of your prints.
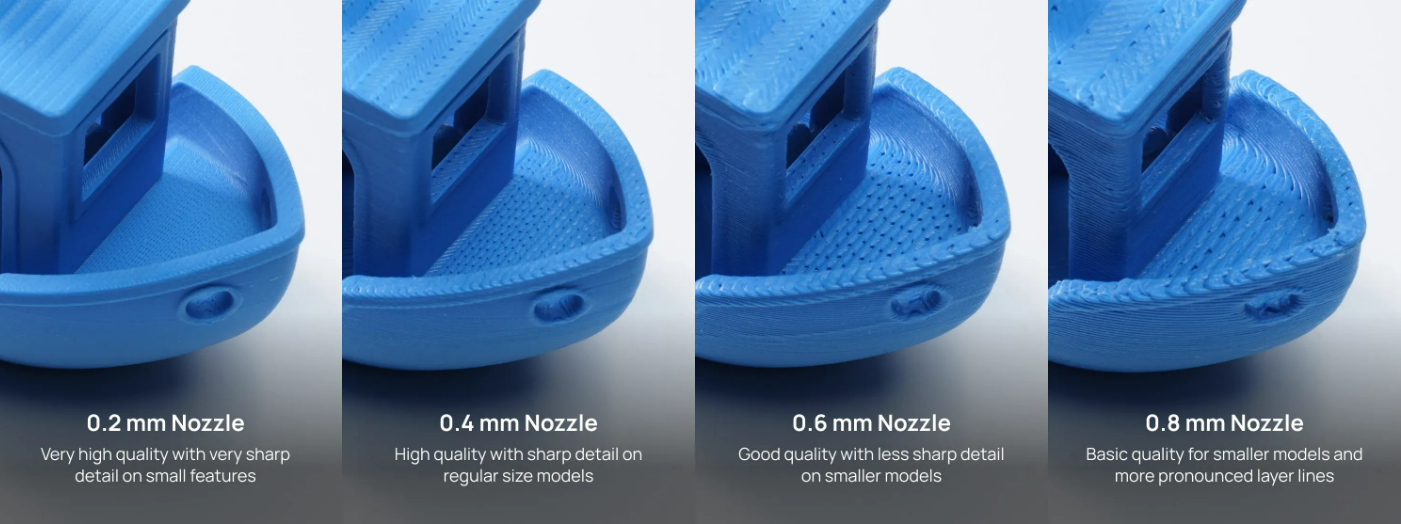
0.2 mm nozzle
This is the smallest available nozzle size, ideal for fine details and high-resolution prints, as it allows lower layer heights and improved print quality. It’s perfect for intricate models or parts that require sharp, precise features, as the small details of the 3D printed object will be clearer and better defined.

Using a 0.2 mm nozzle also comes with several drawbacks. Prints tend to be less strong compared to those made with larger nozzles because the thinner extrusion lines result in weaker layer adhesion. The print speed is significantly slower since the nozzle can only deposit small amounts of material per pass, requiring more layers to complete a print.
Additionally, the smaller orifice makes it more prone to clogging, especially with impurities or inconsistent filament diameters. Lastly, fiber-infused filaments, such as those containing carbon fiber or glass fiber, are incompatible with a 0.2 mm nozzle because the fibers can easily block the tiny opening.
0.4 mm nozzle
This is the most common and versatile nozzle size. It strikes a balance between print quality, detail, and speed, making it great for most types of 3D prints. It’s a go-to for hobbyists and general-purpose printing, being compatible with most filaments on the market.
It can be used with fiber-infused filaments, but the 0.4 mm nozzle can be more prone to clogging. Due to this consideration, it is recommended to use a larger nozzle to minimize the chances of a clog for such filaments.
0.6 mm nozzle
Larger than the standard 0.4 mm, this nozzle can print faster because it extrudes more material at once. It’s good for parts that don’t need as much fine detail but require faster print times or more strength.
A key advantage of using a 0.6 mm nozzle is its reduced risk of clogging when printing fiber-infused filaments, such as those with carbon or glass fibers. The larger orifice allows the filament’s particulates to pass through more easily, preventing blockages and ensuring smoother extrusion.
0.8 mm nozzle
This is the largest nozzle of the four and best for printing very strong, solid parts quickly. It sacrifices detail, but it’s great for larger, bulkier prints or when time and strength are more important than precision.
Differences in material
Nozzles come in two different variants:
Stainless Steel: It has a grey heatsink and can be used for filaments that don’t contain abrasive particles, like PLA, PETG, and TPU.
Hardened Steel: It has a black heatsink and can be used for any filaments, including filaments that contain abrasive particles like carbon fiber, glass-filled, or glow-in-the-dark filaments.
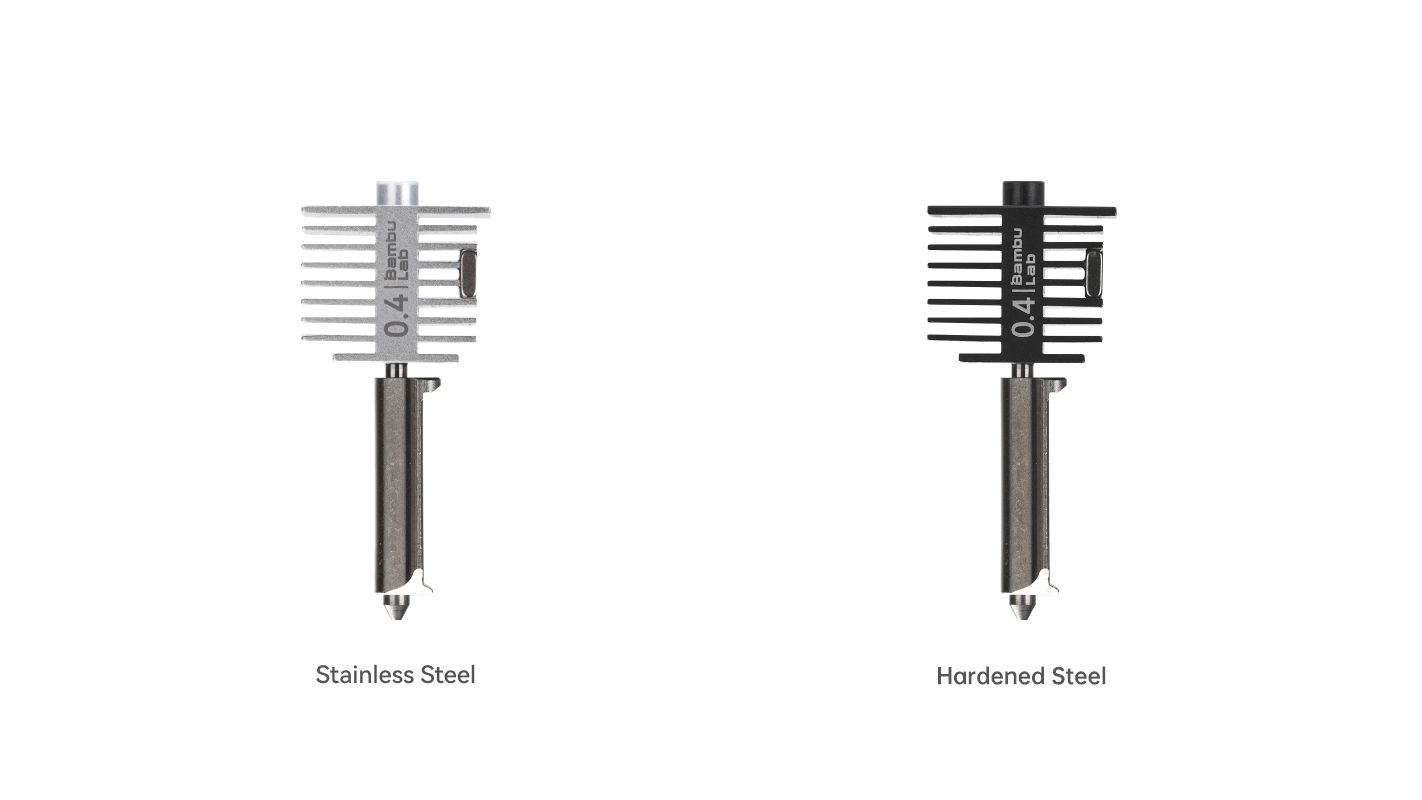
Regular stainless steel is softer compared to hardened steel, which goes through a process that makes it harder and more durable. This means that while standard stainless steel nozzles might work fine for basic plastics like PLA or PETG, hardened steel is better for advanced materials that would otherwise erode a softer nozzle over time.
When printing abrasive or carbon-infused filaments, the two most crucial factors to consider are nozzle size and nozzle hardness/material. A properly sized nozzle helps prevent clogs, while a hardened or wear-resistant nozzle, such as one made from Hardened Steel, ensures longevity and prevents premature wear.
The Bambu Lab A1 3D printer is delivered with a Stainless Steel 0.4 mm nozzle but can easily be upgraded to a Hardened Steel nozzle.
How to replace the nozzle
Thanks to its toolless design, the A1’s nozzle can be replaced in just a few minutes with ease.
To start, turn off the printer and ensure that the nozzle is not hot. Then, press the filament lever on the right side to release and cut the filament.
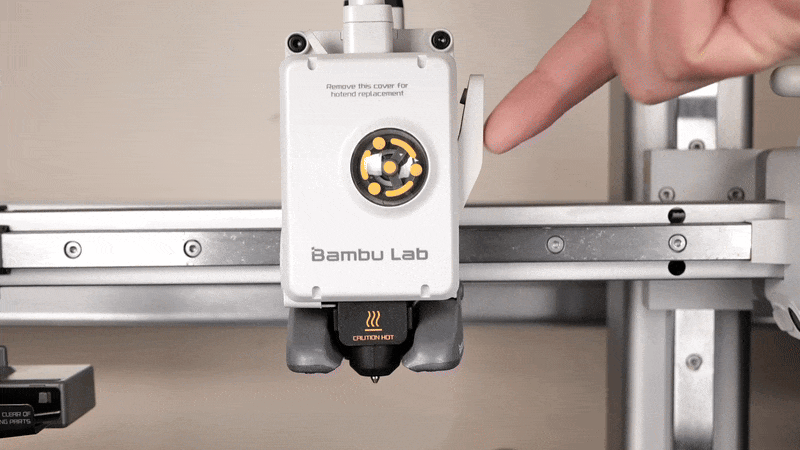
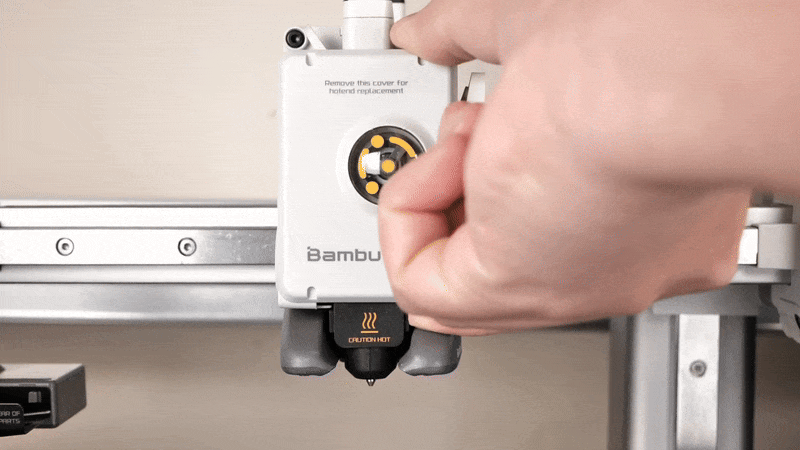
Next, gently pull from the bottom front right corner to remove the front cover.
After that, remove the silicone sock that covers the nozzle.
Push the nozzle buckle to the right to unlock it, then move the left side of the buckle outward. For easier access, you can use a small piece of filament to assist.
Hold the heatsink section of the nozzle and gently pull it out.
With the nozzle removed, you can now install the new one by following the steps in reverse. However, there are a few important details to keep in mind. Let’s go through the process step by step.
Carefully insert the nozzle at a slight angle, tilting it slightly toward the back of the printer. The built-in magnet will attach to the screws, helping with proper alignment. Once in place, press on the heatsink to ensure it sits flush against the hotend heating assembly.

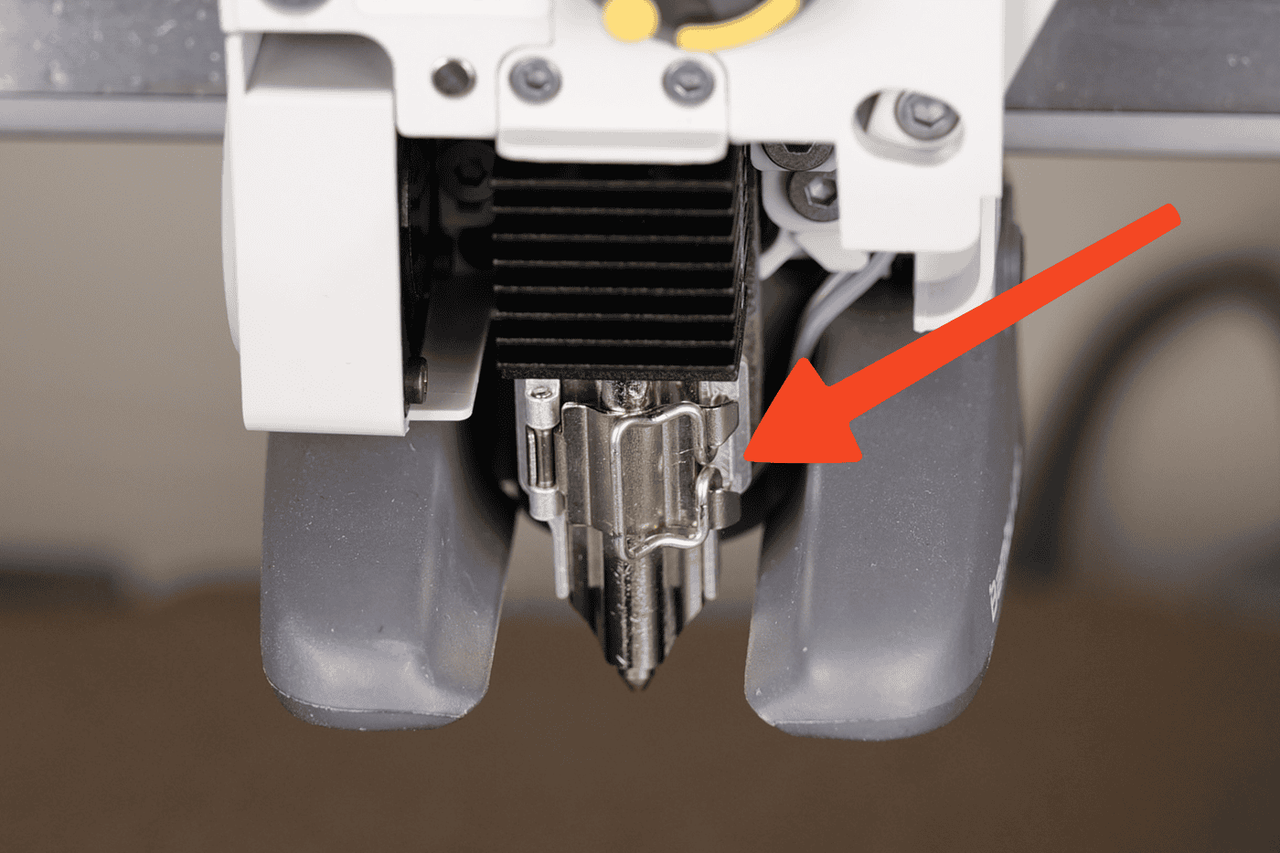
The next crucial step is closing the hotend buckle. First, gently flip the left side of the buckle into place, then lock the right side securely, as shown in the images below.
If the buckle doesn’t lock into place easily, double-check that the nozzle is properly seated flat against the hotend heating assembly and that the heatsink is also aligned correctly. Below is a close-up of the nozzle to illustrate the correct buckle installation.
Next, install the silicone sock over the nozzle, ensuring it is fully secured and properly fitted on the sides, as shown.
Finally, attach the front cover to complete the installation. Press on the bottom corners until you hear it click into place.

Job done! The first time replacing the nozzle might take a bit longer, but after you’ve done it once, repeating the process should take around a minute.