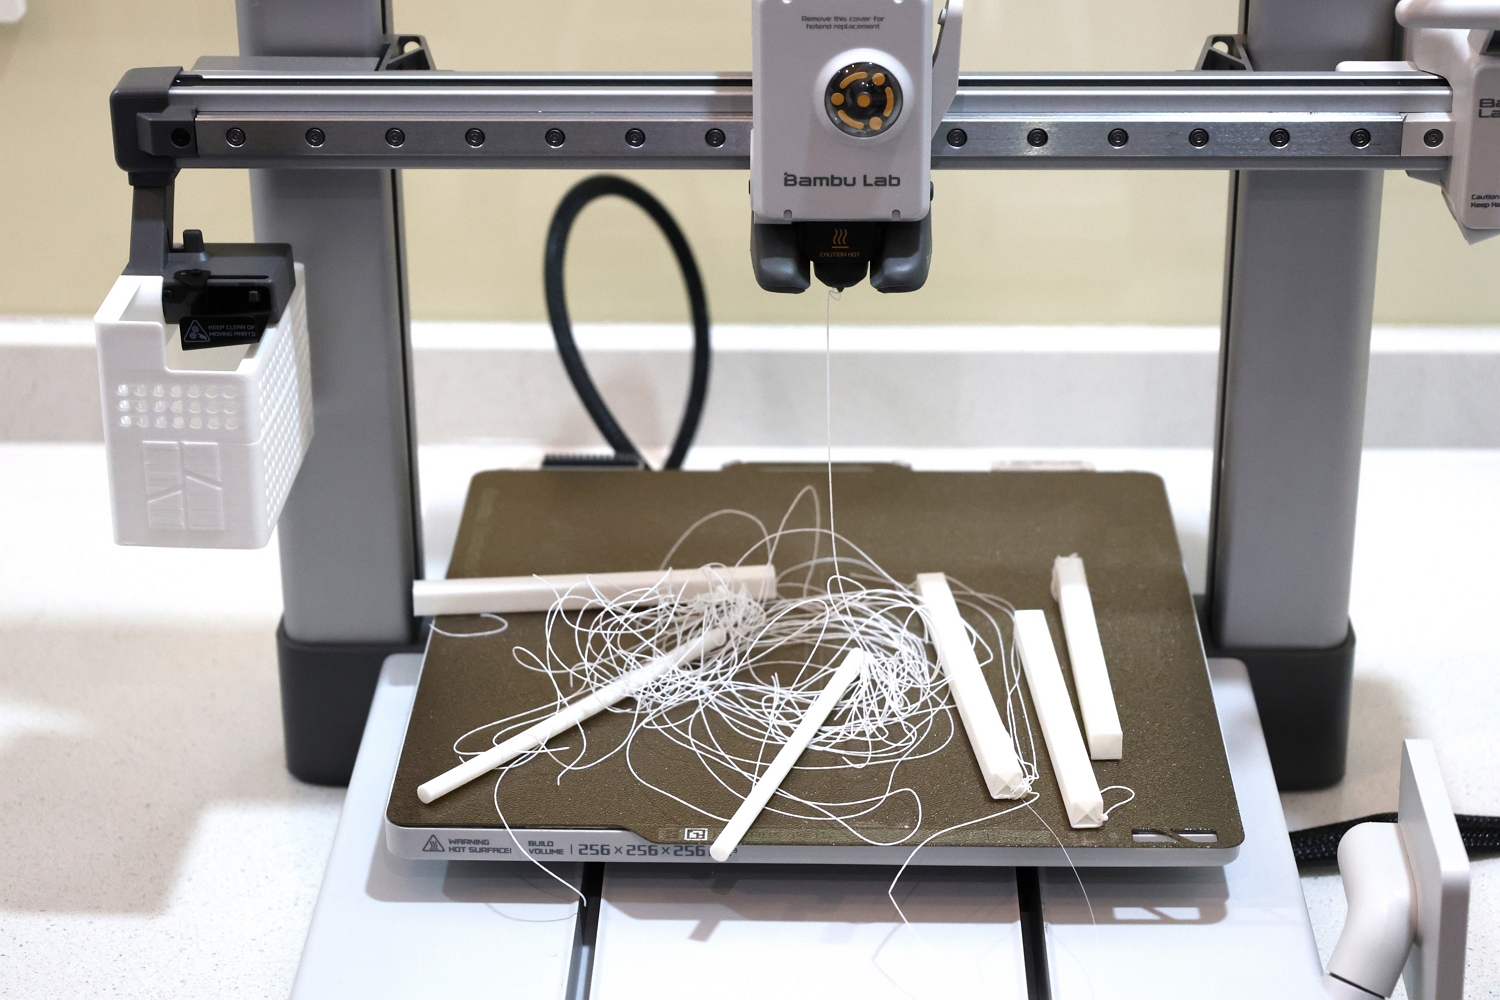
The A1 series 3D printers feature a Y-axis moving heated bed, which moves back and forth during printing. This motion increases the risk of model collapse compared to fixed-bed printers. Common causes of collapse include:
Insufficient bed adhesion: Models with small contact areas at the base lack sufficient adhesion, making them prone to detaching during printing.
Model instability: As print height increases, the model’s inertia grows, causing it to sway during the bed’s reciprocating motion, further weakening adhesion and leading to collapse.
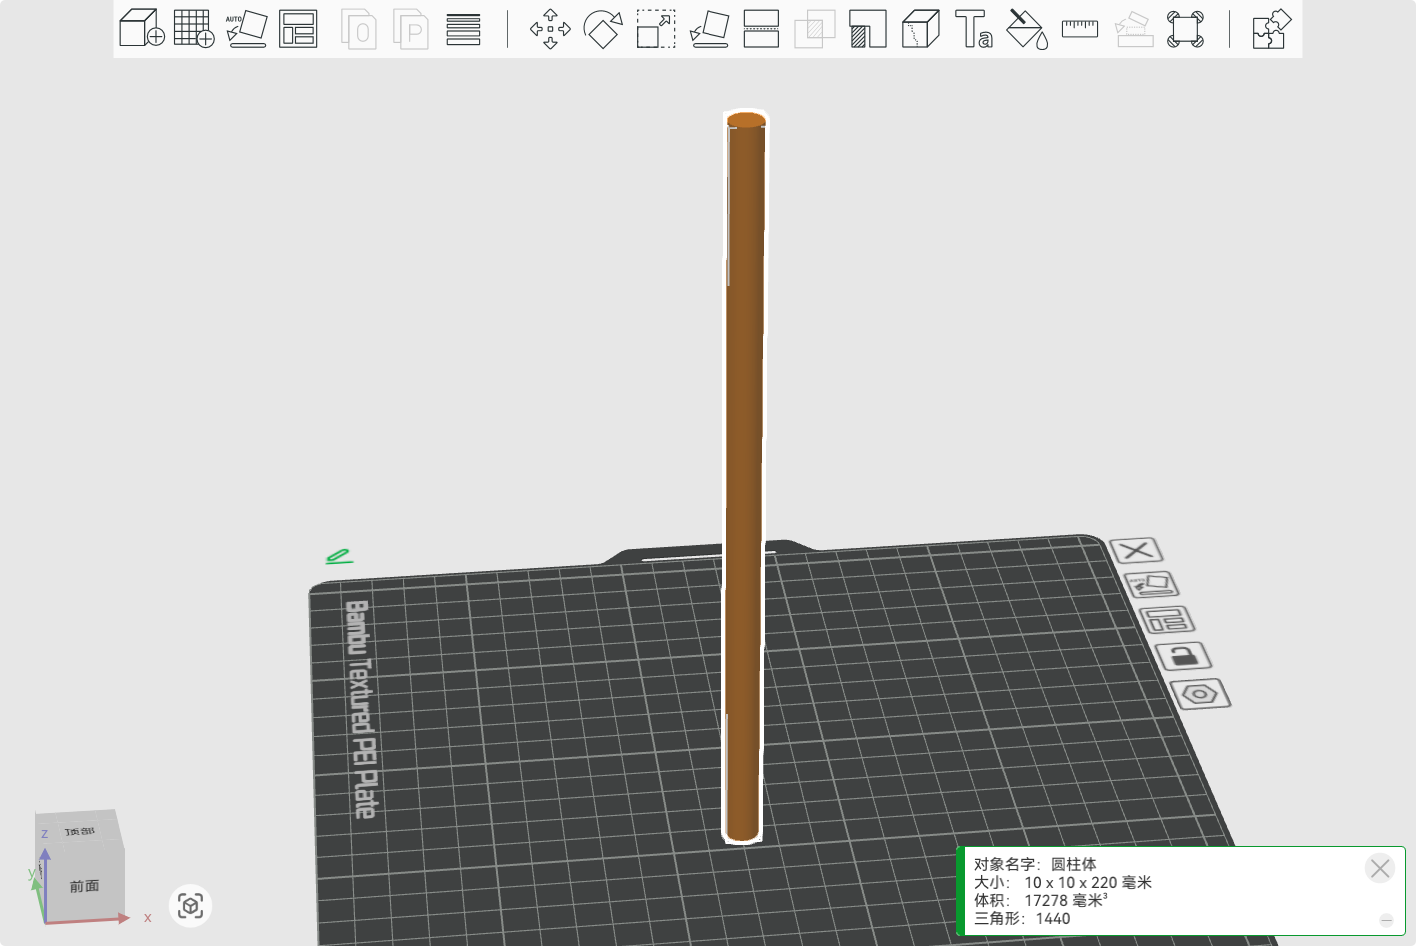
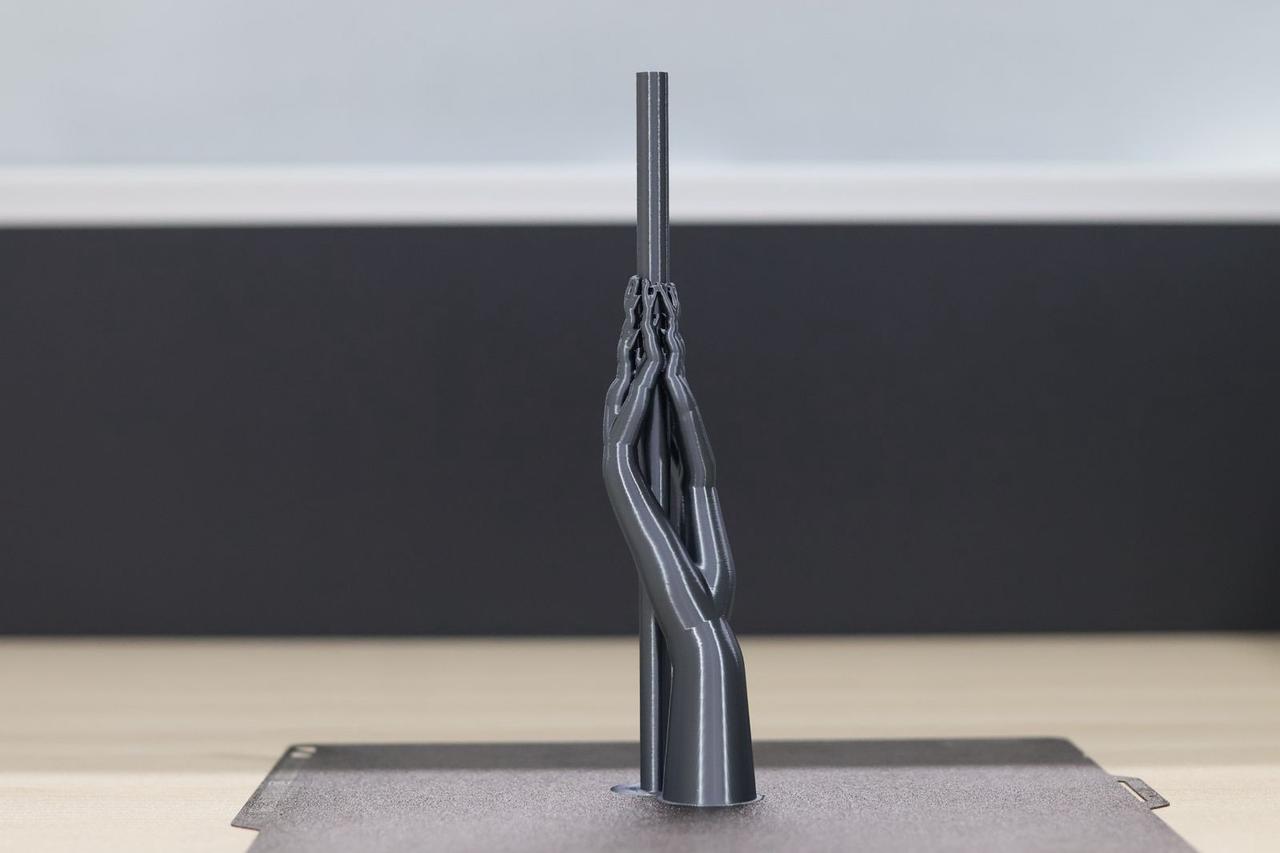
This guide uses two practical examples—a slender cylinder (10 mm diameter, 220 mm height) and a relief painting—to explore strategies for preventing collapse.
Adding Support Structures
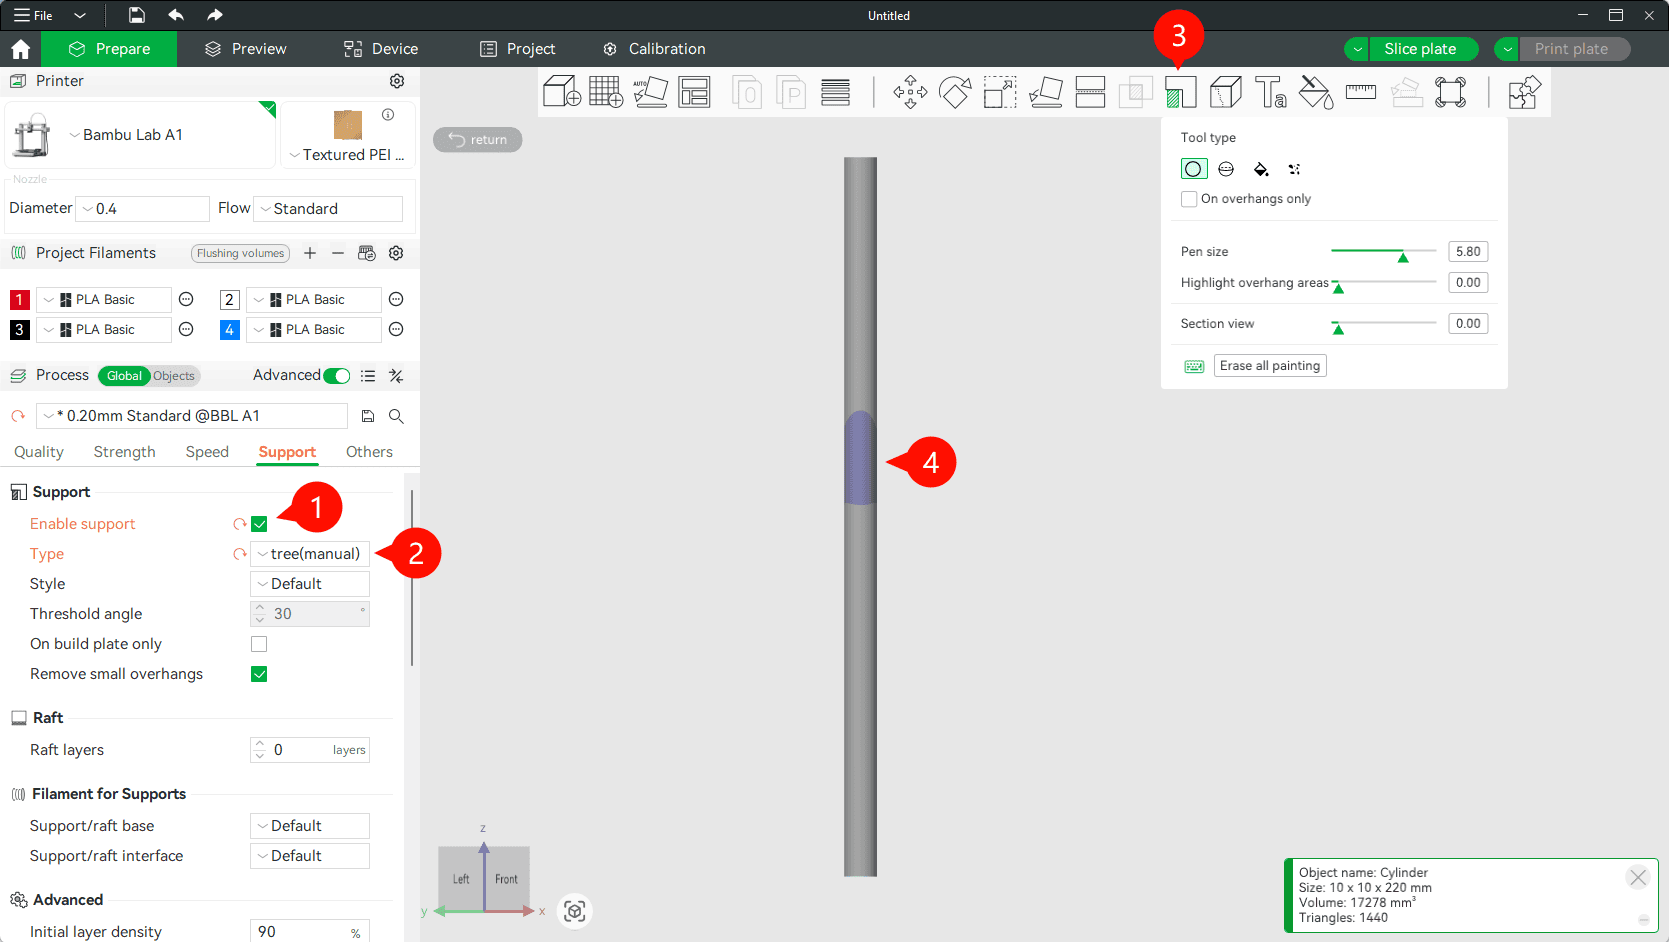
For tall or top-heavy models, effective support is crucial to prevent tipping during the print.
In Bambu Studio, enable the Support option from the left sidebar. For this type of print, it’s recommended to select Tree (Manual) as the support type. Once the model is selected, the top toolbar will become active—click on the Paint Support tool.
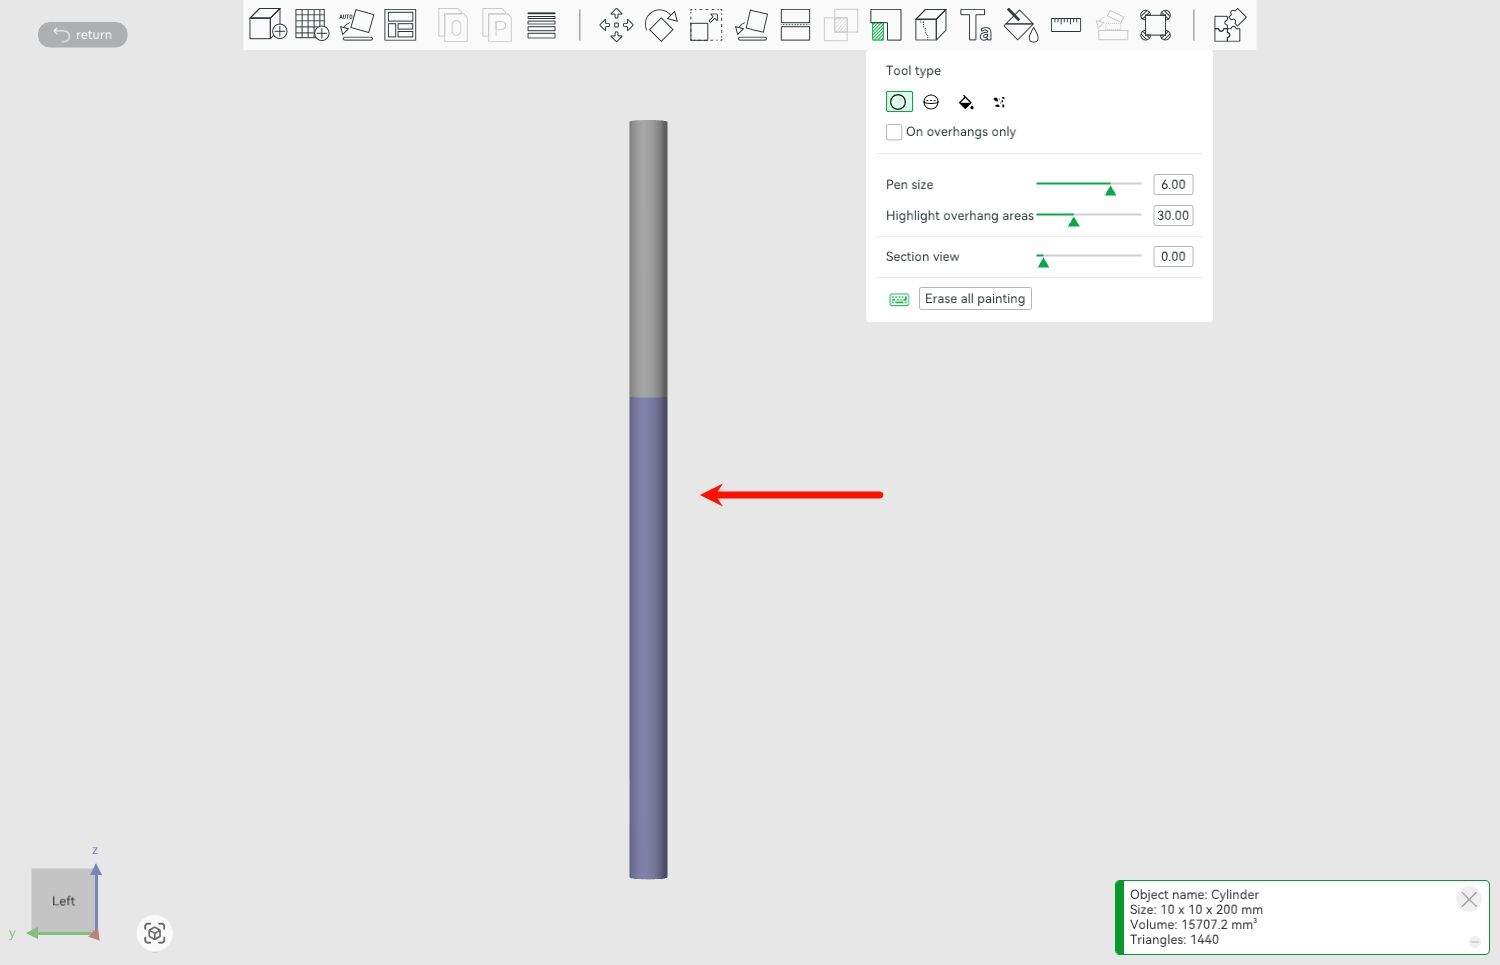
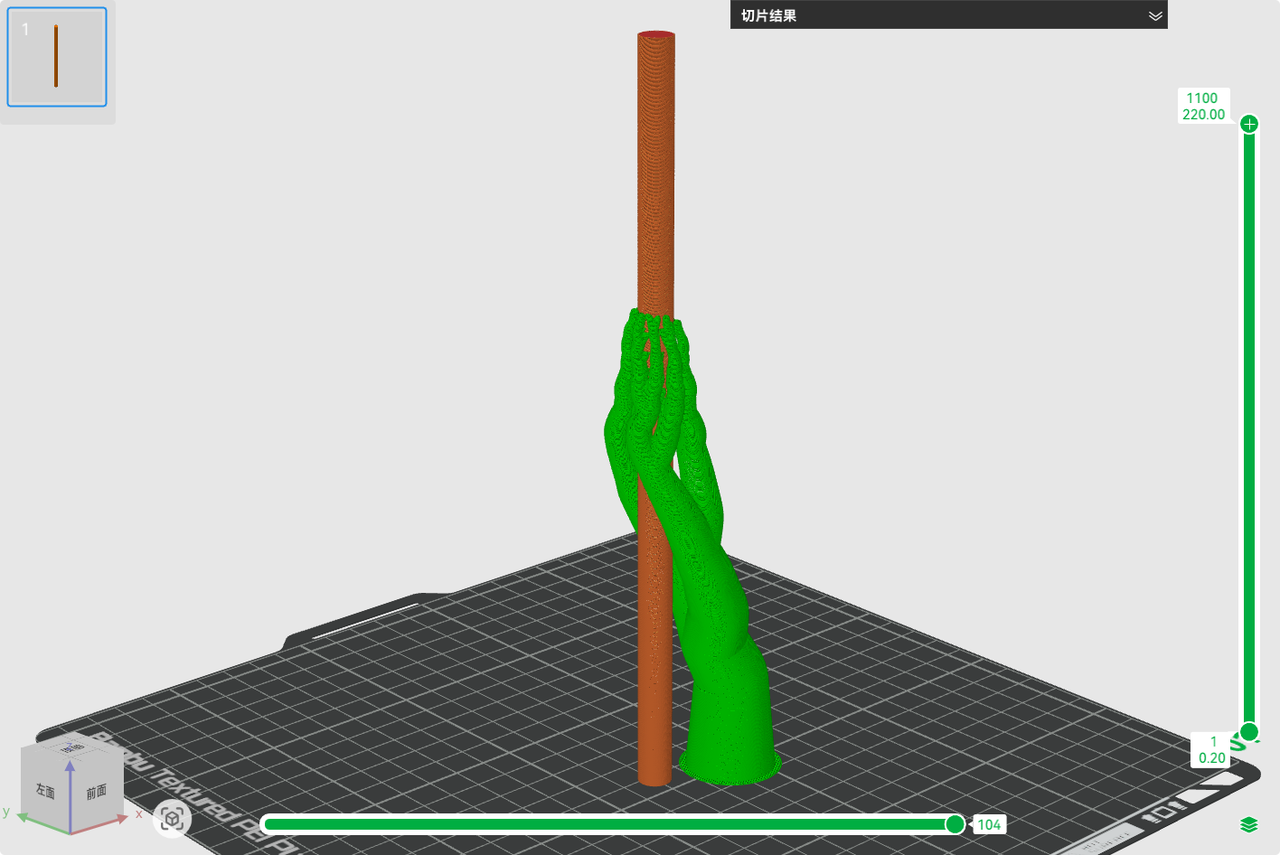
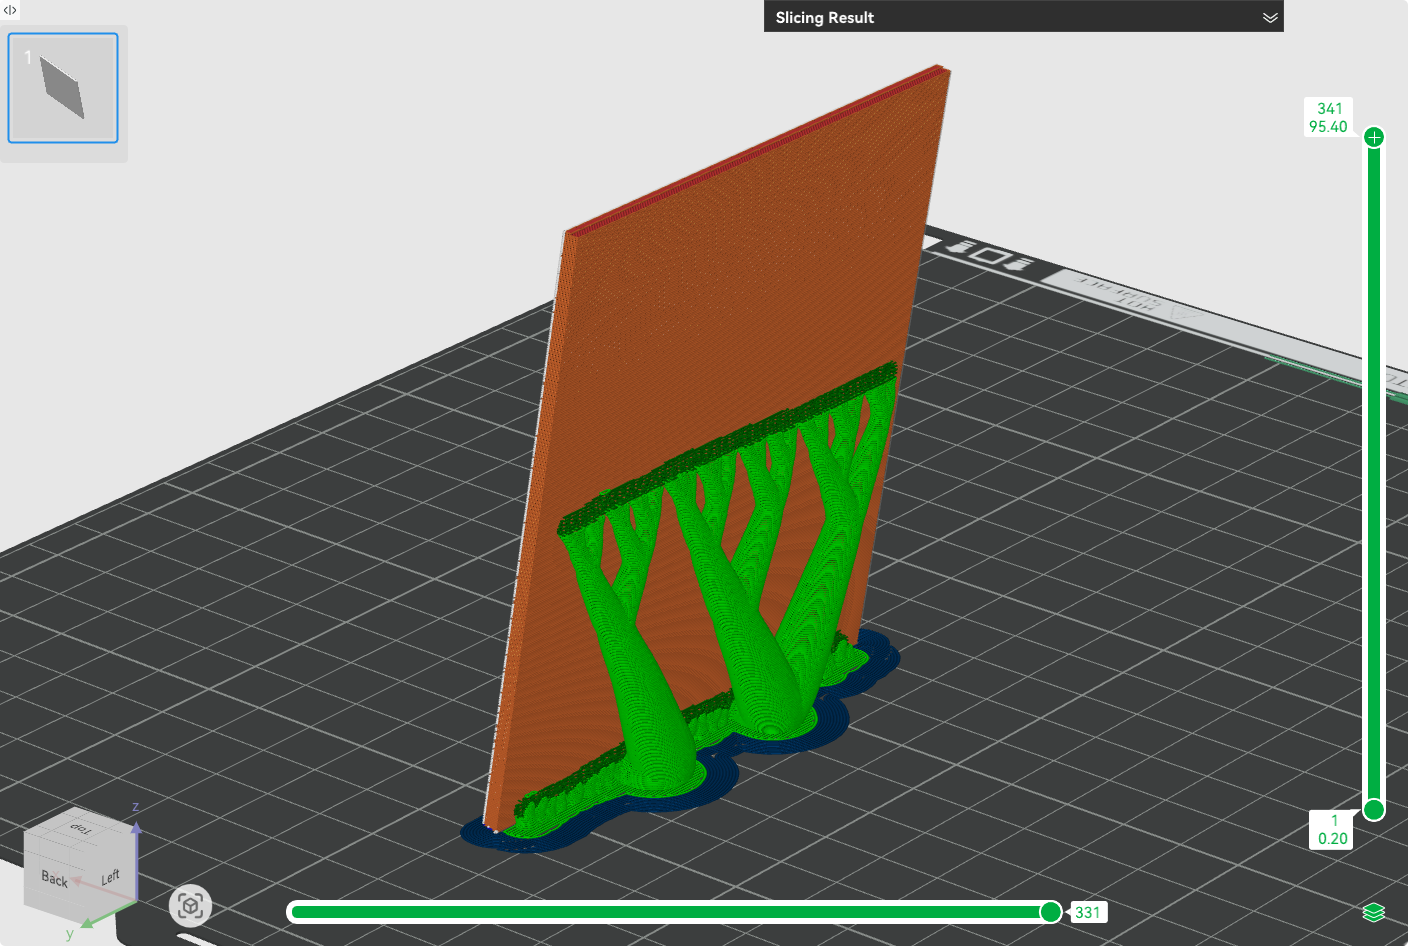
For slender cylindrical models, you should apply support contact points around the upper-middle portion of the model. Tree supports will grow from these areas and extend downward, acting like stabilizing “arms” that help brace the upper part of the model during printing. This greatly reduces wobble and improves overall print stability.
📌Note: If your model is particularly tall or slender, consider adding a full-base support structure underneath it. While this may slightly increase support material usage, it can significantly improve print stability and success rate.
After slicing, switch to Preview Mode and carefully inspect the shape and coverage of the support structures. Ensure they are properly positioned and extensive enough to provide effective stabilization throughout the print.
Lithophane Model Printing Guide
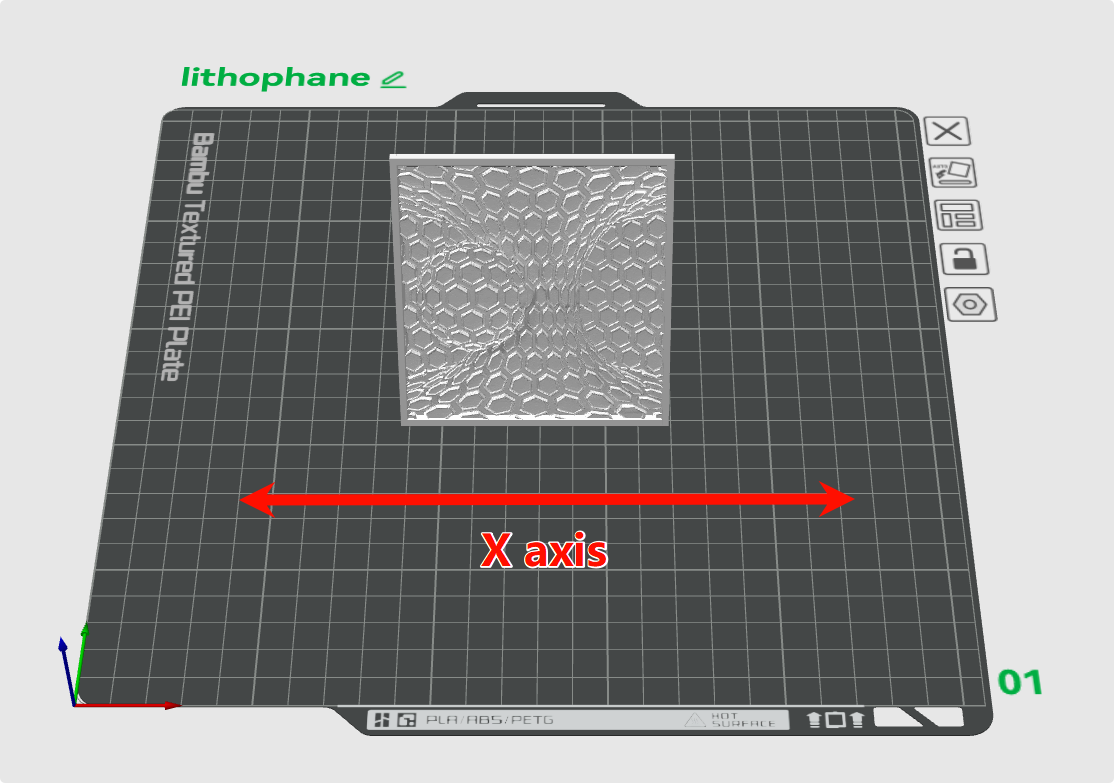
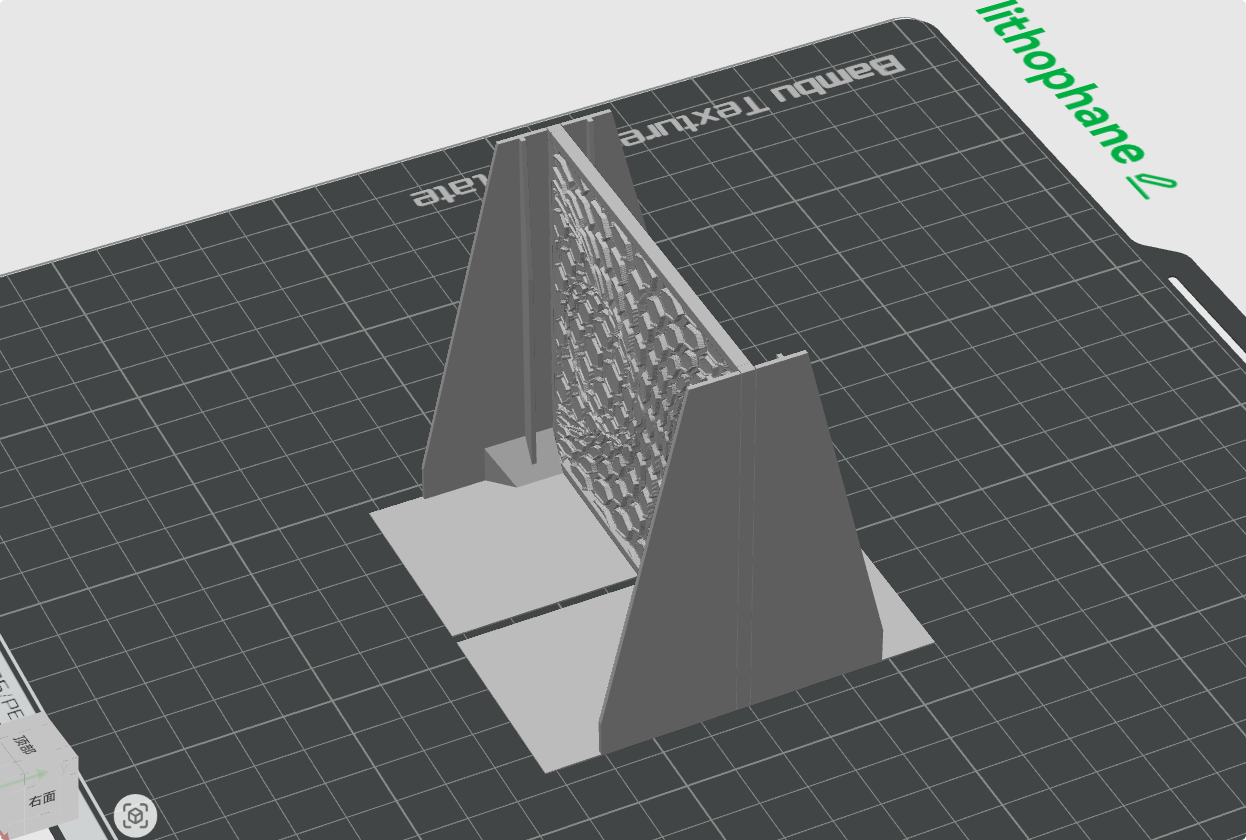
For lithophane models with small base areas, such as relief sculptures or thin structures with a high center of gravity, printing vertically on the A1 printer may cause excessive swaying or even collapse due to the Y-axis heated bed’s back-and-forth movement.
It is recommended to tilt such models and align them along the X-axis whenever a single model is used. This orientation minimizes the swaying caused by Y-axis movement, thereby reducing the risk of collapse and improving print stability and success rate.
When considering lithophane orientation, it’s a good idea to position the model in a way that doesn’t add too much air resistance. Due to fast movements, air resistance can make the model move slightly, leading to failures or less than ideal print quality. In such cases, when multiple models are used, you can orient the models along the Y axis.
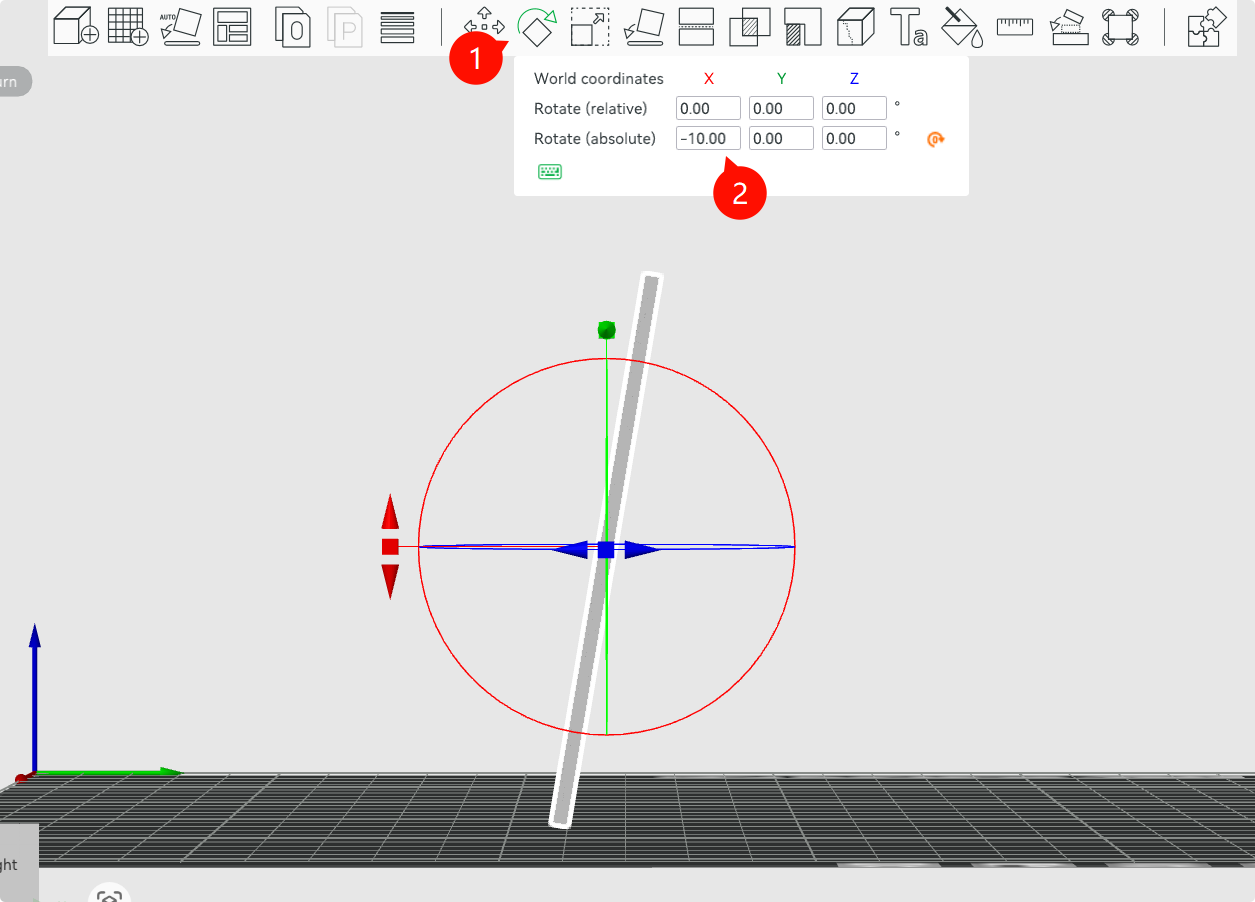
Use Bambu Studio’s “Rotate” tool to tilt the model 10°–20° along the X or Y axis.
Avoid excessive tilt angles, as they may:
Reduce Z-axis precision.
Increase the amount of support material needed to connect the model to the build plate.
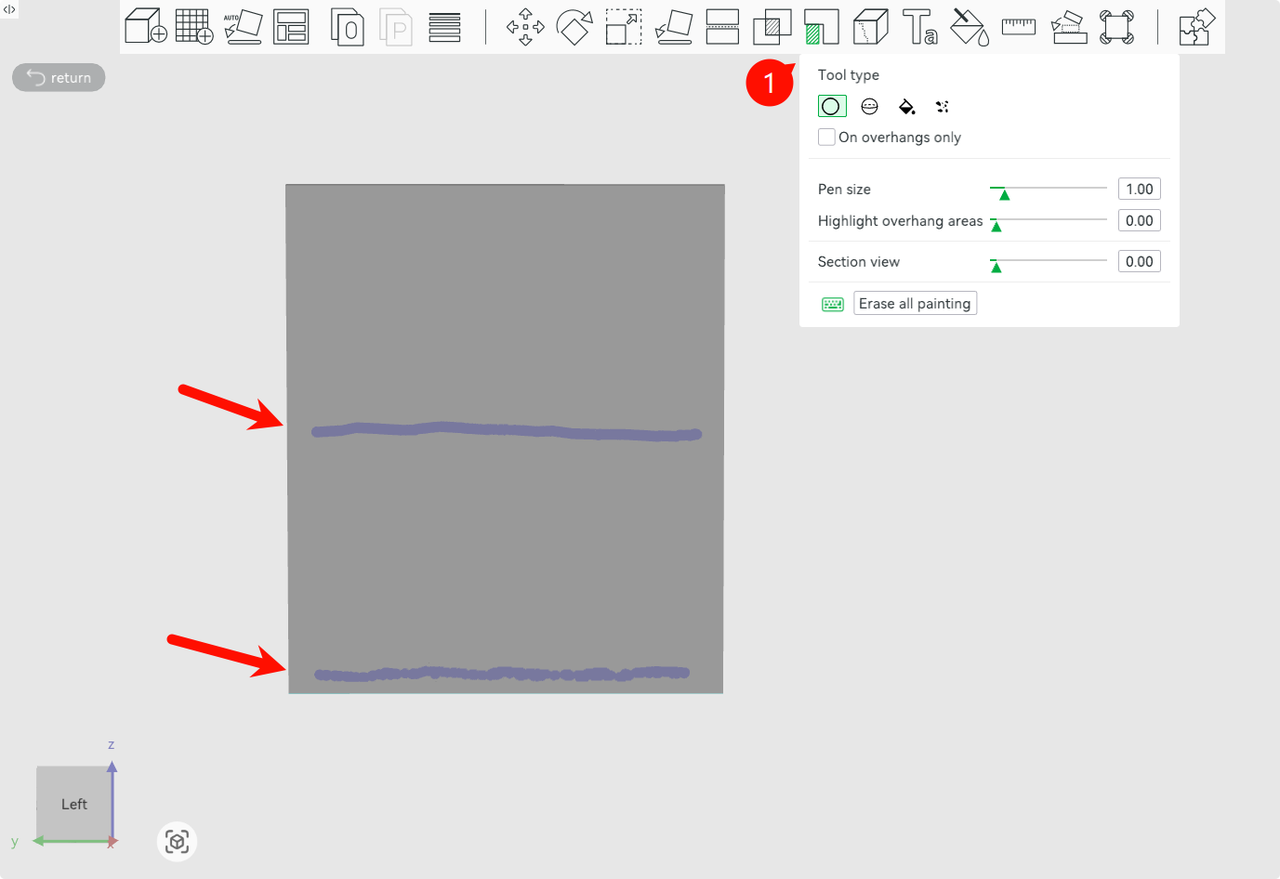
After tilting, add support structures to enhance the model’s contact area with the print bed increasing stability. Adding supports around the middle of the model is particularly effective in preventing swaying due to increased height and inertia. Mid-level supports stabilize the central section, enhancing overall structural stability.
To ensure stronger support for the model, access the support settings interface and decrease the “Top Z Distance” and “Support/Object XY.
After completing the support settings, carefully inspect the support structures in the slice Preview mode to ensure they are generated as expected, providing adequate support and adhesion during printing.
Another idea for best results is to orient the model at a 45 degree angle on the Y axis, which can add additional stability for the litophane.
Design Tip: Experienced designers often incorporate support structures during the model design phase to facilitate printing and enhance overall stability.
Adjusting Brim for Better Bed Adhesion
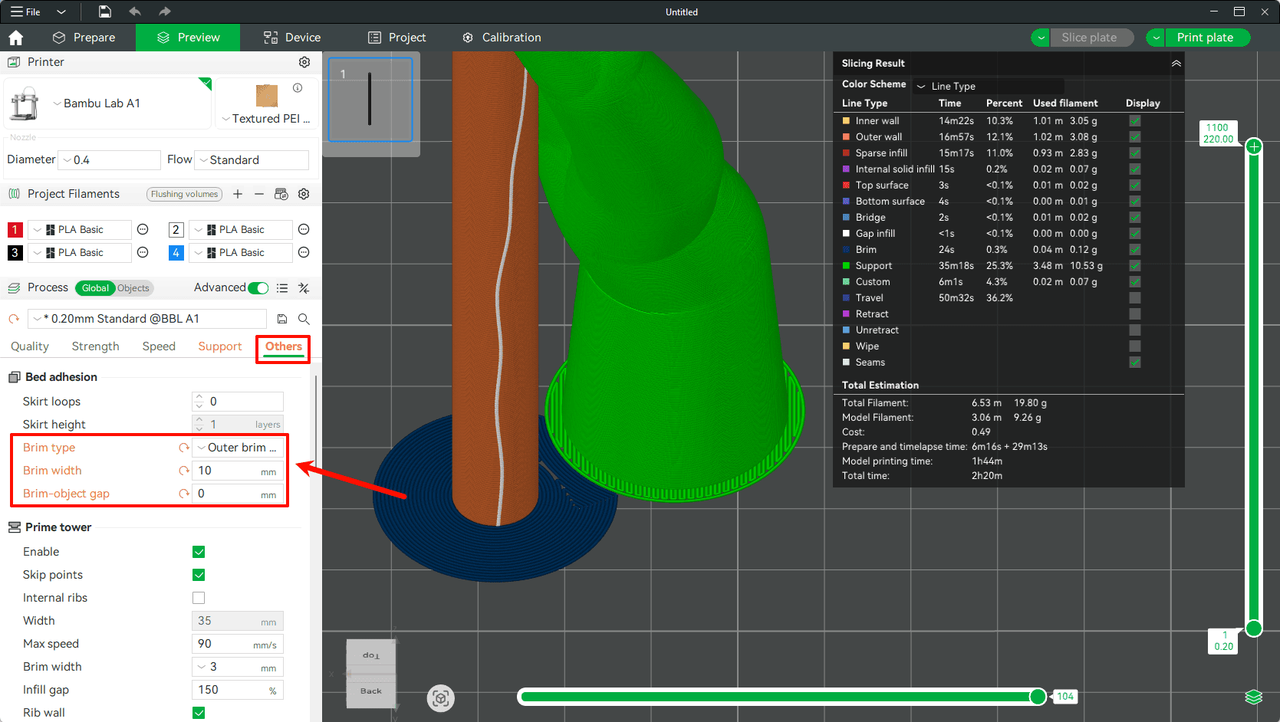
The stability of the model’s base is equally critical. For models like tall, narrow cylinders that have a small footprint and limited initial contact with the build plate, using a Brim can significantly improve bed adhesion.
Set the “Brim Width” to around 5–10 mm to create enough additional contact area. It’s recommended to set the “Brim-object gap” to 0, so the brim is tightly connected to the model base, maximizing its stabilizing effect.
Stabilizing Print Speed Using the “Minimum Layer Time” Mechanism
For the upper sections of tall, slender models, each layer typically has a very small cross-sectional area, which means the printing time per layer is extremely short. Rapid nozzle movements in these cases can introduce vibrations and increase the risk of the model collapsing. Fortunately, Bambu Studio includes a helpful slowdown feature within its cooling settings that can effectively mitigate this issue.
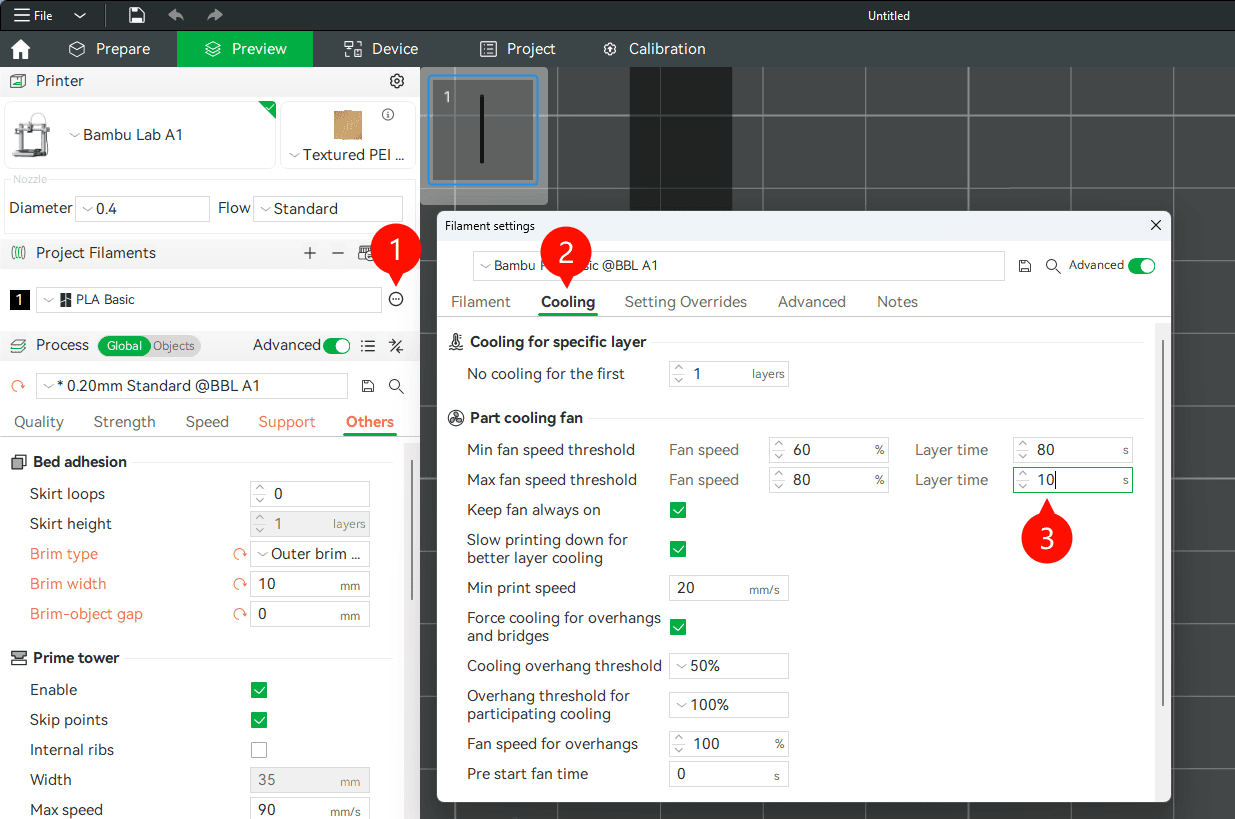
In the “Filament Settings”, increase the “Layer Time” under “Max Fan Speed Threshold”, for example to 10 seconds, and enable the option “Slow printing down for better layer cooling”. When slicing, if the estimated print time for a given layer is shorter than the set minimum layer time, the printer will automatically slow down the print speed for that layer (down to the value set in Minimum Print Speed, e.g., 20 mm/s). This extends the actual print time and helps reduce nozzle-induced shaking, resulting in a more stable print.
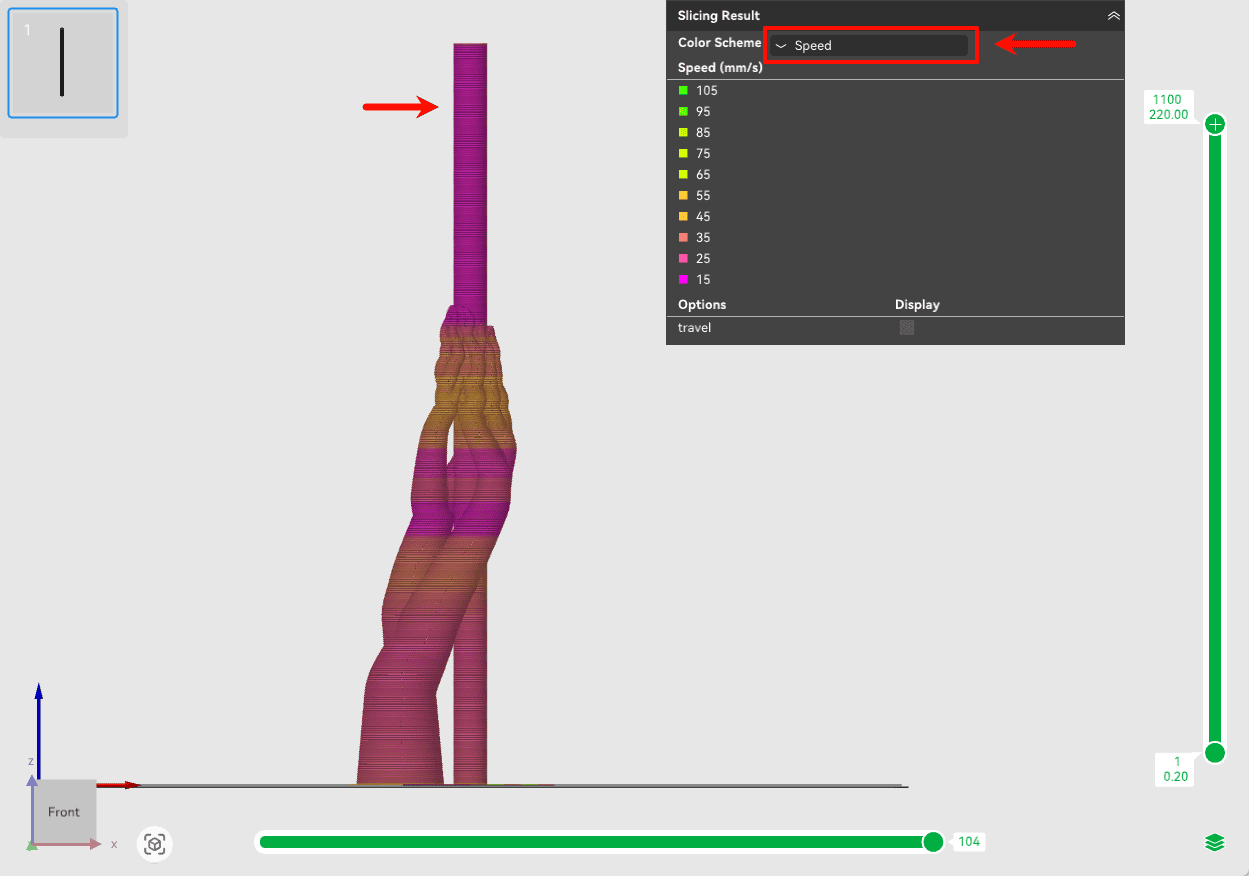
After slicing, switch the Color Scheme in the Preview view to “Speed”. You’ll notice that the upper part of the model—where each layer has a shorter print time—shows significantly reduced print speeds. This indicates that the minimum layer time mechanism is actively working as intended.
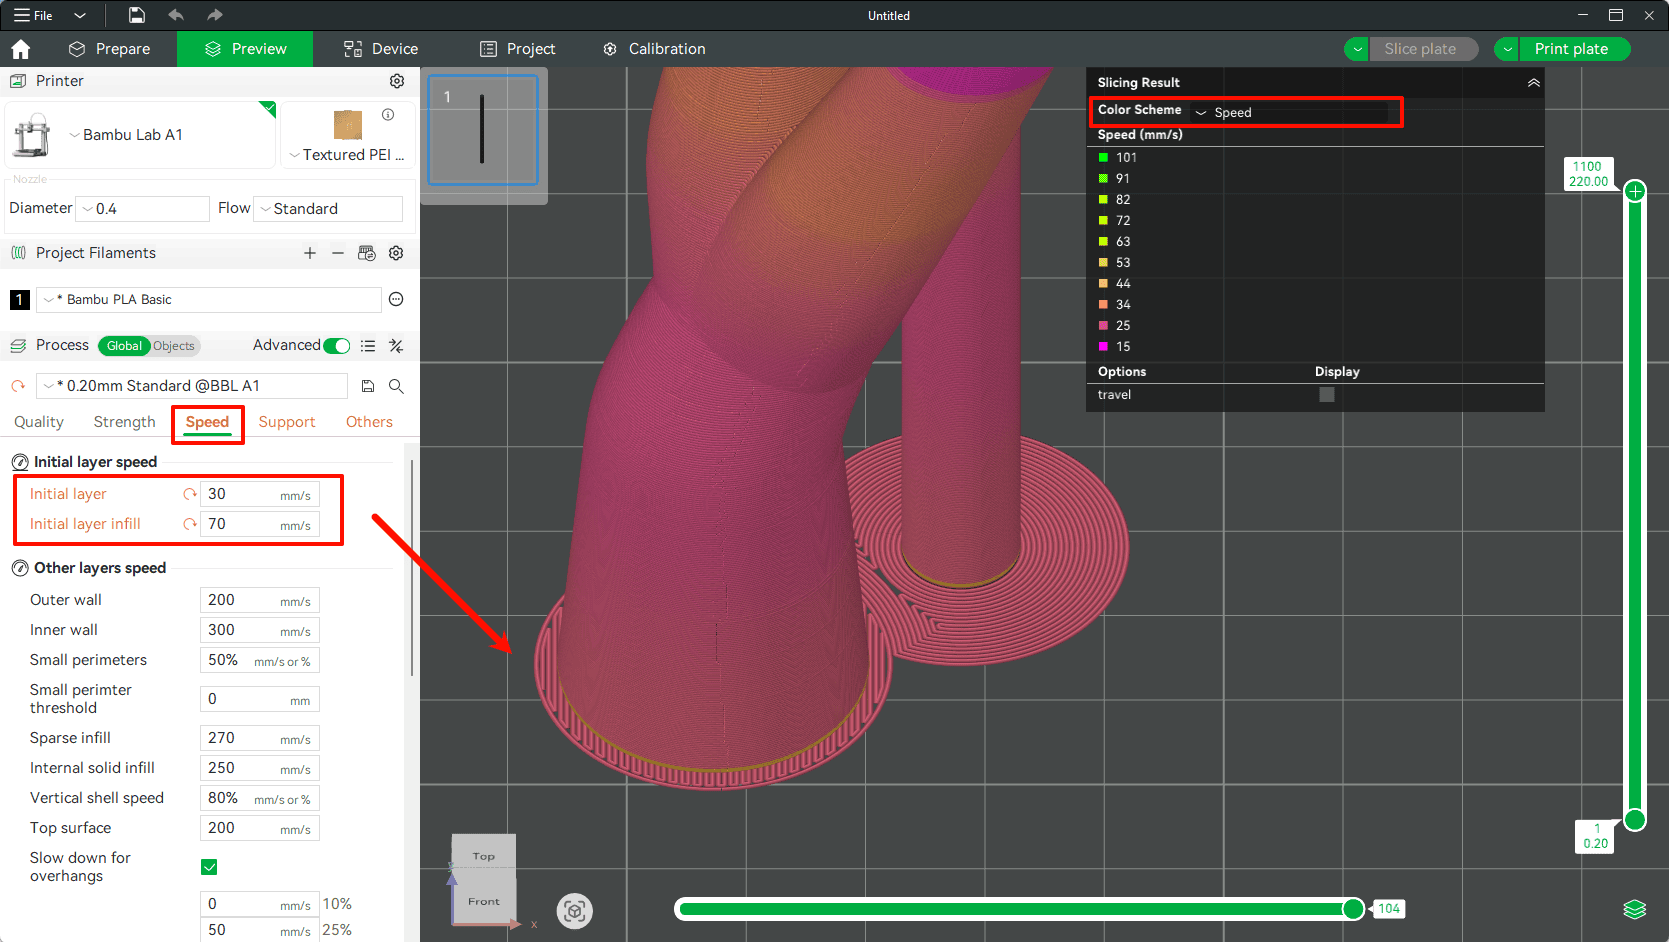
Optimizing First Layer Print Speed
The first layer is the foundation of a successful print. Slowing down the first layer print speed helps ensure that the molten filament bonds well with the build plate, providing a strong and stable base for the rest of the print.
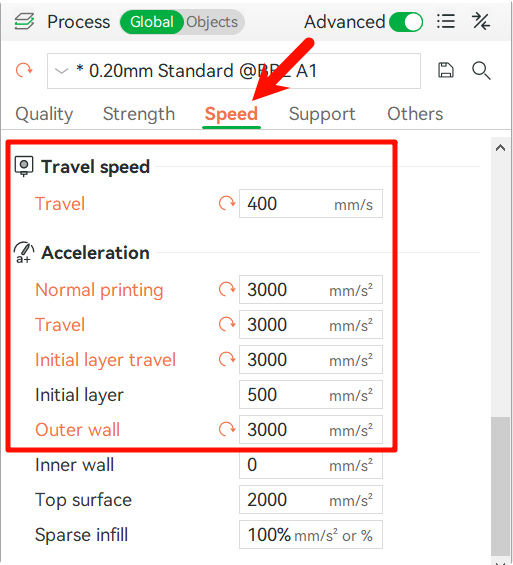
Reducing Print Acceleration
To minimize abrupt movements of the print head and heated bed during printing, optimizing acceleration and travel speed is critical for ensuring smooth operation. Excessive acceleration can generate excessive inertial forces as the heated bed moves back and forth, increasing the risk of model wobbling or collapsing.
In Bambu Studio’s “Speed” settings, locate the “Travel Speed” and “Acceleration” options. It is recommended to reduce the travel speed to below 400 mm/s and the acceleration to below 3000 mm/s². These settings effectively slow down the rapid movements of the print head and heated bed, reducing the impact on the model and thereby improving the print success rate for tall or top-heavy models.
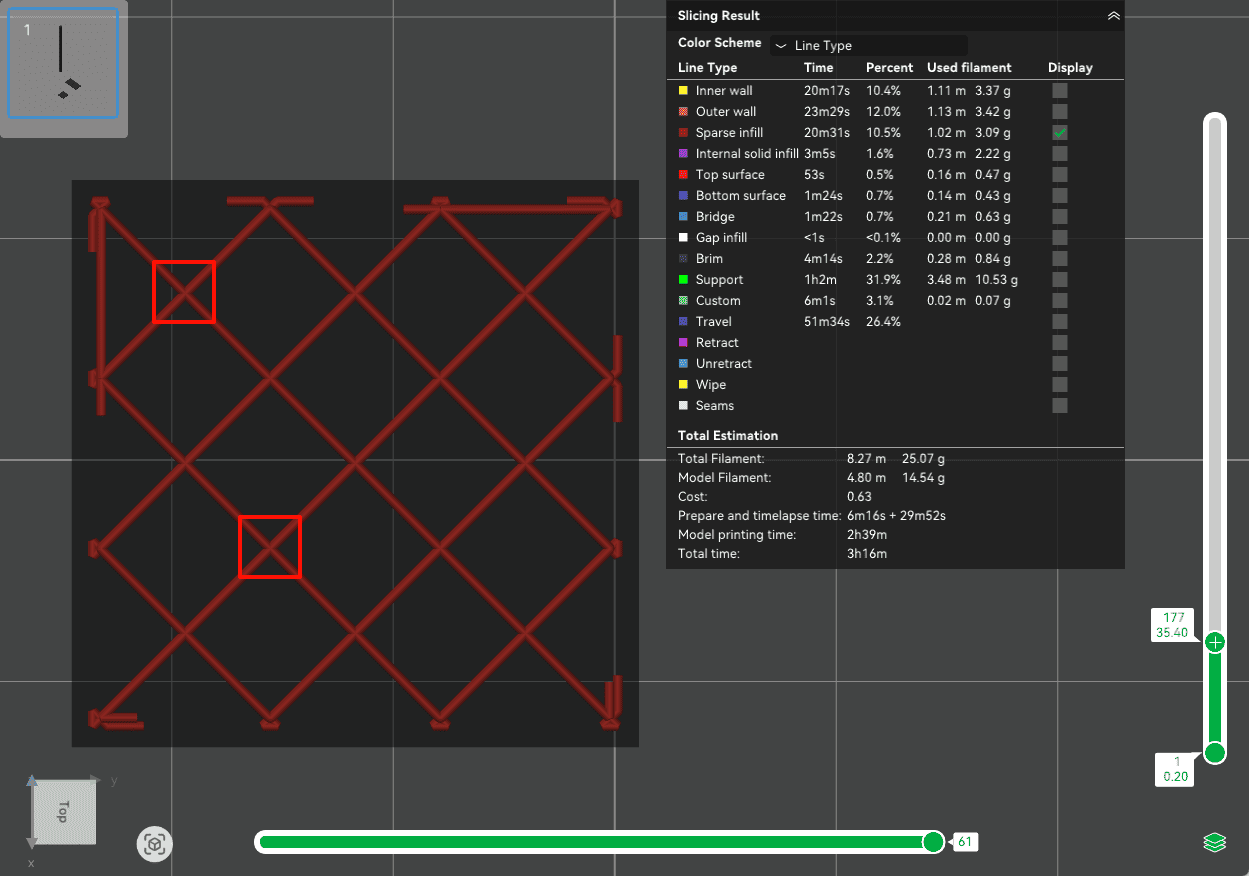
Avoiding Internal Dragging Risks
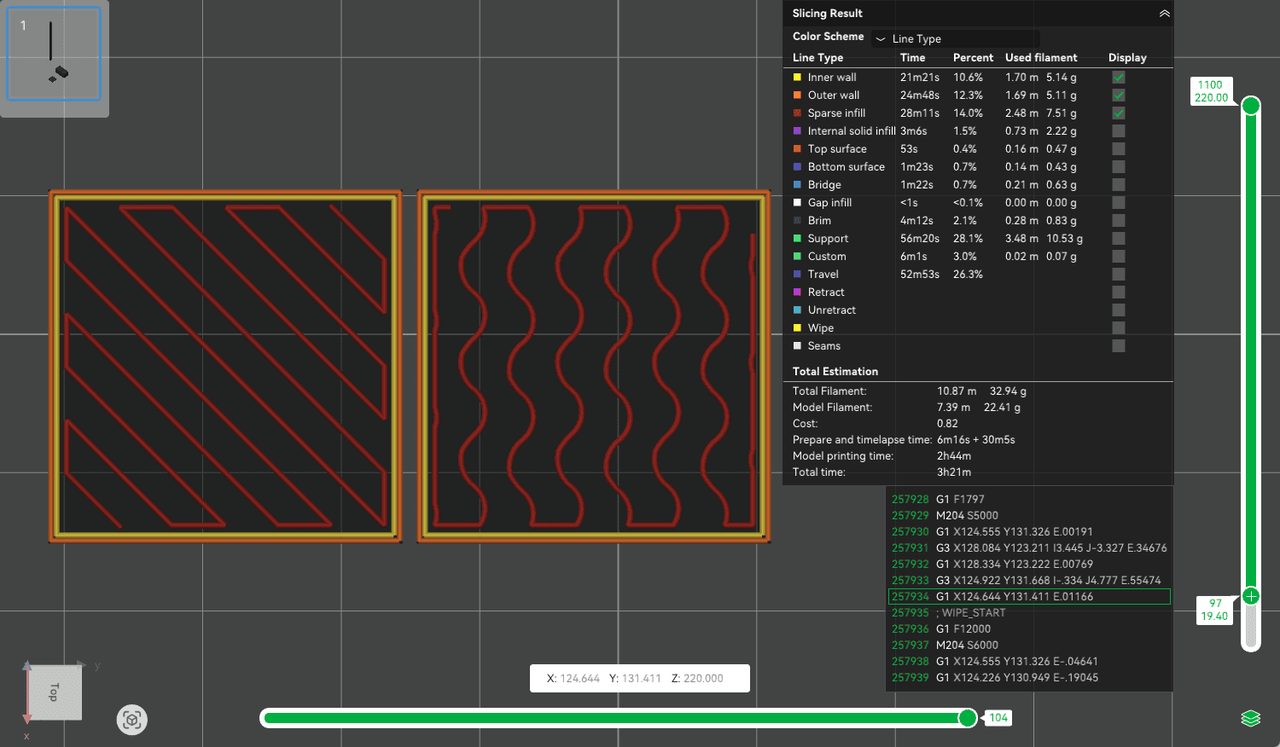
With certain infill patterns, such as “Grid”—the nozzle may cross over previously printed lines on the same layer. If the structure hasn’t fully stabilized, these minor internal drags at the intersection points can accumulate and cause wobbling, or even lead to the model collapsing.
It’s recommended to use infill patterns with minimal or no crossovers, such as Aligned Rectilinear or Gyroid. These patterns significantly reduce the risk of the nozzle colliding with partially solidified areas on the same layer, helping to maintain model stability during printing.
Now that you’ve mastered the techniques for preventing model collapse, go ahead and confidently tackle those challenging prints that once gave you trouble! Careful observation and fine-tuning during real-world printing are key to improving your success rate.
❗❗❗Pre-Print Considerations:
1. Thoroughly clean the print bed surface before printing to remove any grease, dust, or residues, as these can significantly weaken first-layer adhesion. For Bambu Lab’s textured PEI bed, it is recommended to clean using dish soap and a sponge cloth, then rinse using clean water and allow it to dry completely. After cleaning, avoid touching the print bed surface directly with your hands. You can refer to the Bambu Lab wiki for a cleaning tutorial: Bambu Lab Textured PEI Plate Cleaning Guide.
2. If using special engineering materials or printing models prone to warping, and the print bed is clean and in good condition, apply a thin layer of adhesion aid, such as a solid glue stick or 3D printer-specific adhesive, to the print area to improve first-layer adhesion.