How to color your 3D models in Bambu Studio
If you’ve purchased the Bambu Lab A1 along with the AMS lite accessory, you have the exciting ability to print your 3D models in up to four different colors at the same time! This opens up a new, creative way to make your 3D prints look awesome!
To begin, you’ll need to import your 3D model into Bambu Studio, the slicer software used to prepare prints for Bambu Lab printers. There are two easy ways to do this:
1. Download from MakerWorld – If the model you wish to print is available on MakerWorld, you can open it directly in Bambu Studio with just a few clicks.
2. Drag and Drop – If you already have the model saved on your computer, simply drag and drop it into Bambu Studio to start working with it.
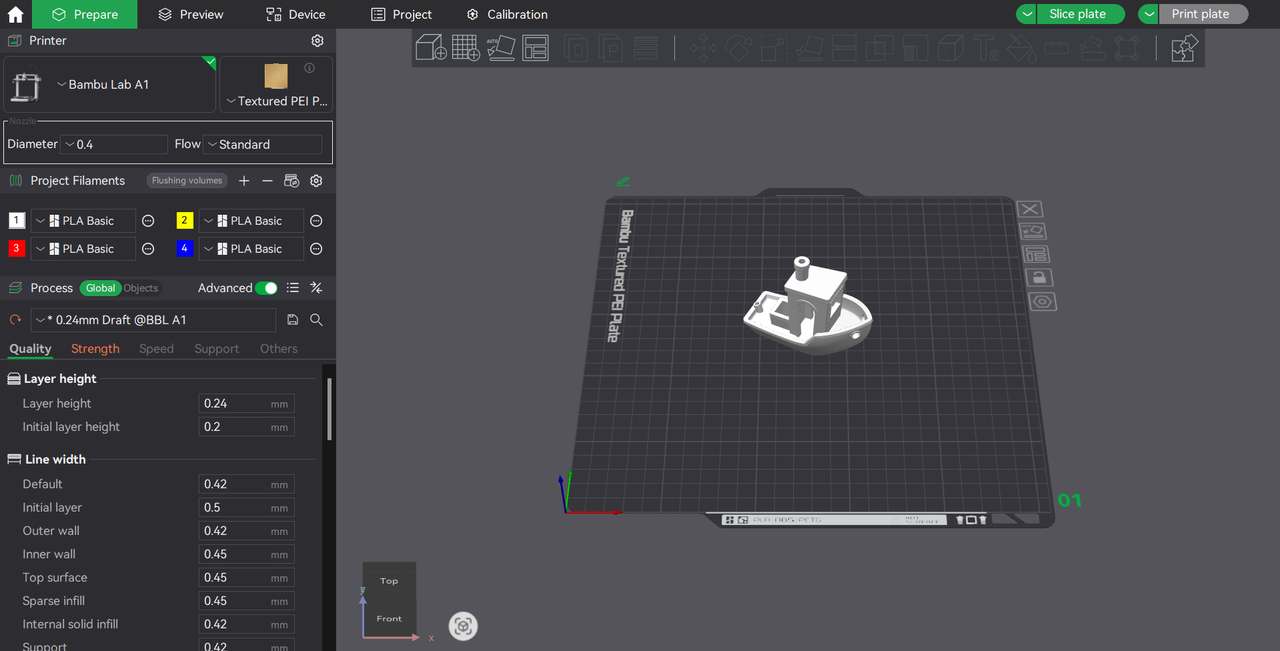
After importing your 3D model into Bambu Studio, you can start preparing it for multi-color printing using the Color Painting tool. This tool allows you to assign different colors to specific parts of your model easily.
You can access the Color Painting tool in two ways:
- Click the paint bucket icon in the toolbar (as shown in the image below).
- Press the “N” key on your keyboard for a quick shortcut.

Now that you’ve accessed the Color Painting tool, you can start customizing your model with different colors.
First, set up the colors for each filament to match the ones loaded in your AMS lite. Then, choose a painting tool to begin applying colors to different parts of your model.
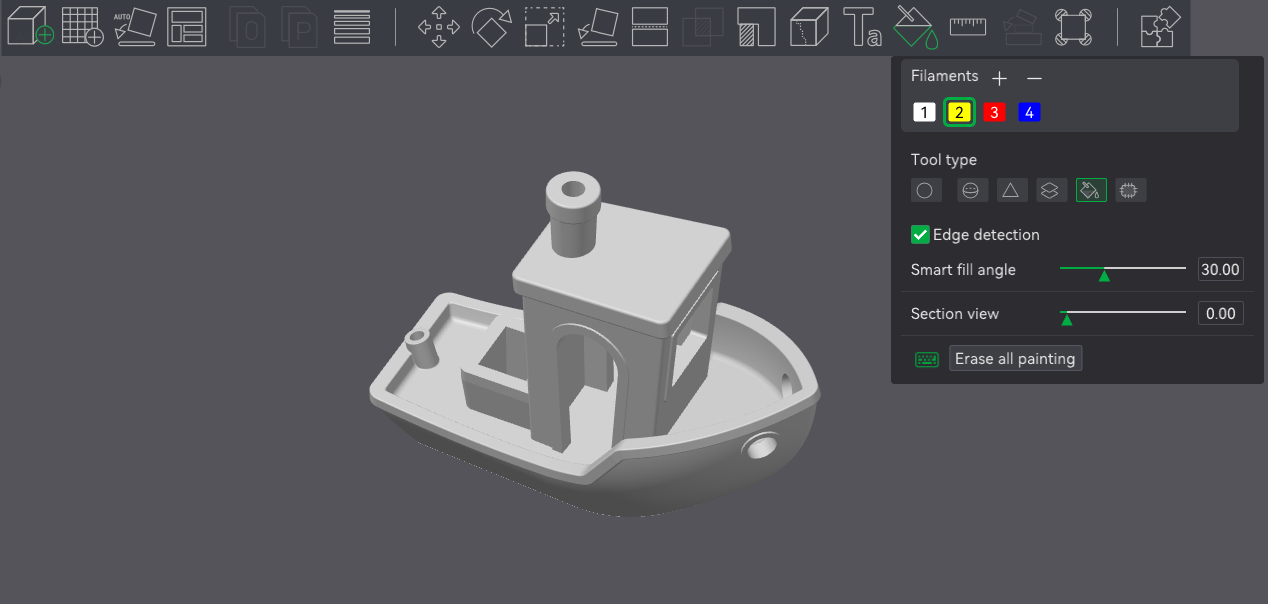
Which painting tools you use will depend on the shape and details of your model. For quick and precise coloring, the Fill tool is a great option.
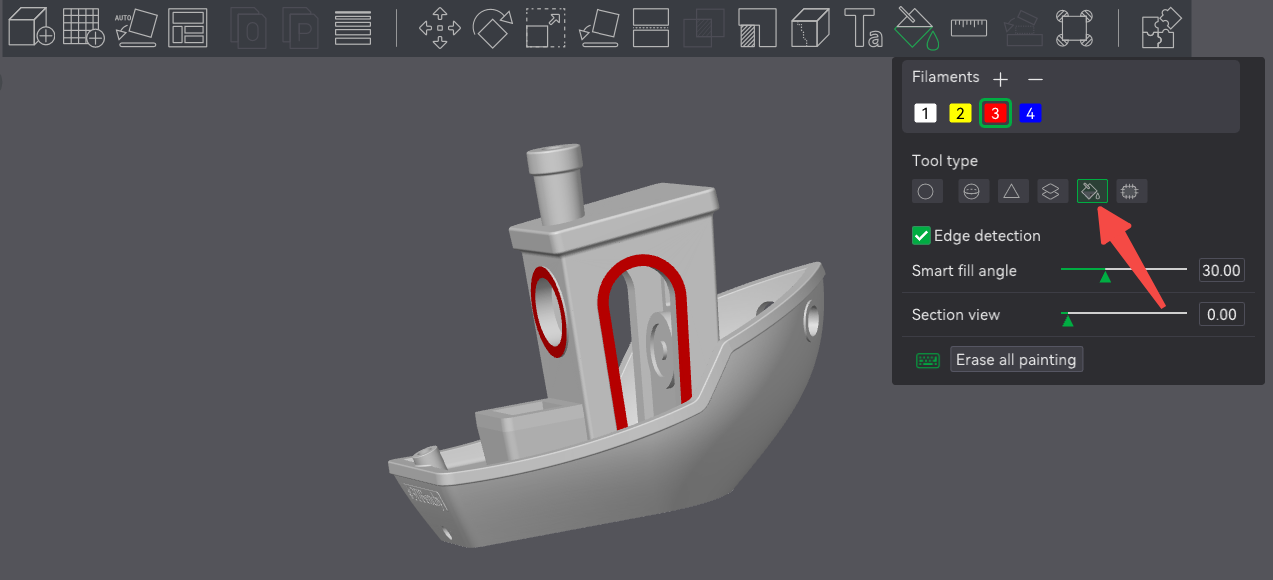
With just one click, the Fill tool allows you to color entire sections of your model. It automatically detects sharp edges, ensuring clean color separation. If needed, you can fine-tune this detection using the Smart Fill Angle slider, which controls how much geometry is colored based on the angles between the faces of the model.
If the Fill tool isn’t the best fit for your model, another great option is the Circle tool. This tool allows you to freely draw on the model, applying color exactly where you need it.
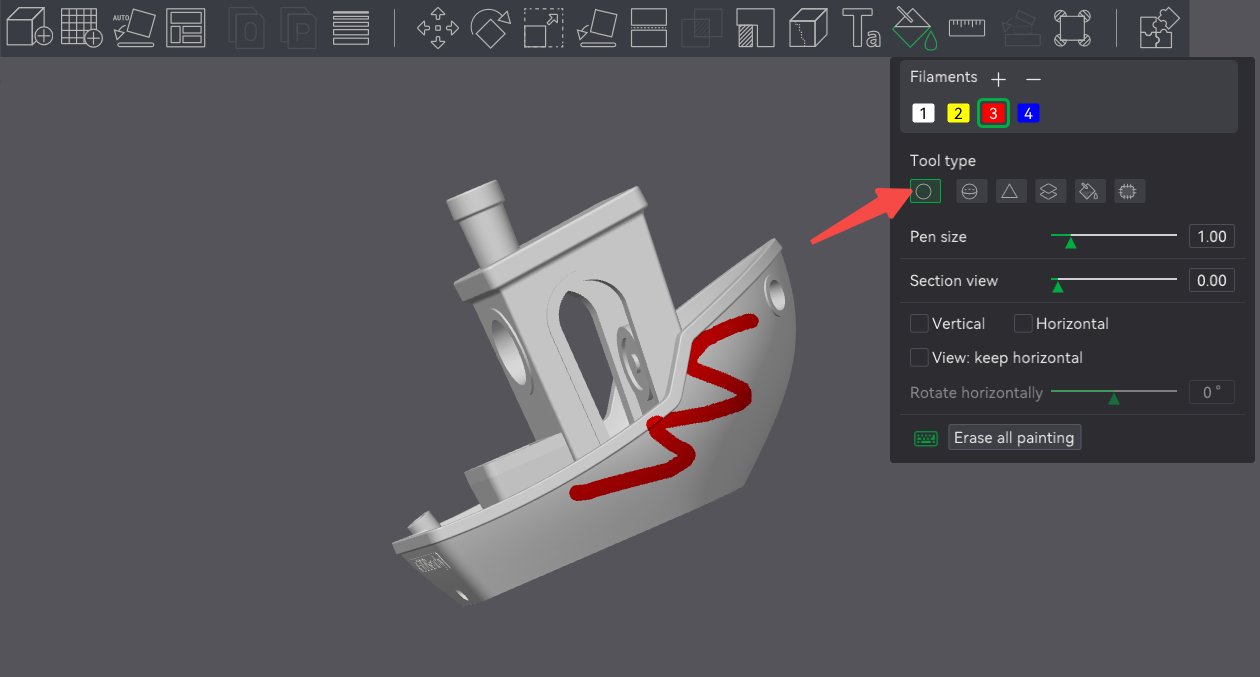
With the Pen size slider, you can adjust the brush size for better precision. Use a smaller size for fine details or increase it to quickly cover larger sections of your model. This flexibility makes the Circle tool especially useful for models with intricate details or areas that need more manual control over color placement.
Take some time to explore the other color painting tools available in Bambu Studio. Experimenting with them will help you understand how each one works and when to use them for the best results. The more familiar you become with these tools, the faster and more efficiently you’ll be able to prepare your multi-color 3D prints.
You can learn more about how to color 3D models in Bambu Studio from the videos below: