How to print from SD card
Printing a sliced model from the Micro SD
In certain situations, when there is no internet connectivity, you might wish to print using the Micro SD card in the printer.
Start by preparing the SD card for ejection using the Eject button in the A1 menu:
- Navigate to Settings → SD Card.
- From the SD Card menu, select Eject.
- Confirm the selection with Eject.
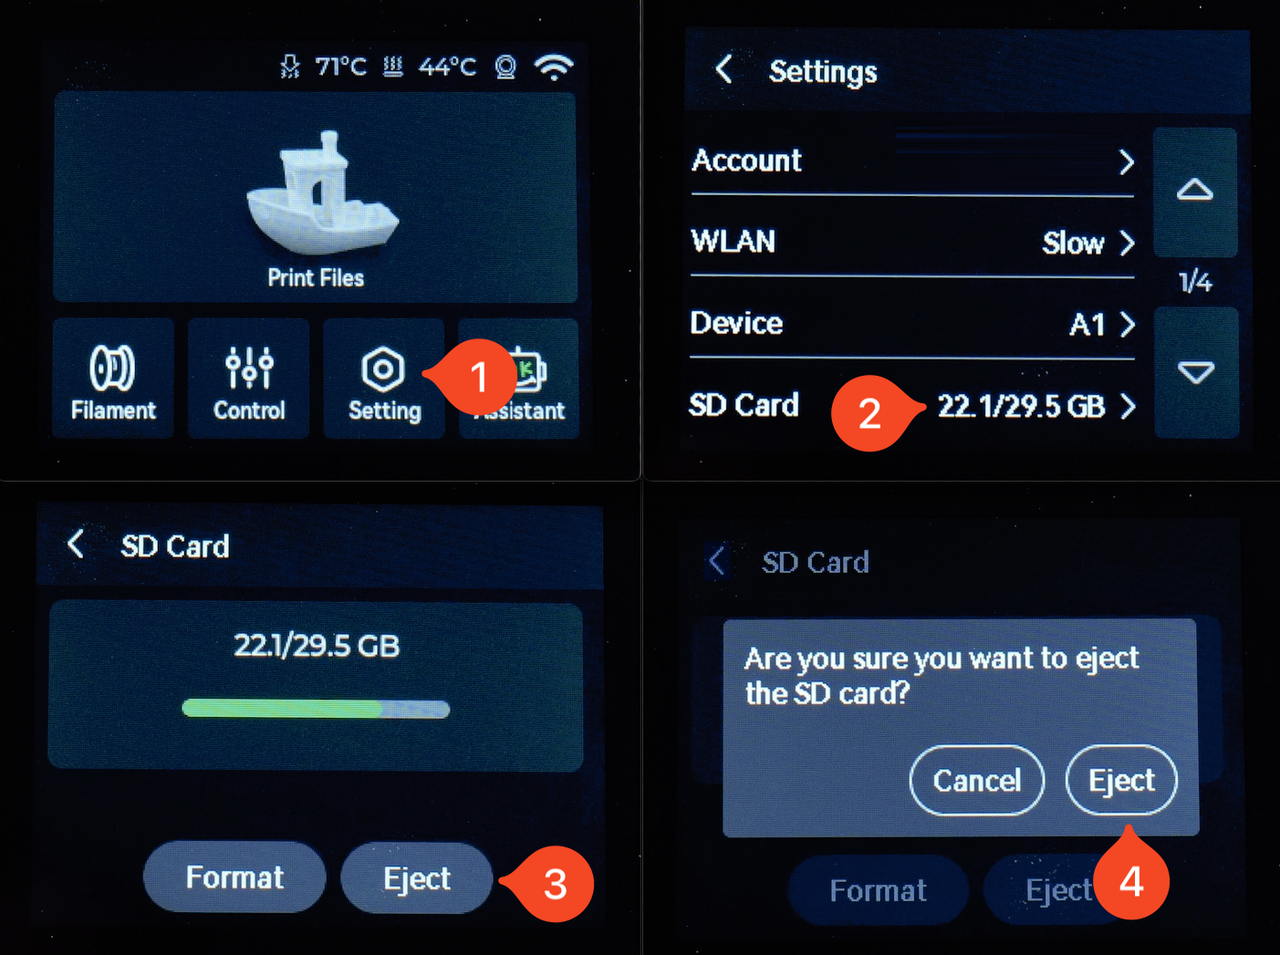
The micro SD card can now be removed from the printer. Simply press on the Micro SD card, then release it to eject it from the printer.
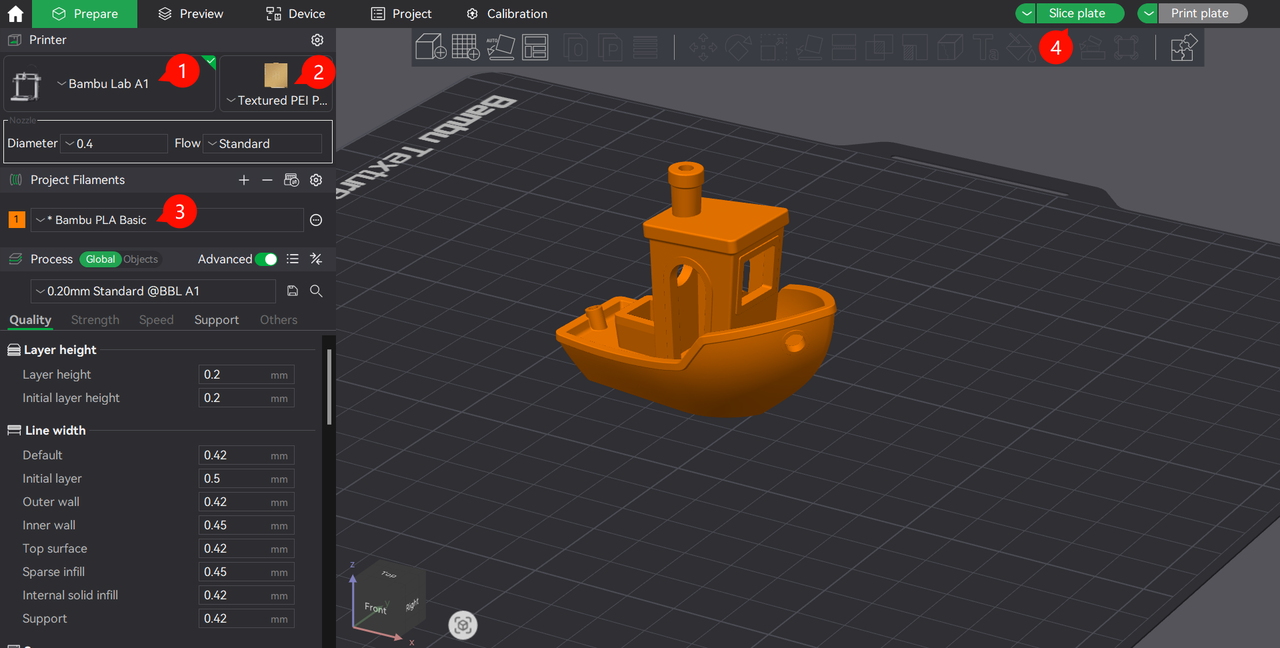
The next step is to slice the 3D Model using Bambu Studio. On your computer, open Bambu Studio and import the model you wish to print, then follow these steps:
- Select the correct Printer Type.
- Select the correct Plate Type.
- Select the type of filament you wish to print with.
- Click on Slice Plate.
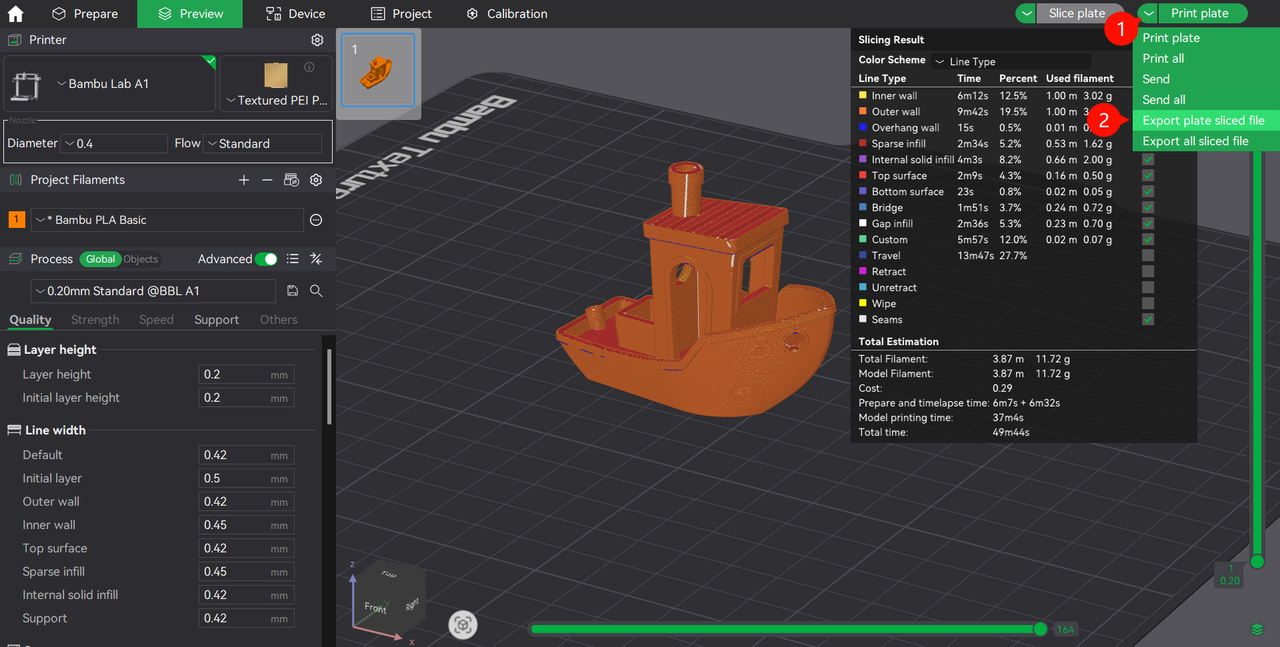
Once the file has been sliced, the model preview will be shown.
- Select the small arrow next to Print Plate.
- Click on the Export plate sliced file option.
- Click again on the main Export plate sliced file option.
A prompt will show up, allowing you to select where to save the file. When the Save prompt appears on your computer:
- Set a file name for your model.
- Select the location where you wish to save it. In this case, it is the Micro SD card from the printer.
- Click on Save.

Important. Do not save it in any of the folders seen on the Micro SD card, save the file in the root folder of the SD card. Next, remove the Micro SD card from your computer, and insert it into the printer’s Micro SD card slot.
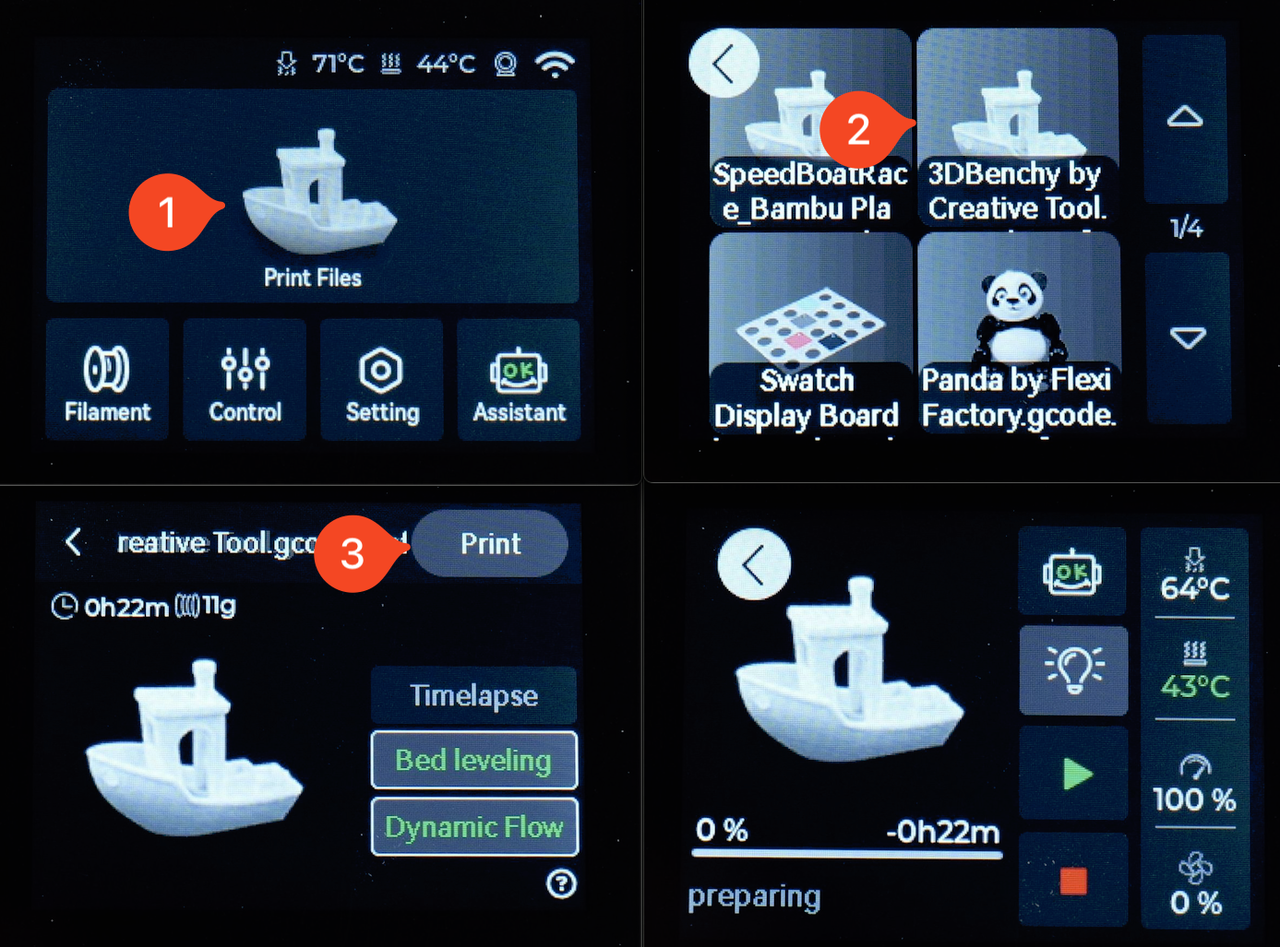
With the file sliced and copied onto the Micro SD card of the printer, you can start printing.
To do so:
- Tap on Print Files.
- Select the file you have previously saved.
- Confirm all the calibration features you wish to use (it’s recommended to keep the defaults).
- Click Print.
Printing from the Micro SD card using Wi-Fi Transfer
If you wish to avoid needing to handle the Micro SD card, you can also directly send the prints to the A1 using Wi-Fi, even if you don’t have an internet connection. This transfer uses the local Wi-Fi network for transferring the file between your computer and the printer.
On your computer, open Bambu Studio and import the model you wish to print, then follow these steps:
- Select the correct Printer Type.
- Select the correct Plate Type.
- Select the type of filament you wish to print with.
- Click on Slice Plate.

Once the file has been sliced, the model preview will be shown.
- Select the small arrow next to the Print Plate.
- Click on the Send option.
- Click Send again.

Select the printer you want to send to in the pop-up window and click Send.