Model Orientation, Support, Infill, and other general slicing settings
Model Orientation
When slicing models for your 3D printer, the orientation is crucial for achieving optimal print quality and minimizing the need for support material. Proper orientation can help reduce overhangs—areas that extend outward horizontally without underlying supporting layers—since large overhangs require support structures to print correctly. Orienting the model to minimize these overhangs not only reduces the amount of support needed but also saves time and material.
Sometimes, it can even make the difference between some post-processing required and no post-processing. Surfaces in direct contact with support material can have rougher finishes, so positioning the model to avoid supports on visible or functional surfaces improves the final appearance. Furthermore, the orientation can influence the part’s strength by aligning layers in a way that best resists the specific stresses the part will encounter in use.
We will use this Plane model from MakerWorld.
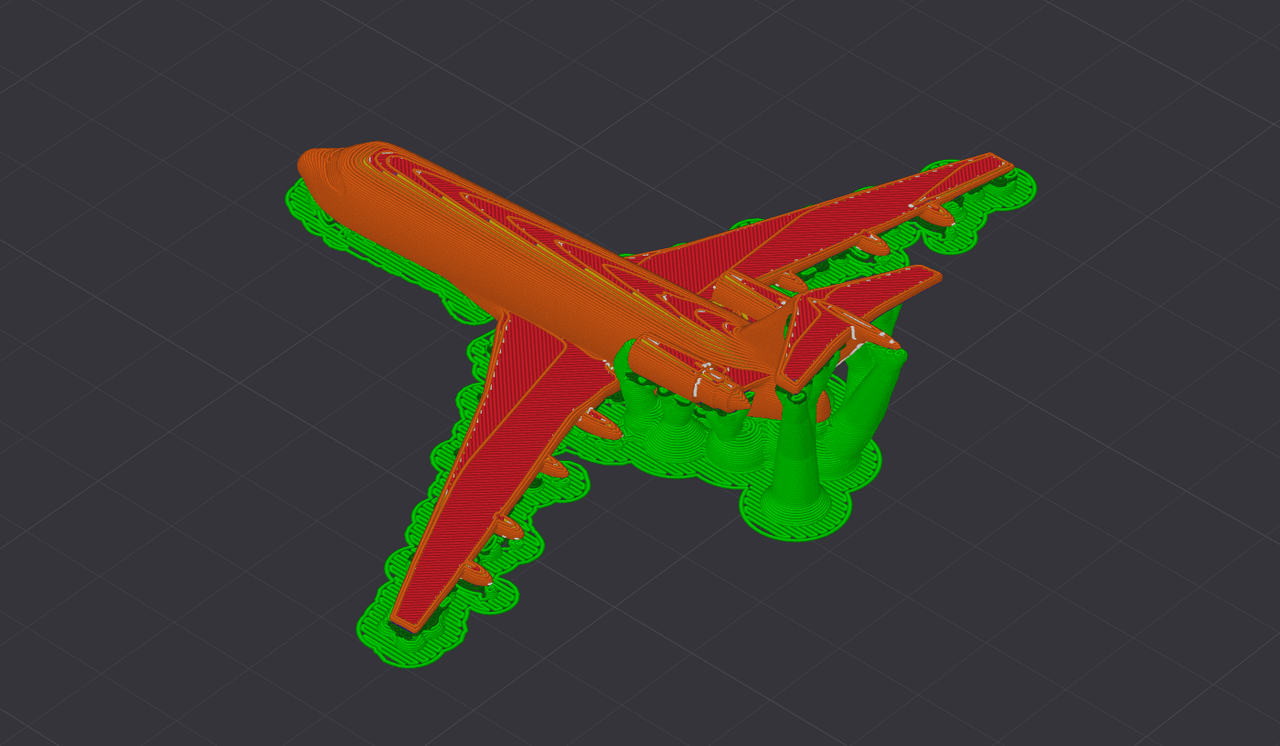
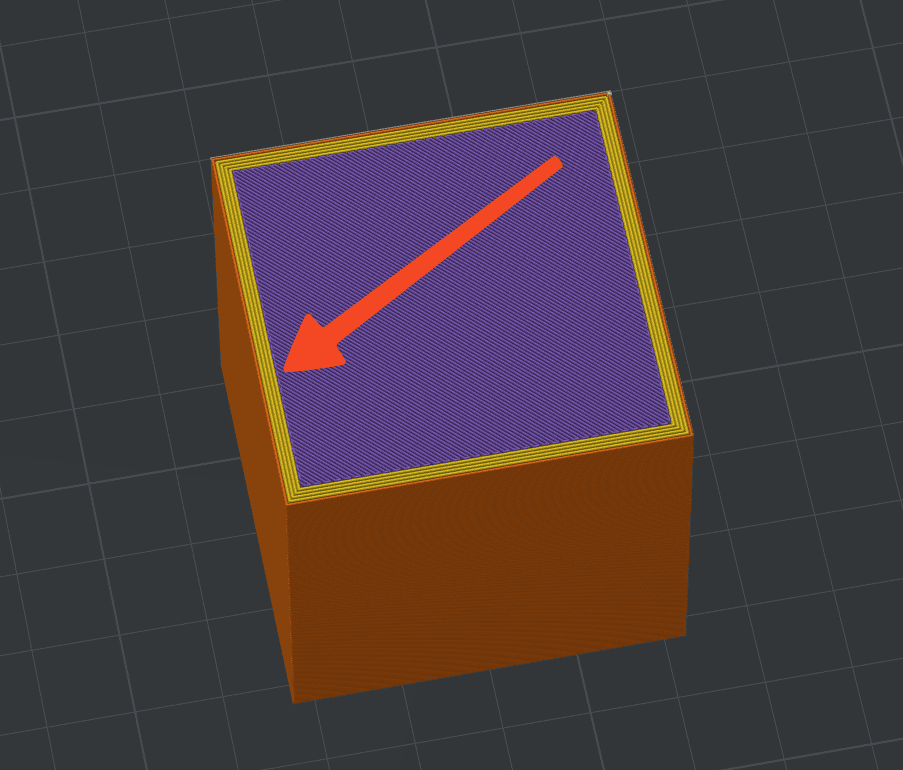
In the image below, the model is oriented in a way that generates inconsistent print quality, with layer lines and increased support requirements under the model. Due to the model orientation, support material could scar the model and make removal harder.
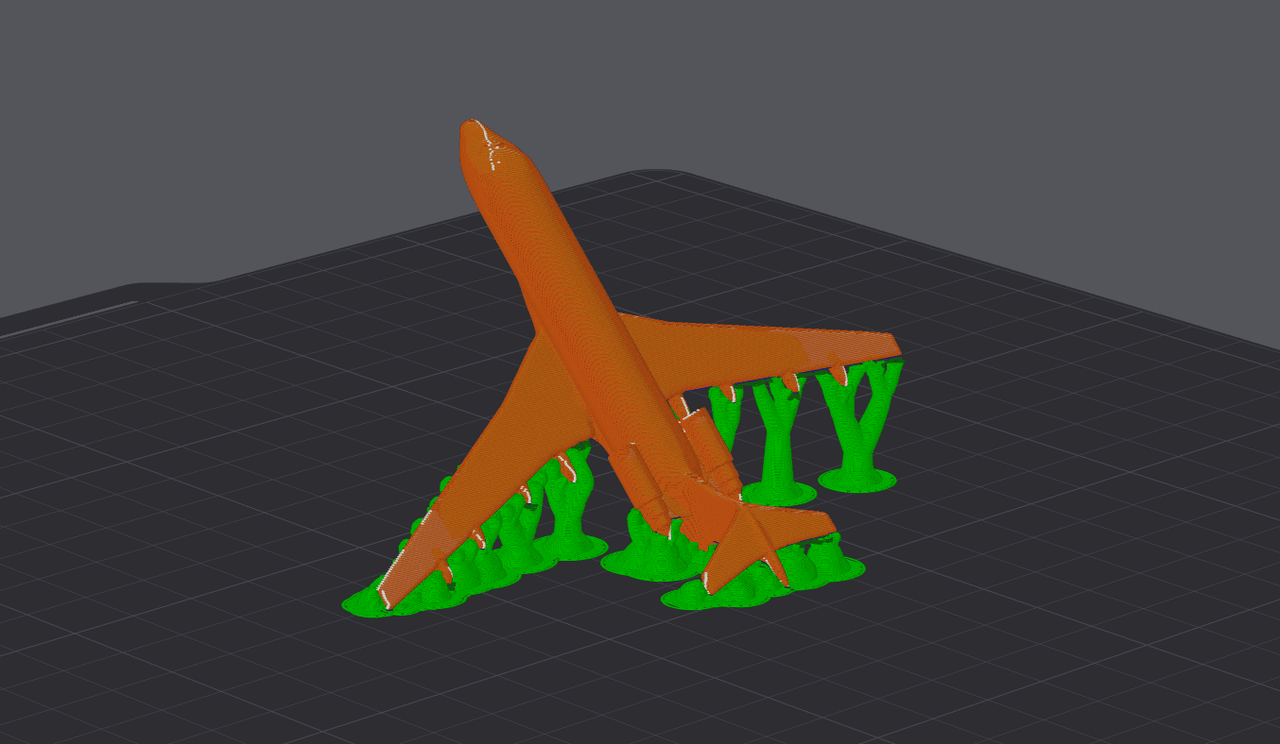
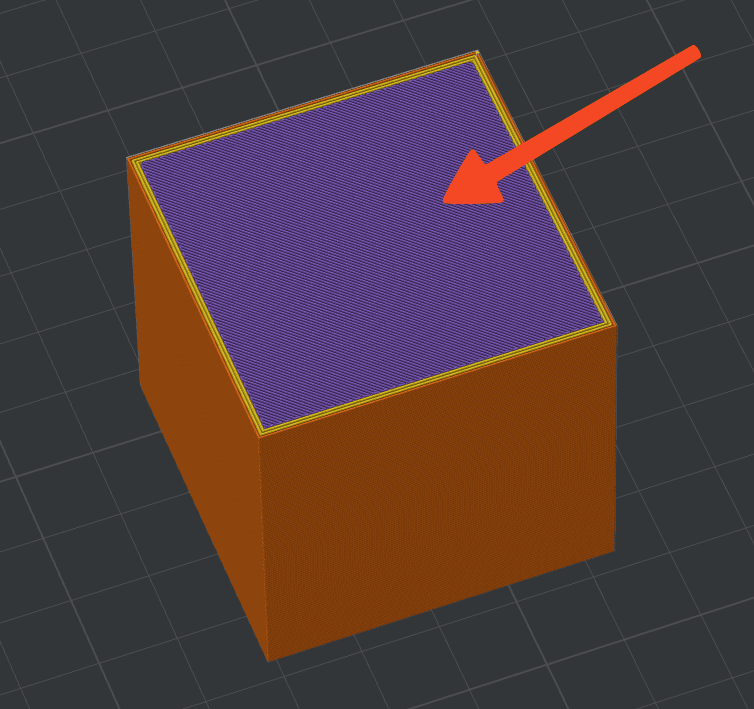
When the model is correctly oriented, the support material is minimized, and the print quality increases significantly. Support is applied to a small section of the model, making it easier to remove, and the resolution of the print will be much higher.
Using Support Material
In some situations, it is not possible to orient the model in such a way that removes or minimizes the support usage. When that’s the case, it is recommended to enable support generation in Bambu Studio.
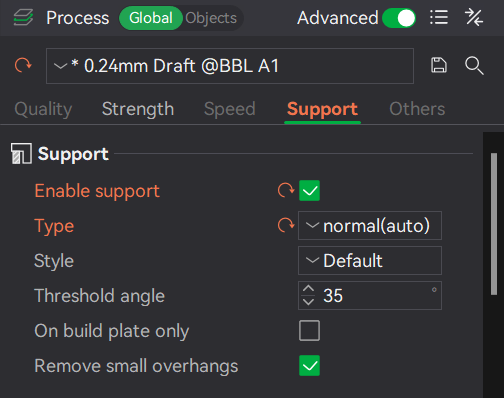
With this feature enabled, Bambu Studio will detect all overhangs of the model and generate support for them.
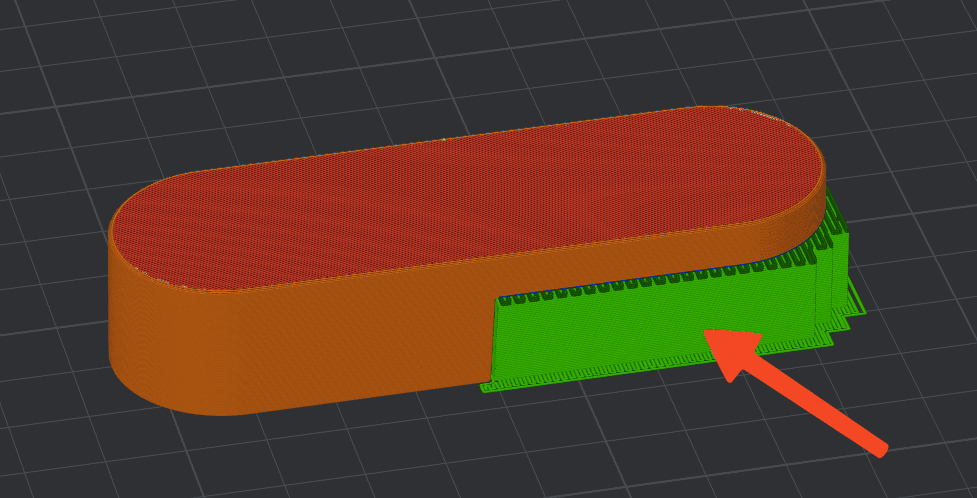
One of the most useful features for support in Bambu Studio is Support Painting. With this option, you can paint the sections on a model where you wish support to be generated. Careful support painting is another way to minimize the filament used for support.
It is recommended to paint support material for sections that would otherwise be printed in mid-air or for overhangs that are greater than 45-50 degrees.
For more information about print orientation, supports, and adjusting their position, watch the following videos:
Wall Loop number
In Bambu Studio, you have access to the Wall Loops option (available under the Strength tab), which refers to the outermost perimeters of each printed layer, and forms most of the outer shell of the model. The number of wall loops can be adjusted independently of infill density, allowing you to control how thick the outer walls of a print will be. A higher number of wall lines means more layers of material are stacked around the perimeter of the part, forming a thicker, more robust shell.
Increasing the number of wall loops can significantly enhance the strength of a 3D-printed part, often more effectively than just increasing the infill density. When a printed part is subjected to stress—such as bending, tension, or compression—the outer walls take on most of that load, as they form a continuous, solid structure. Each additional wall layer improves the part’s ability to absorb and distribute forces, reducing the risk of failure. This distribution effect is beneficial for parts expected to withstand substantial mechanical loads or impacts.
A good “rule of thumb” for general prints that don’t require a lot of strength is to use 2-3 wall loops, which add up to around 1.2mm in wall thickness when printed with a 0.4mm nozzle.
Sparse Infill
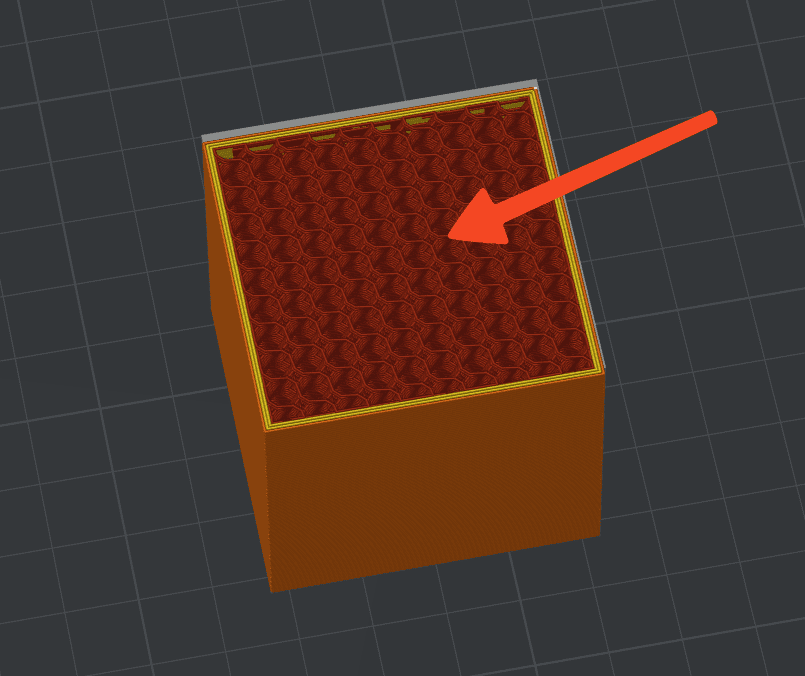
The SparseInfill option (available under the Strength tab) represents the internal structure that fills the space inside a printed part, providing support and strength without making the part solid. The Infill can be printed in various patterns, which can vary depending on the desired balance between strength, weight, and material use. Common infill patterns include grid (a simple, cross-hatched structure), honeycomb (hexagonal cells resembling a beehive), gyroid (a continuous, wave-like structure), and triangle (triangular cells).

Each pattern has unique properties: for example, honeycomb and gyroid infill provide good strength-to-weight ratios, while grid and triangle infill offer straightforward structural support with increased speed.
Bambu Studio also implemented the Cross Hatch infill, which combines grid and gyroid infill for higher print speed while also contributing to the strength of the printed model.
The infill helps reinforce the part by distributing load across the internal volume, which increases the part’s ability to withstand compression, tension, and bending forces. By adjusting infill density and pattern, users can control a part’s rigidity, with higher densities adding more strength at the cost of additional material and print time.
Generally, a 15%-20% infill ratio is recommended for general models that don’t require a lot of strength. Increasing the infill to 35%-45% and adding an additional 1-2 extra wall loops can help increase the stiffness of the part.
Top/Bottom Shells
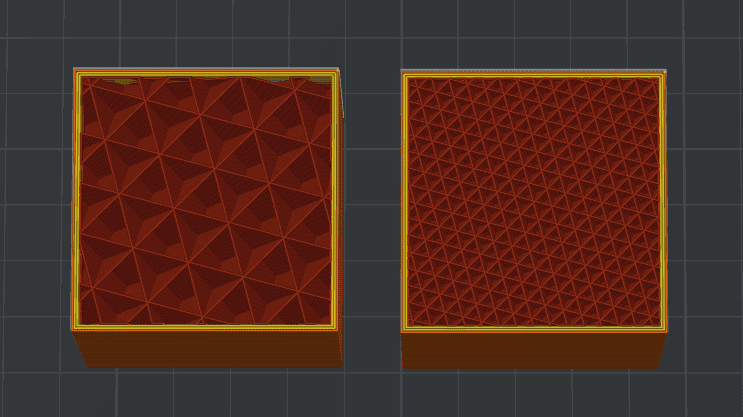
The Top/Bottom Shells (available under the Strength tab) are the solid outer layers that cap the printed part on its top and bottom surfaces. Together with the wall loops, the top and bottom shells create the entire outer shell of a part. The bottom shell provides a strong foundation, ensuring good adhesion to the print bed, while the top shell seals the infill, distributing load more evenly across the surface and preventing collapse under pressure.
Increasing the number of top and bottom shells can improve the part’s overall durability and resistance to forces that might cause warping or layer separation, while also increasing the quality of the top layer.
When deciding on the number of top and bottom shells, it is recommended to use a close-to or similar thickness as for the wall loops. As an example, if you are printing with 3 wall loops totaling around ~1.2mm, the number of top and bottom layers is recommended to be set at ~6, which totals around ~1.2mm, printed at a 0.2 layer height.
More information about strength settings for prints is available in the following Bambu Studio videos: