How to perform Manual Bed Tramming on X1C?
What is Bed Tramming?
Bed Tramming, also known as Manual Bed Leveling, refers to the process of manually adjusting the heatbed to ensure it is perfectly level and parallel to the printer’s nozzle.
A level bed is critical for achieving high-quality prints, as it ensures the first layer of filament adheres uniformly to the build surface. The X1C comes with an automatic bed leveling (ABL) system which can compensate for most of the inconsistencies in the bed leveling, and tramming is typically only needed if there are noticeable inaccuracies in the bed’s alignment, often due to shipping disturbances or maintenance tasks like bed replacement.
Performing the Bed Tramming procedure can help increase the accuracy of the first layer while also minimizing the automatic adjustments required for the printer to do during printing.
Prerequesites before starting the operation
Before starting the Bed Tramming procedure, it is important to prepare the printer for the operation.
Start by ensuring the tip of the nozzle is clean, free from any debris or filament. This can impact the accuracy of the procedure, while also making the operation slightly more difficult.
It is also recommended to remove the Textured PEI plate as the operation might be harder to do visually, due to its texture.
Next, you might need to adjust the bed leveling knobs located on the bottom of the heatbed. Start by visually inspecting them, to confirm if they are under the right tension, by comparing them to the image below.
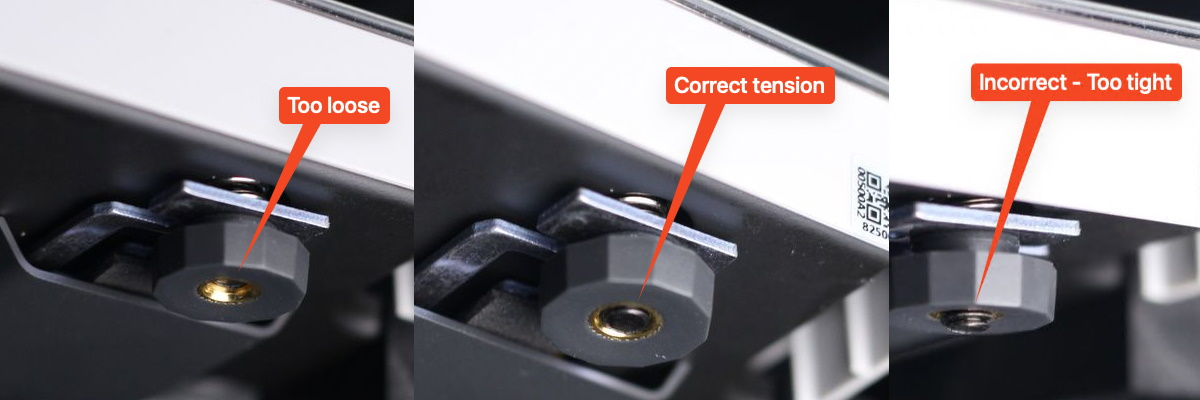
❗❗❗ Important: This image serves as a reference point, to ensure you can adjust them during the leveling operation, and they should only be adjusted if there are significant differences from the ideal position shown. If the Bed Leveling knobs are too loose, or too tight, you might not have enough room to adjust them.
How to perform Bed Tramming?
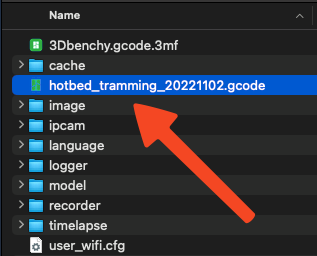
Start by downloading the Bed Tramming g-code file which contains the necessary automation.
With the printer turned off, remove the MicroSD card then simply transfer the file to the root of the MicroSD card.
Insert the Micro SD card to the printer, start the printer, then select the model just like you would do with a regular print, from the Micro SD card.
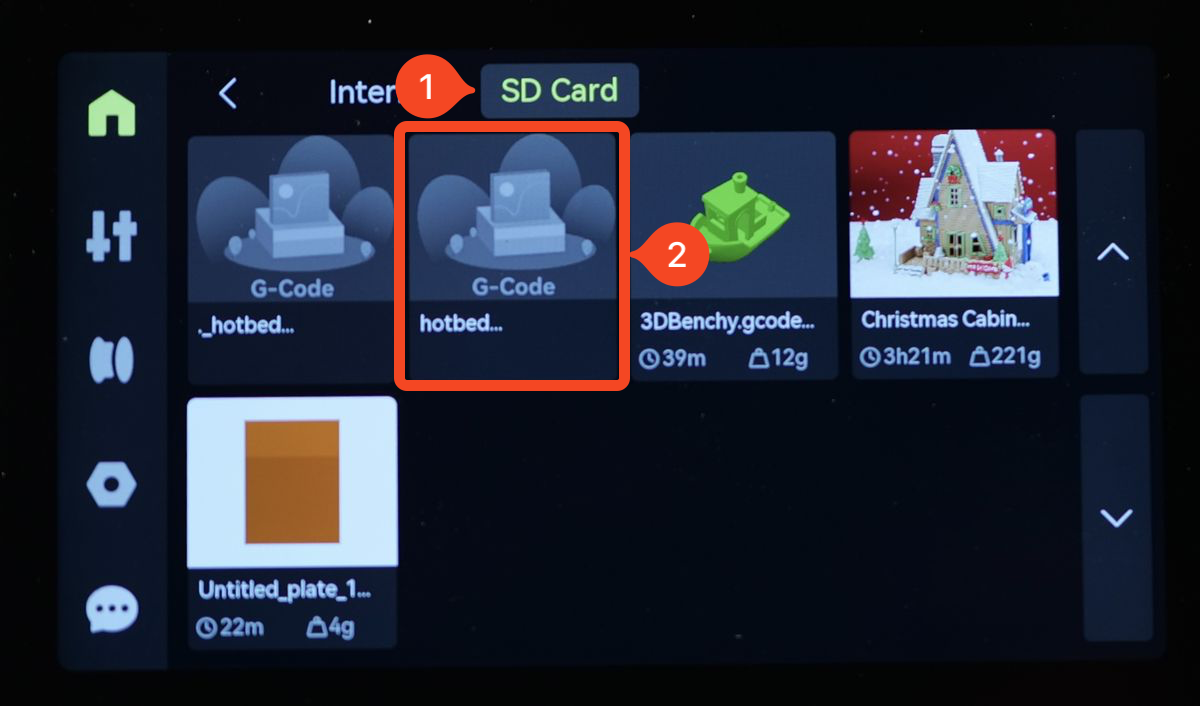
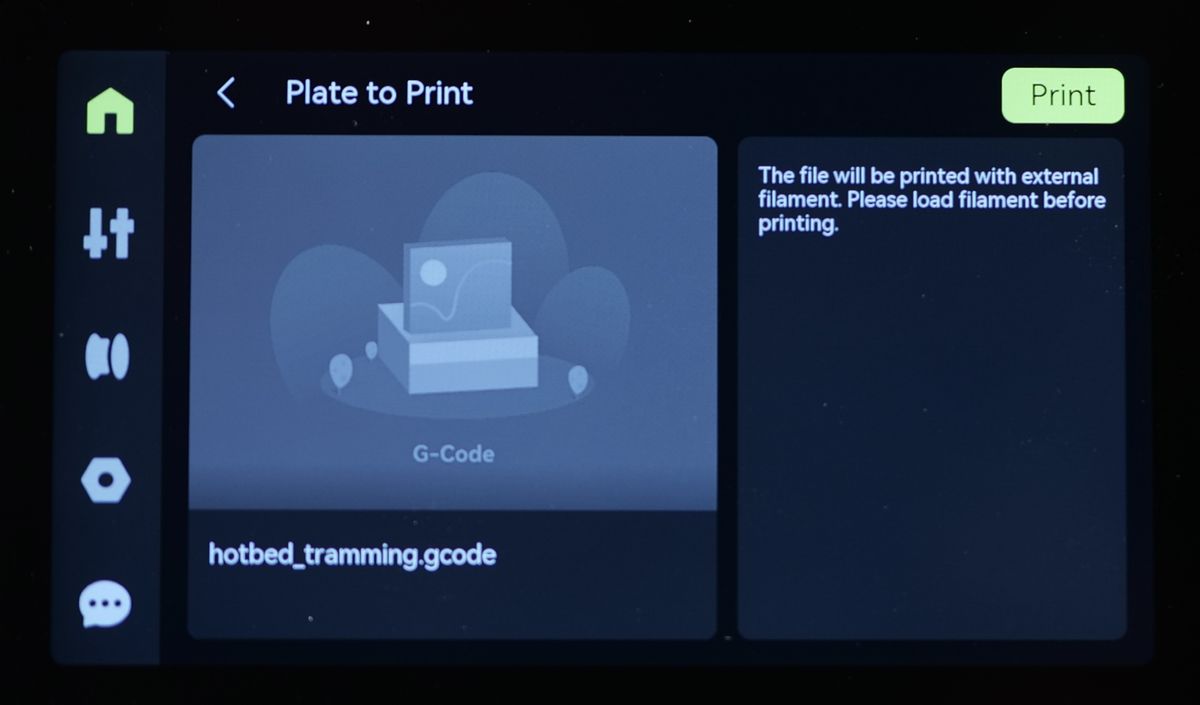
Don’t worry if there is no image displayed for the model. This is expected – simply tap Print to start the process.
The printer will home itself, then move over to the front left corner and wait for 30 seconds. When this happens, carefully turn the corresponding bed leveling knob until the tip of the nozzle barely touches the bed surface.
Rotating the heatbed knob clockwise raises the heatbed toward the nozzle, while rotating it counterclockwise lowers the heatbed away from the nozzle.
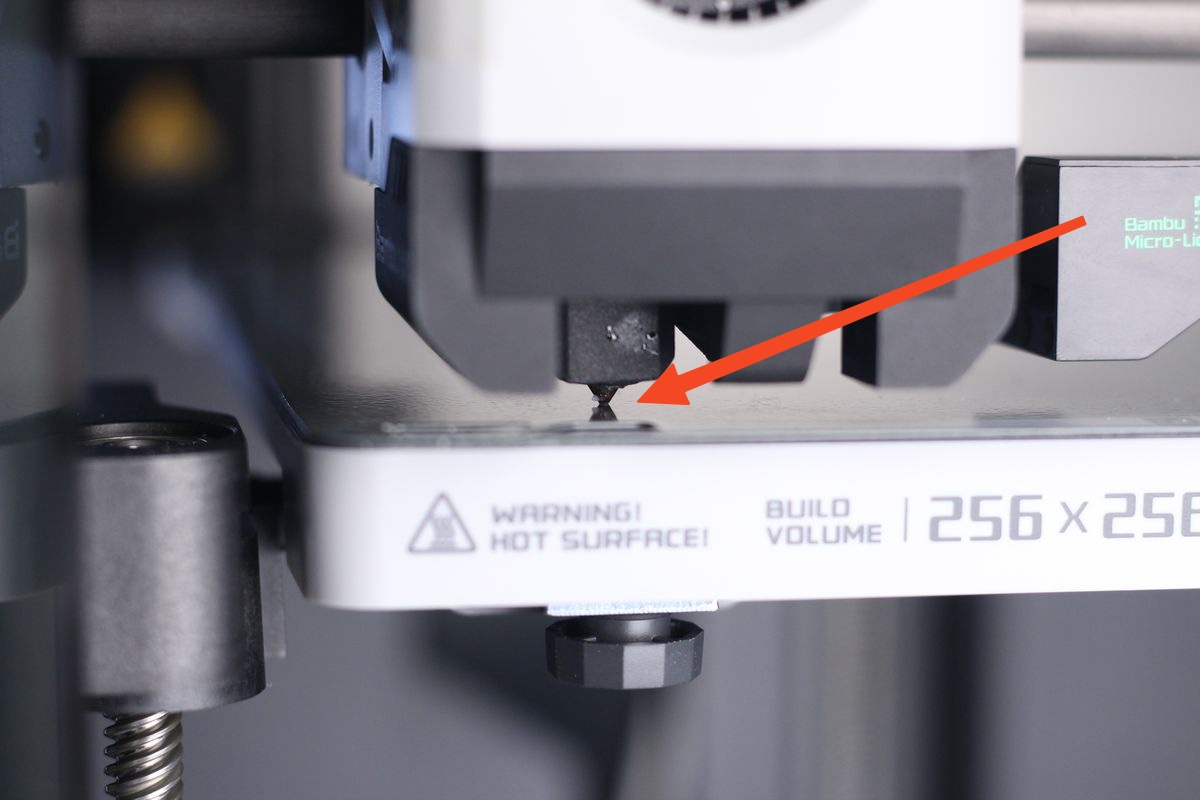
It can be much easier to determine the correct position of the nozzle, if there is a light behind the toolhead.
Don’t worry about getting this perfect the first time, you will have the chance to fine tune it. Once first leveling is done, the process will be repeated two more times, with 15-second pauses, to allow you to fine-tune the adjustment and double-check the distance between the nozzle and the bed.
After 30 seconds, the nozzle will move over the back bed leveling knob, then on the front right. Repeat the procedure until the nozzle barely touches the bed on all three points.
Complete the operation
Now that the heatbed is physically trammed, you can complete the operation by starting the automated bed leveling process. Navigate to the Print Calibration menu, then select the Auto Bed Leveling option from the printer’s menu.
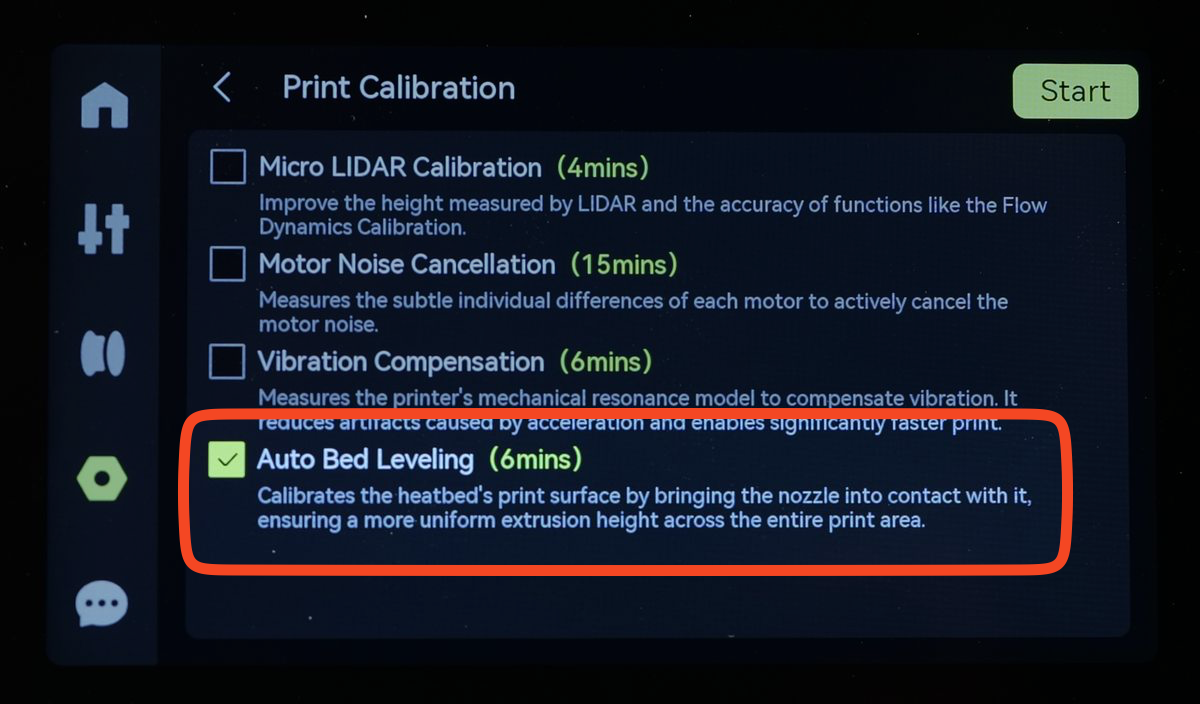
This operation will generate a new bed mesh that will be used on the next print.